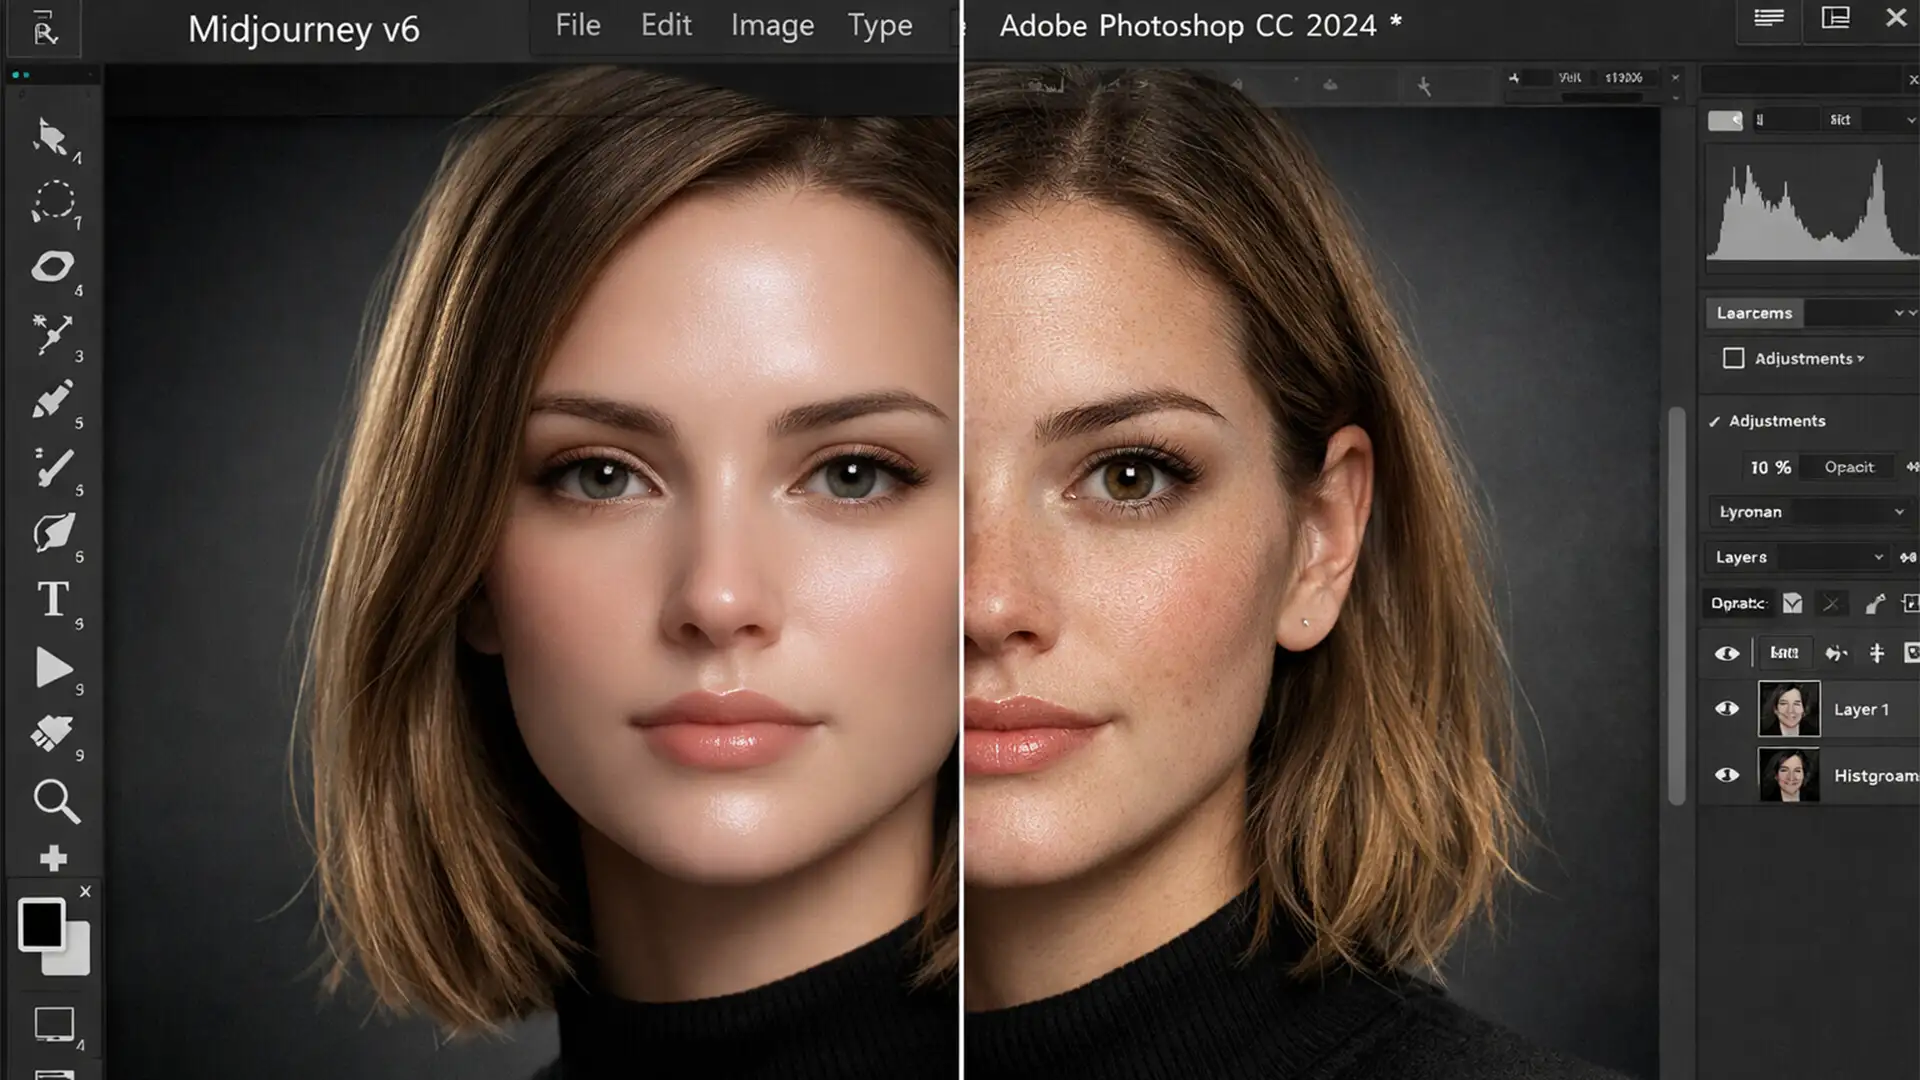
You generated the perfect corporate portrait in Midjourney, but there is a glaring problem: it looks like a digital mannequin. The skin is impossibly smooth, the eyes are lifeless, and the flawless symmetry screams “fake.”
This phenomenon is known as the uncanny valley-the unsettling feeling we get when a digital face looks almost, but not quite, human. If you are using these images for professional branding, LinkedIn profiles, or corporate directories, that subtle artificiality destroys trust.
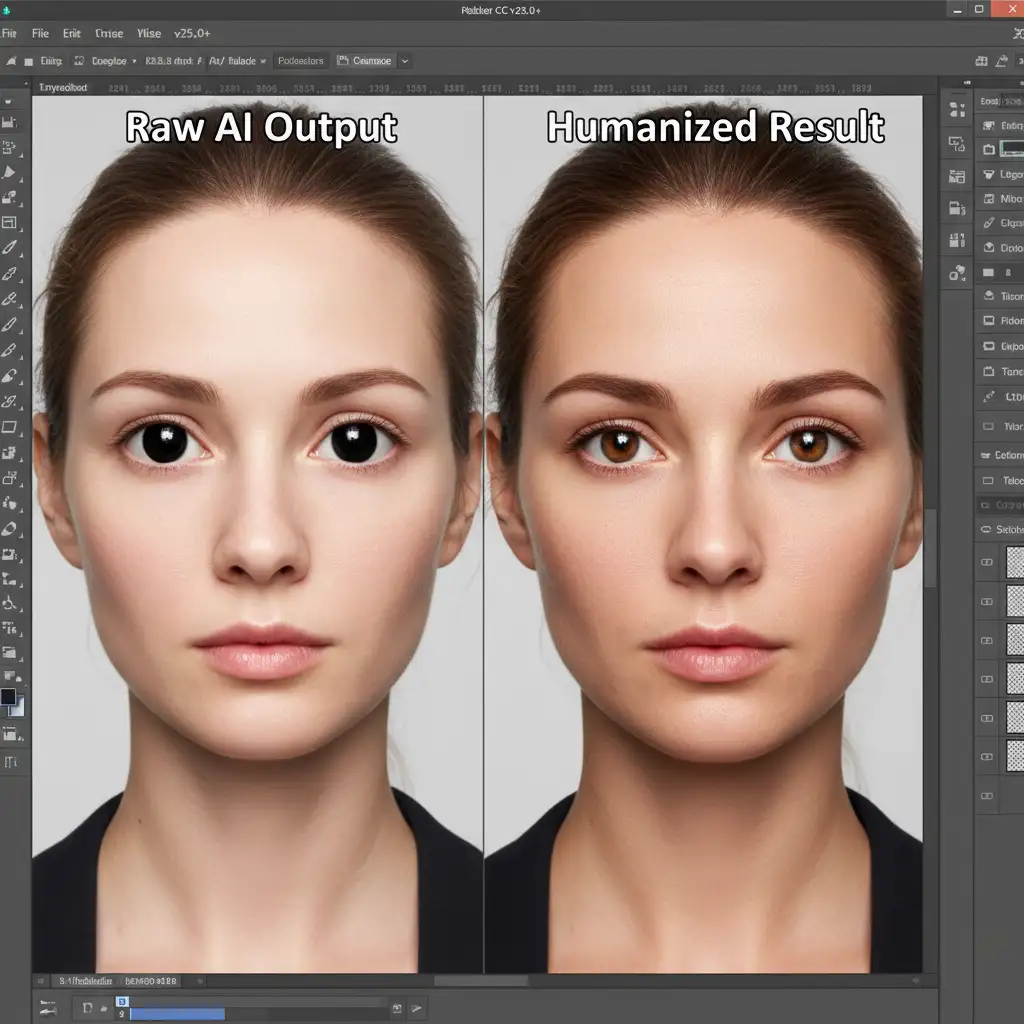
The secret to humanizing AI generated headshots isn’t generating more prompts; it is intentional degradation. By using Adobe Photoshop CC v25.0+ to introduce organic imperfections, realistic subsurface scattering, and structural asymmetry, you can transform a plastic-looking generation into a photorealistic portrait. Here is the exact technical workflow used by professional retouchers.
Why AI Headshots Suffer from the “Plastic Skin Artifact”
Generative AI models like Midjourney v6 and DALL-E 3 are trained to denoise images, which naturally results in an over-smoothed, idealized aesthetic. This creates several distinct technical pain points:
- The Plastic Skin Artifact: A complete lack of skin micro-texture (pores, peach fuzz, and fine lines).
- Dead Eyes: AI struggles with directional lighting, often rendering physically impossible or conflicting catchlights in the pupils.
- Perfect Symmetry: Real human faces are naturally asymmetrical. AI defaults to perfect mathematical symmetry, which the human brain instantly flags as unnatural.
To fix these issues, we must manually rebuild the organic traits of traditional photography.
Step-by-Step Guide to Humanizing AI Generated Headshots
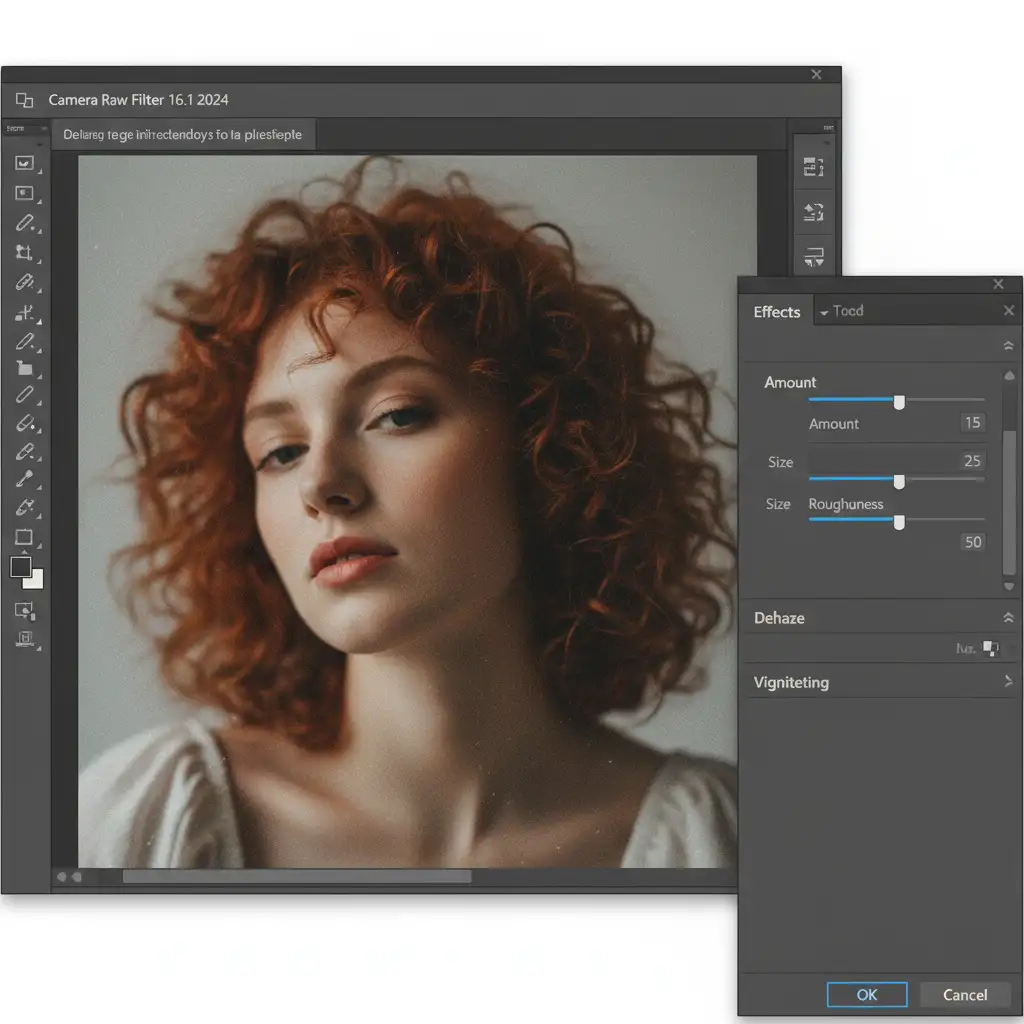
Method 1: The Quick Fix – Unifying Pixels with Camera Raw Grain
The fastest way to break the AI aesthetic is to simulate the organic noise of a real camera sensor. This unifies the pixel structure and instantly masks minor AI artifacts.
- Open your AI headshot in Photoshop.
- Convert the image layer to a Smart Object (Right-click > Convert to Smart Object).
- Navigate to Filter > Camera Raw Filter.
- Open the Effects panel.
- Add Camera Raw grain using these baseline settings:
- Amount: 15
- Size: 25
- Roughness: 50
- Click OK. This subtle noise disrupts the hyper-perfect gradients of AI rendering.
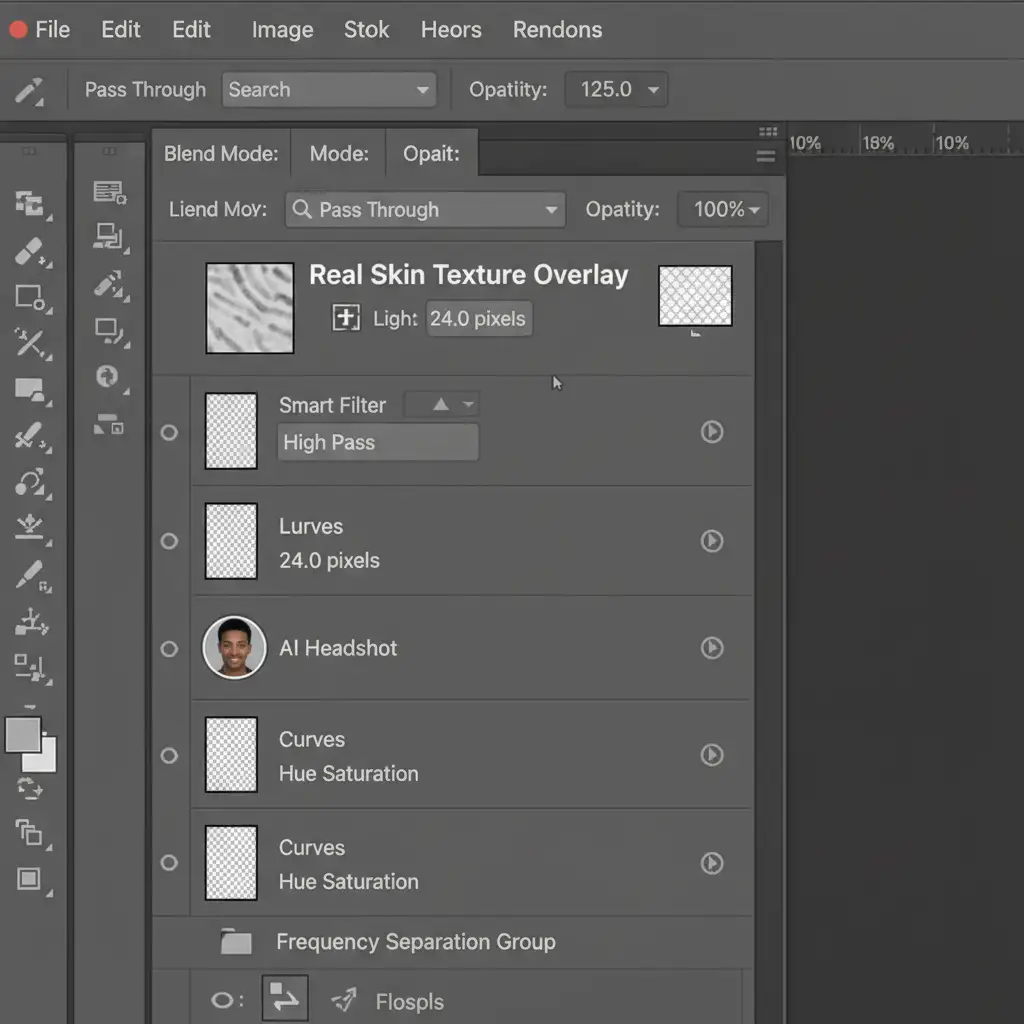
Method 2: The Pro Workaround – Frequency Separation for Real Pores
Adding grain isn’t enough for close-up portraits. To truly cure the plastic skin artifact, we need to graft real human pores onto the AI image using a modified frequency separation technique.
- Import a high-resolution stock photo of real human skin (ideally a macro shot of cheeks or a forehead).
- Place this texture layer above your AI headshot and Rasterize the layer if it was imported as a Smart Object.
- Desaturate the skin texture layer (Ctrl/Cmd + Shift + U).
- Apply a High pass filter (Filter > Other > High Pass). Set the radius between 2.0px and 4.0px until only the pores and micro-details are visible in gray.
- Change the layer’s blend mode to Linear Light blend mode.
- Add a black layer mask (Hold Alt/Option and click the Layer Mask icon).
- Use a soft white brush at 30% opacity to carefully paint the real skin texture over the AI headshot’s cheeks, nose, forehead, and chin.
Method 3: The Technical Deep-Dive – Fixing Dead Eyes and Perfect Symmetry
The final step in humanizing AI generated headshots is correcting the structural and lighting errors that AI models make regarding the eyes and facial symmetry.
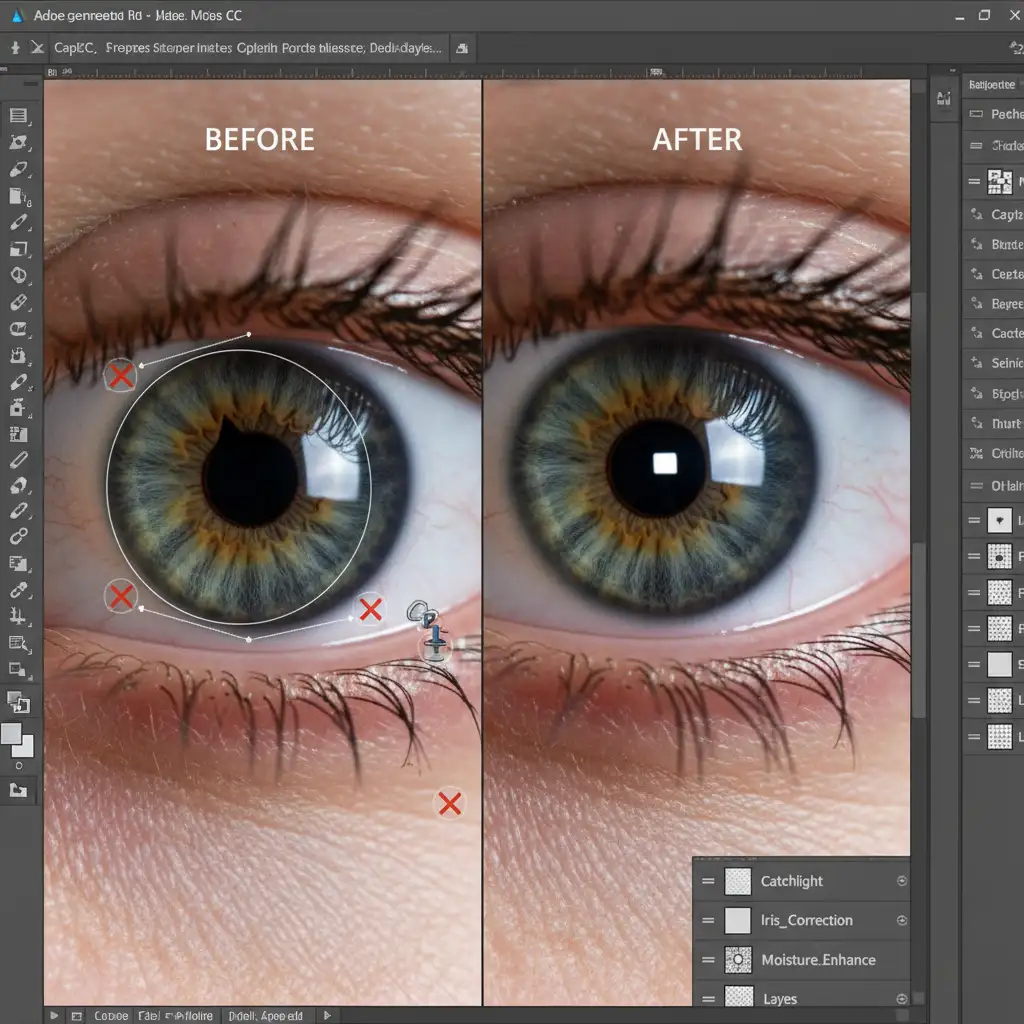
Restoring the Eyes:
- AI often renders misshapen pupils. Use the Elliptical Marquee tool to select the iris, copy it to a new layer, and transform it to ensure perfect roundness.
- Create a new blank layer named “Catchlights.”
- Sample the environmental light color (usually white or a very pale warm/cool tone).
- Using a soft brush, manually paint a realistic window reflection or key-light reflection in the exact same position on both eyes. This directional consistency brings the eyes to life.
Breaking Perfect Symmetry:
- Select your base layer and go to Filter > Liquify.
- Open the Face-Aware Liquify panel.
- Subtly adjust the eye size, jawline, and mouth geometry so they are slightly asymmetrical. For example, make the left eye 2% smaller or tilt the jawline by 1 degree. Real humans are never perfectly mirrored.
Stop Settling for Fake-Looking Brand Assets
Humanizing AI generated headshots requires a deep understanding of traditional photography, lighting physics, and advanced Photoshop retouching. While adding grain is a quick fix, achieving true, pixel-perfect realism takes time and technical expertise.
Don’t let the uncanny valley ruin your brand’s trust and authority. If you need flawless, photorealistic portraits for your team, marketing campaigns, or executive profiles, let the experts handle it.
Hire the elite retouching team at Image Work India & Cloud Retouch. We specialize in professional image manipulation, frequency separation, and structural editing to turn your raw AI generations into 100% authentic-looking human portraits. Contact us today to elevate your visual assets.


