
E-commerce retailers waste thousands of dollars and hundreds of hours photographing every single color variant of a product. The result? Inconsistent lighting, delayed catalog updates, and shrinking profit margins. If you are struggling with “color bleed” or lost fabric textures when trying to change product colors digitally, you are not alone. Automated tools often fail to cleanly separate complex boundaries like collars, overlapping fabrics, or metallic buttons.
The secret to scaling your catalog without endless photoshoots is mastering multi-clipping paths for e-commerce color variants. By isolating every distinct material zone within a single image file, you can unlock instant, hyper-realistic color changes.
Here is exactly how to achieve sub-pixel accuracy in Photoshop v25.x and streamline your e-commerce production.
The E-Commerce Nightmare: Re-shooting Every Color Variant
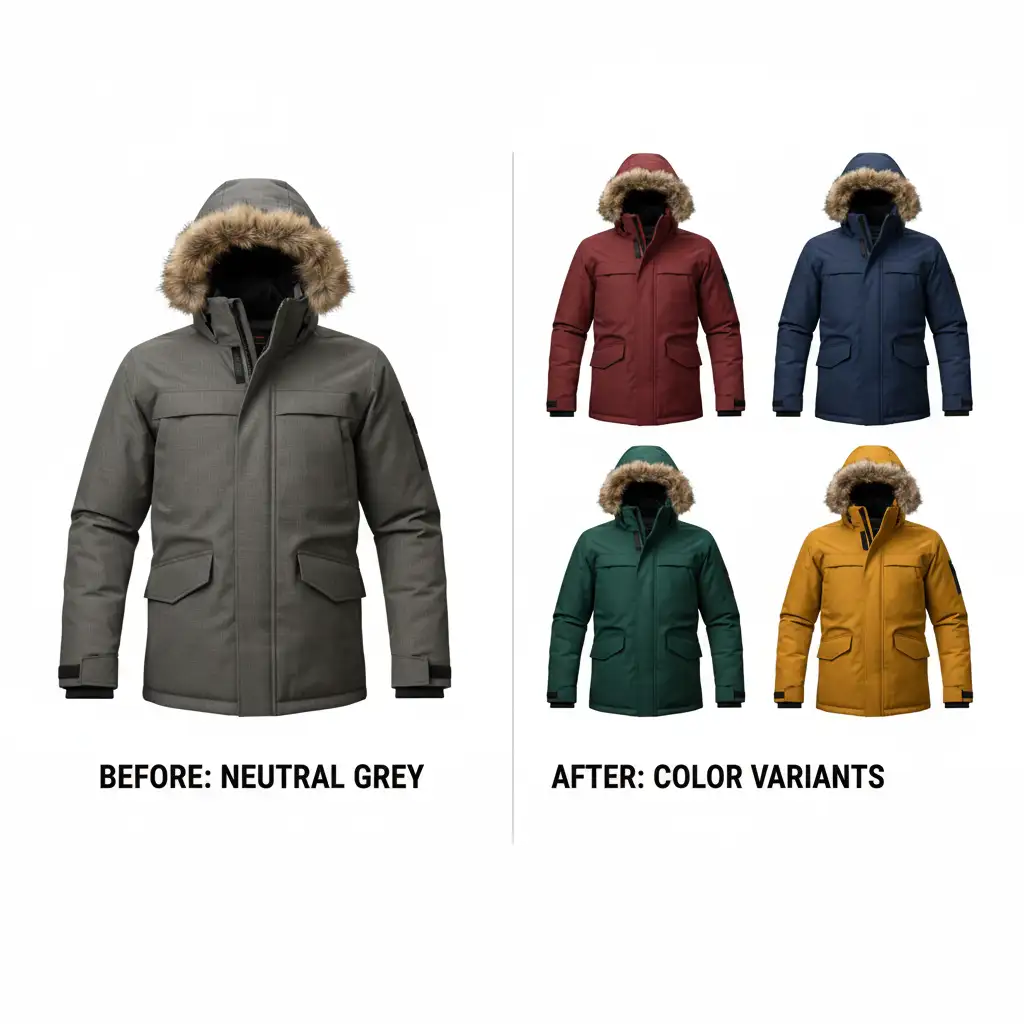
When a new apparel line drops in ten different colors, photographing every piece is a logistical nightmare. Even if you manage the shoot, matching the lighting and angles across all ten photos is nearly impossible. This inconsistency hurts your brand’s premium feel and reduces conversion rates.
Alternatively, using basic automated selection tools in Photoshop often results in the dreaded “halo effect” on edges, flat colors, and unnatural rendering. To achieve a true photorealistic color replacement, you need a non-destructive workflow built on absolute precision.
What is a Multi-Clipping Path?
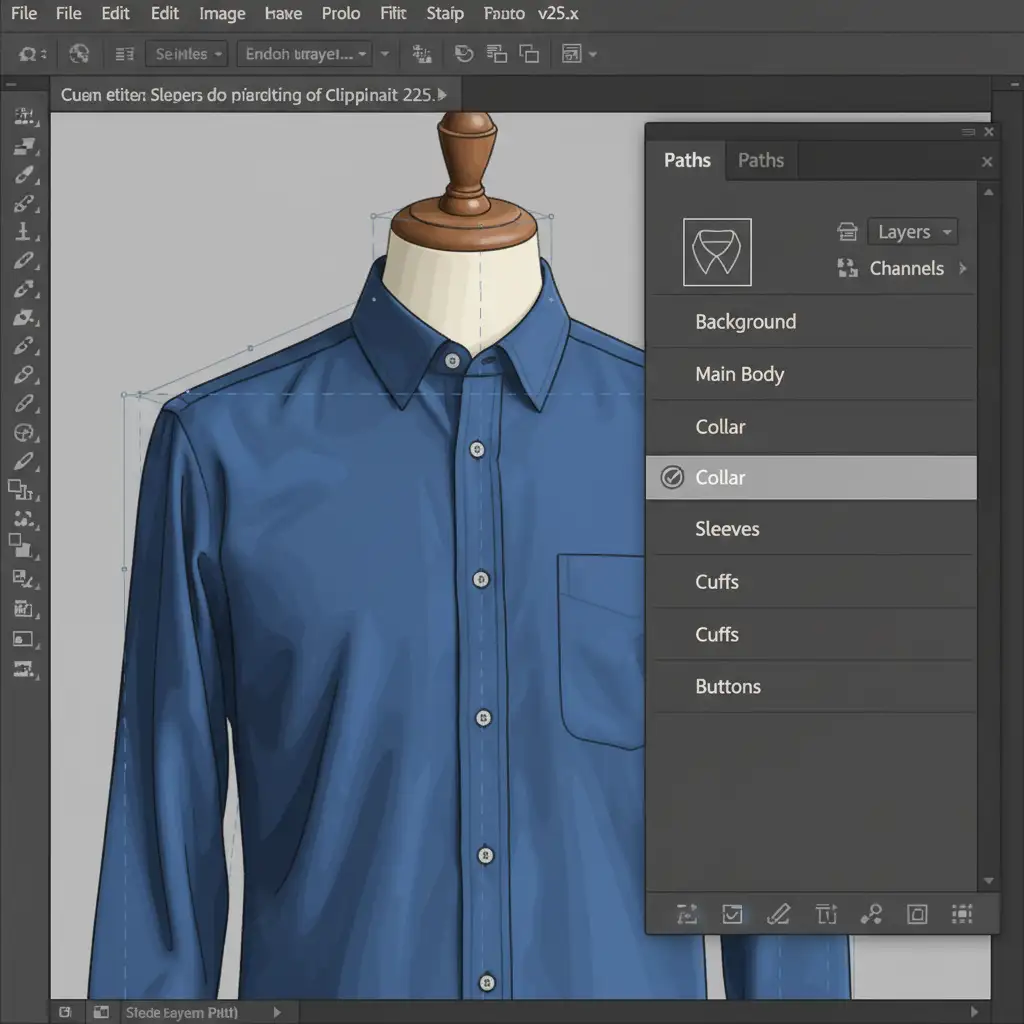
A multi-clipping path is an advanced image editing technique that utilizes the Pen Tool to create multiple closed vector paths within a single image file. Instead of just cutting the product out from the background, editors draw distinct paths for every material, component, or color zone (e.g., the main body of a shirt, the sleeves, the collar, and individual buttons).
This allows you to apply targeted adjustments exclusively to those areas, paving the way for flawless, scalable color variations.
How to Create Perfect Color Variants in Photoshop v25.x
Achieving photorealistic color variations requires moving past basic tools and embracing a structured, professional workflow. Here are three methods, ranging from a quick fix to a technical deep-dive.
Method A: The Quick Fix (Object Selection Tool)
For low-stakes mockups, Photoshop’s AI tools can provide a rapid starting point.
- Select the Object Selection Tool.
- Hover over the product component (e.g., a sleeve) and click to select.
- Add a Hue/Saturation Adjustment Layer. The selection will automatically become a layer mask.
- Adjust the Hue slider to change the color.
The Drawback: While fast, this method frequently causes edge halos, color bleed onto adjacent materials, and unnatural color mapping. It lacks the sub-pixel accuracy required for high-end e-commerce.
Method B: The Pro Workaround (Pen Tool Precision)
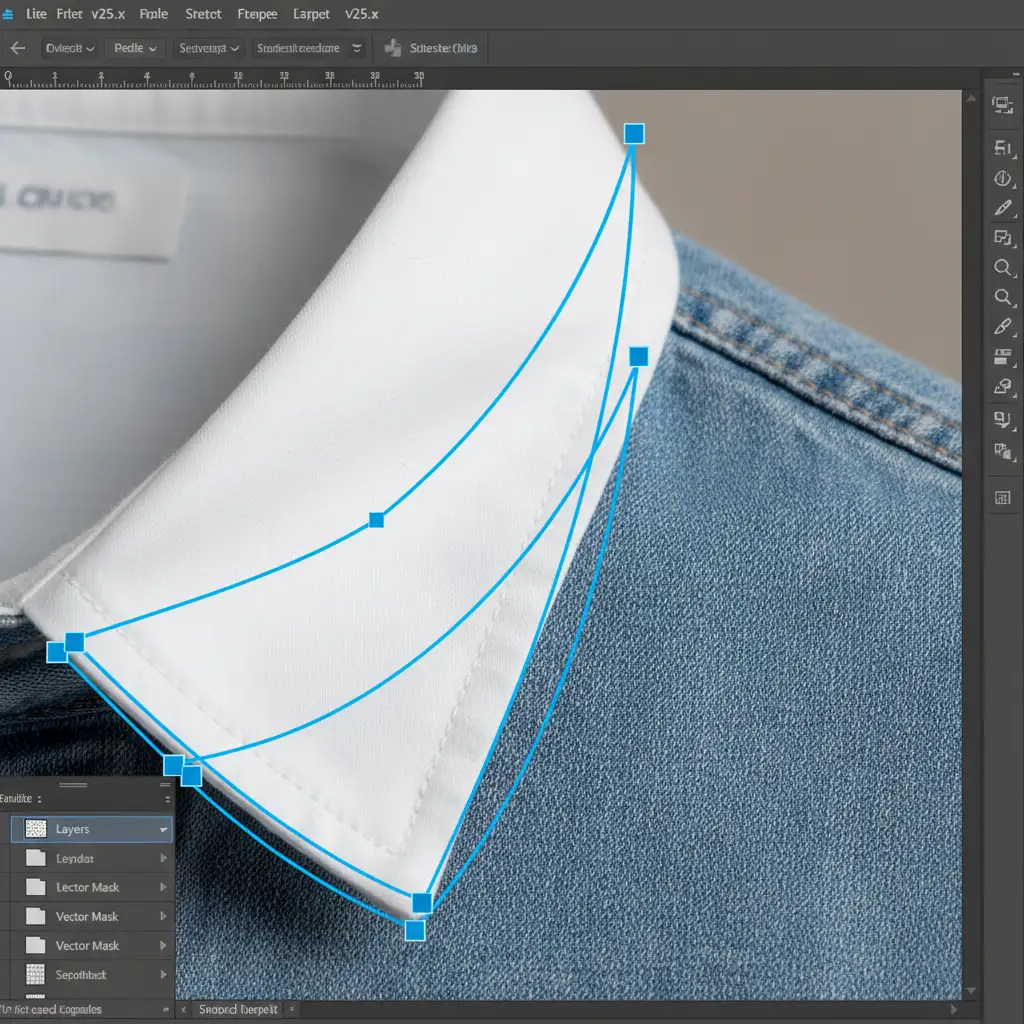
To prevent halos and retain original fabric textures, you must use Pen Tool precision.
- Select the Pen Tool (P) and meticulously trace the distinct parts of your product.
- Save these paths in the Paths panel (e.g., “Sleeves”, “Body”).
- Cmd/Ctrl + Click the path thumbnail to load it as a selection.
- Add a Solid Color adjustment layer. This turns your precise selection into a vector mask.
- Change the layer’s blending mode to Color or Multiply.
By utilizing these blend modes, the Solid Color layer perfectly adopts the underlying highlights and shadows, resulting in seamless non-destructive editing.
Method C: The Technical Deep-Dive (Blend If & Luminosity Masking)
For complex materials like silk, leather, or metallic surfaces, even blend modes might leave the product looking slightly flat. To ensure the new color perfectly wraps around the product’s natural lighting contours, combine multi-clipping paths with advanced blending.
- Create your multi-clipping paths and Solid Color adjustment layers as detailed in Method B.
- Double-click the Solid Color layer to open the Layer Style dialog box.
- Navigate to the Blend If sliders at the bottom.
- Hold Alt/Option and drag the white and black triangles on the “Underlying Layer” slider to split them. This isolates the highlights and shadows, allowing the underlying texture to punch through the new color.
- For ultimate control, apply luminosity masking to restrict your color changes strictly to the midtones, preserving the pure white highlights and deep black shadows of the original photography.
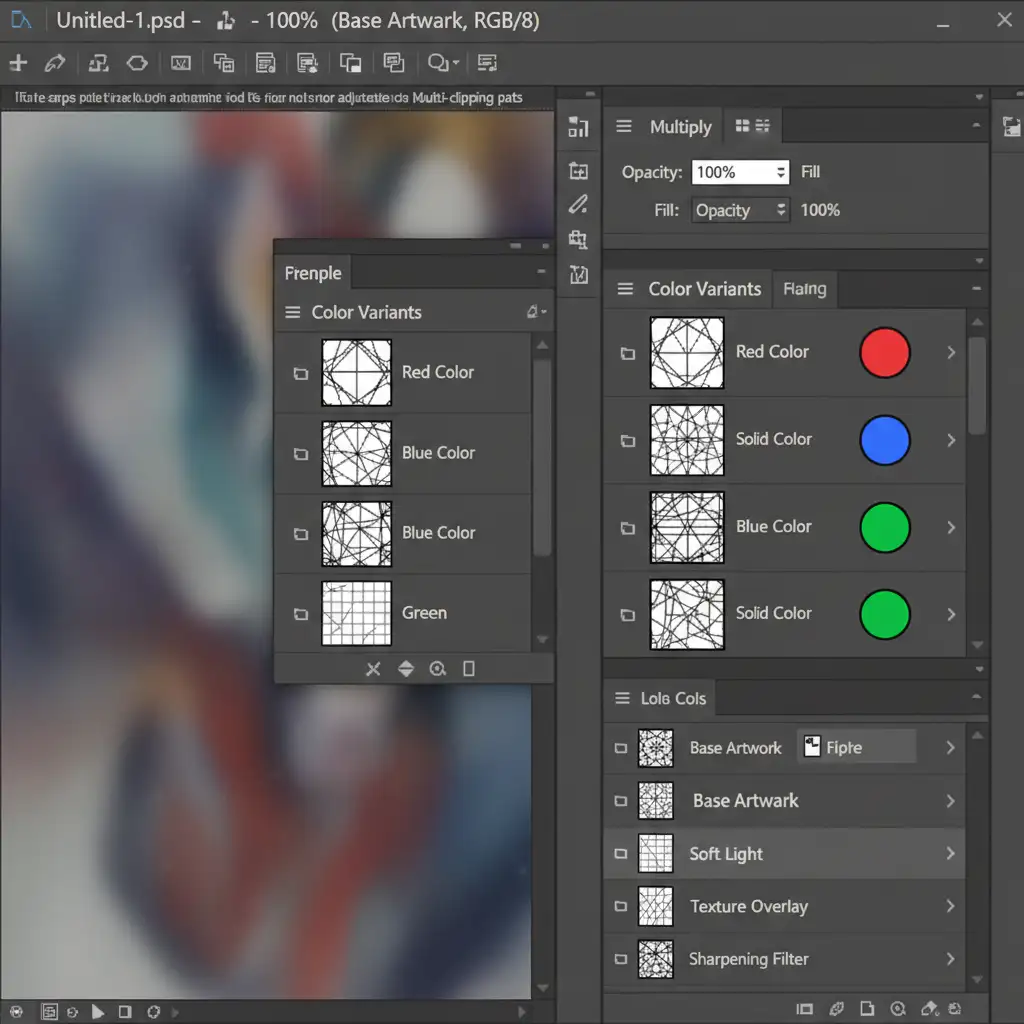
Automating Your E-Commerce Catalog
The true power of the multi-clipping path technique is scalability. Once you have drawn distinct paths for each material zone on your master TIFF or PSD file, the hard work is done.
You can now use Photoshop Actions or automated scripts to render dozens of accurate color variants from that single master file. Simply swap the hex codes in your Solid Color adjustment layers, and export.
Stop Struggling with Paths: Let the Experts Handle It
Mastering Pen Tool precision, blend modes, and luminosity masking takes years of practice. For e-commerce managers and studio directors, spending hours meticulously drawing multi-clipping paths is a massive drain on resources.
Stop struggling with tedious color variations and manual pathing.
At Image Work India and Cloud Retouch, we specialize in high-volume, pixel-perfect multi-clipping paths and scalable e-commerce color correction services. Our team of expert retouchers will isolate every button, collar, and fabric panel with sub-pixel accuracy, delivering master files ready for instant color variations.
Save time, eliminate the cost of endless photoshoots, and guarantee absolute consistency across your entire product catalog. Contact Image Work India and Cloud Retouch today to streamline your e-commerce imagery and scale your business faster.


