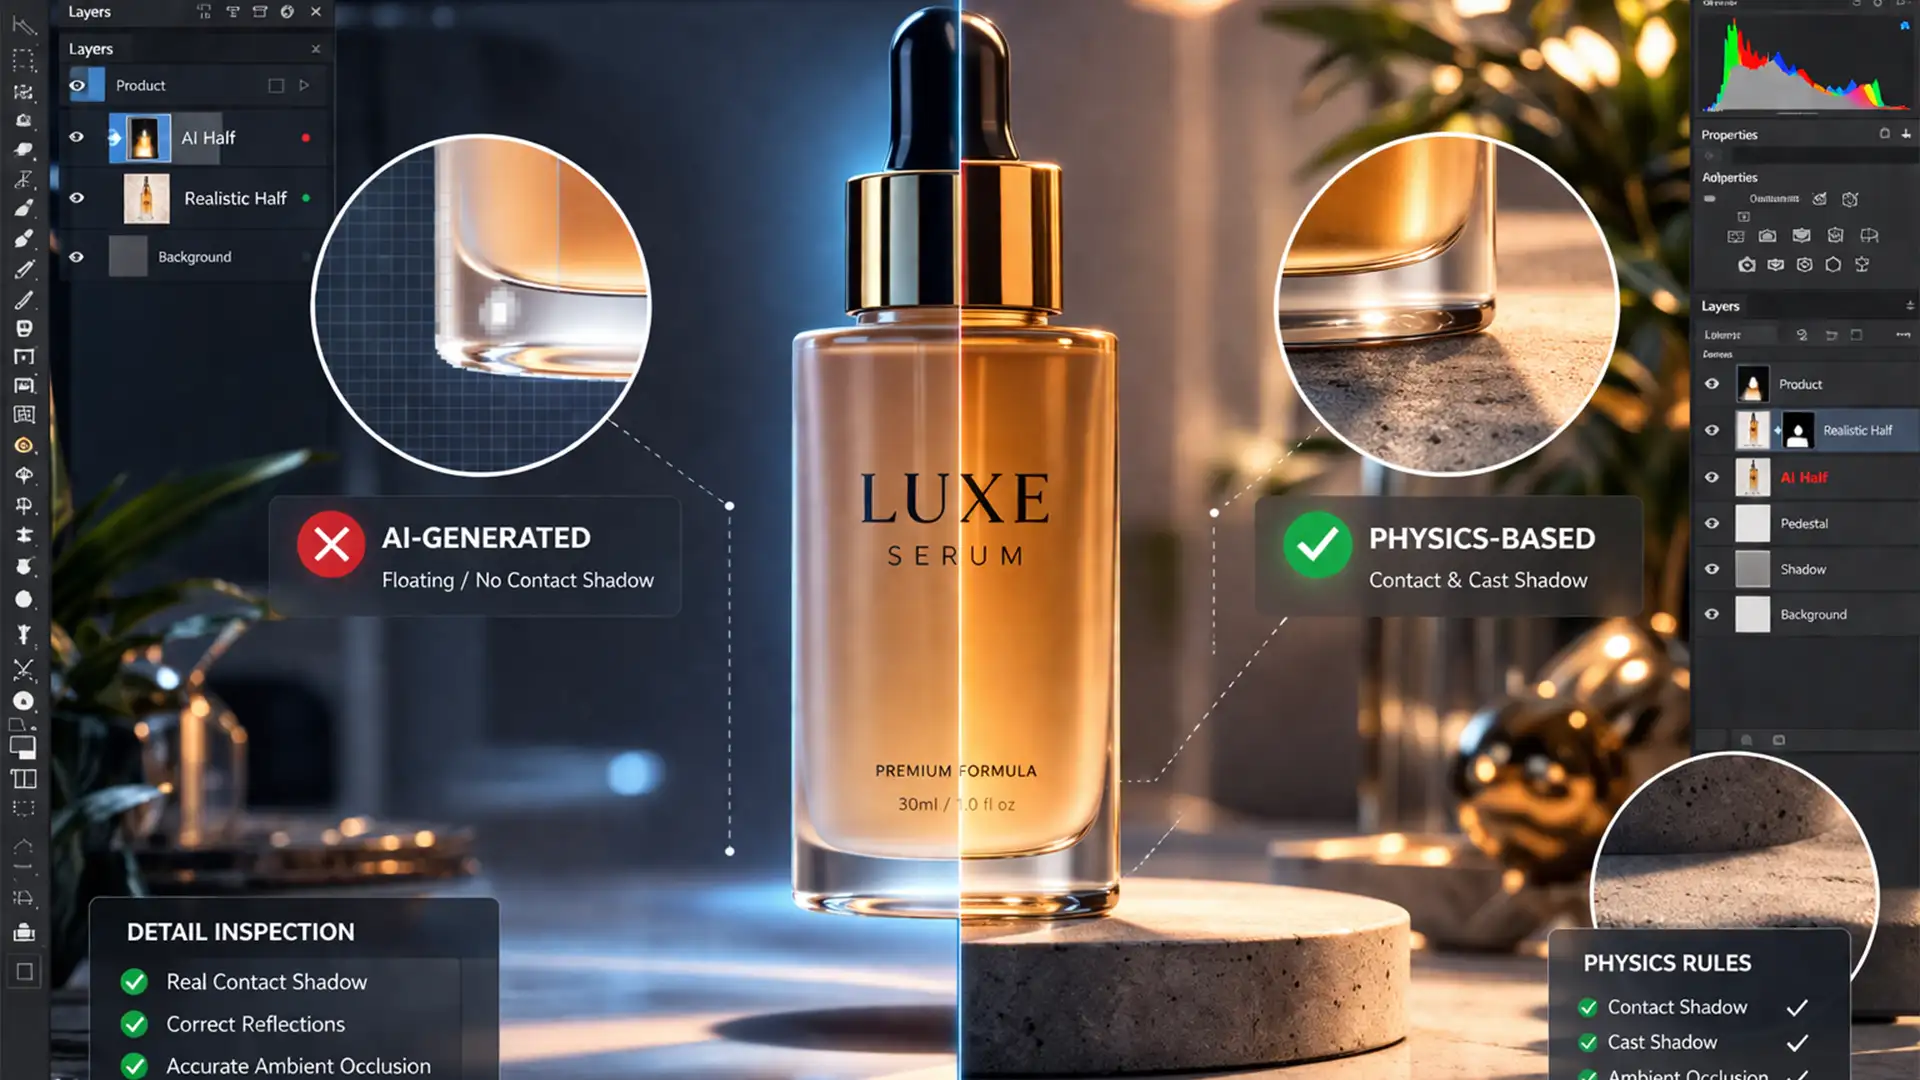
You just generated the perfect product shot using Midjourney v6 or Adobe Firefly. The lighting is crisp, the background is stunning, but there is one glaring issue: the product looks like it’s floating.
AI image generators notoriously struggle with physics-based lighting, specifically ambient occlusion and accurate contact shadows. This “floating object effect” instantly breaks the illusion, making your ecommerce listings look fake and untrustworthy. If you want to maximize conversion rates, you need to ground your products. In this guide, we’ll show you exactly how to fix uncanny AI shadows using Photoshop CC (v24.x and newer) to create a high-end, professional finish.
The Problem with AI Product Shadows
When rendering objects, AI models don’t calculate actual light rays. Instead, they predict pixel patterns. While they excel at global illumination, they fail at the micro-level interactions where an object meets a surface.
To create realistic shadows for AI product photography, you must understand the two shadow types missing from your generated images:
- Contact Shadow: The dark, tight line directly underneath an object where it touches the surface, blocking ambient light (ambient occlusion).
- Cast Shadow: The longer, softer shadow projected by the object based on the primary light source.
Here is how to manually reconstruct these in Photoshop.
3 Ways to Add Realistic Shadows in Photoshop CC
Before starting any of these methods, you must isolate your AI-generated product from its background. Use the Object Selection Tool to mask the product, placing it on its own dedicated layer.
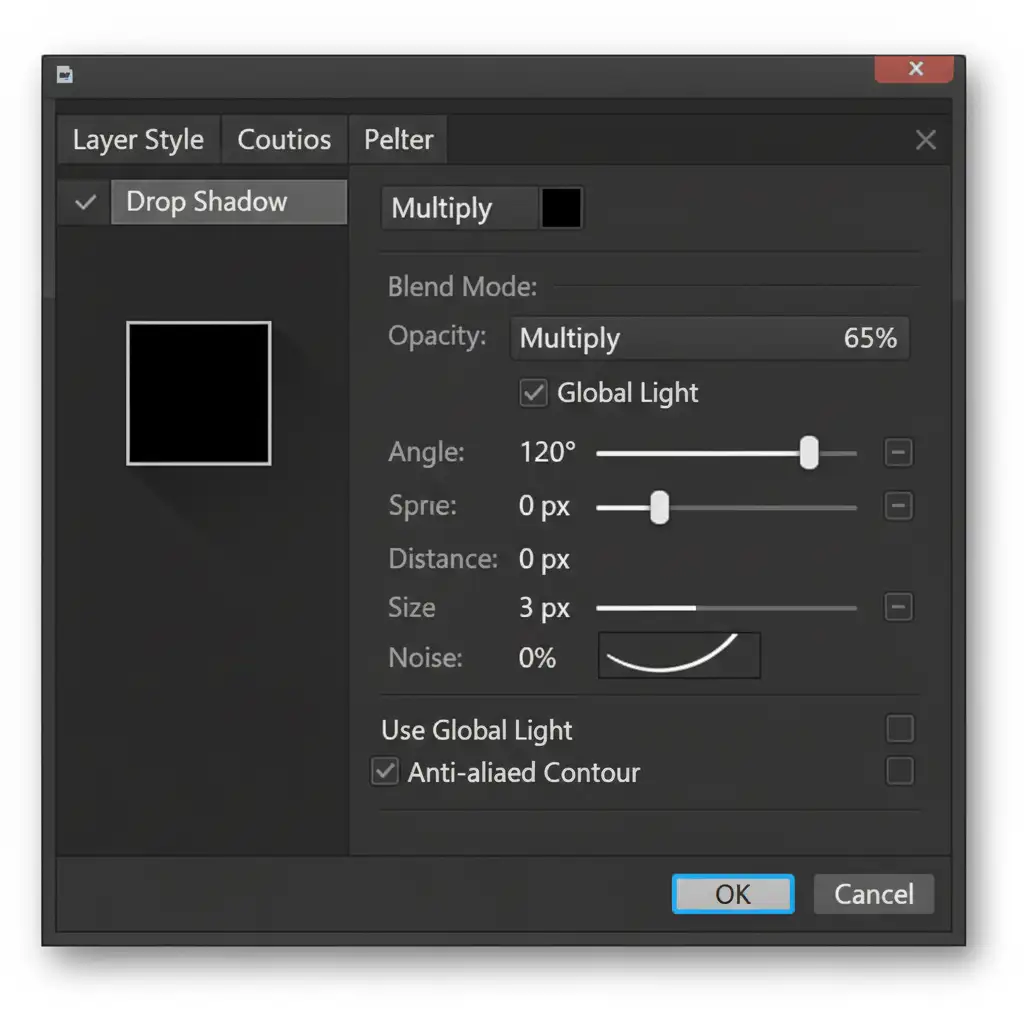
Method 1: The Quick Fix (Drop Shadow Layer Style)
If you need a fast grounding effect for a flat-lay product, the built-in drop shadow layer style is your quickest option.
- Double-click your isolated product layer to open the Layer Style panel.
- Check the Drop Shadow box.
- Change the Blend Mode to Multiply (this ensures the shadow darkens the background naturally without looking gray).
- Adjust the angle to match the visible light source in your AI background.
- Keep the Distance very low (1-3px) and the Size small (2-5px) to simulate a tight contact shadow.
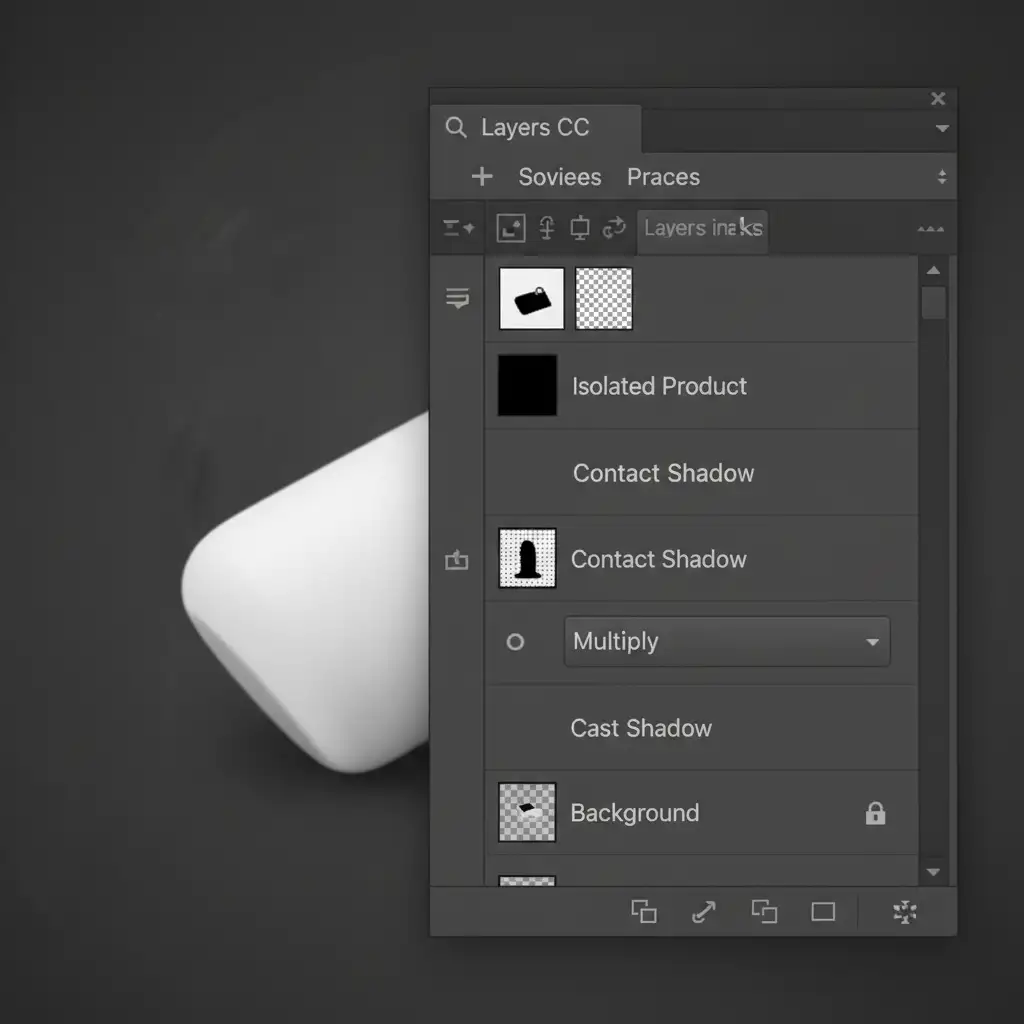
Method 2: The Pro Workaround (Manual Brush and Masking)
For premium ecommerce imagery, you need separate control over your shadows. This method uses manual painting to rebuild ambient occlusion.
- Create a new blank layer beneath your isolated product layer. Name this “Contact Shadow”.
- Select the Brush Tool (B). Choose a soft round brush and set the opacity and flow low (Hardness 0%, Flow 10%).
- Select black as your foreground color. Change the layer’s blend mode to Multiply.
- Carefully paint a tight, dark line directly under the object’s base where it makes contact with the floor.
- Create a second layer below the contact shadow and name it “Cast Shadow”.
- Using a larger brush, paint a broader, lighter shadow stretching away from the product in the direction of the light source.
- Apply a slight Gaussian blur (Filter > Blur > Gaussian Blur) to this cast shadow layer to feather the edges realistically.
You can also use a clipping mask if you need the shadow to only affect specific floor elements, though keeping it on a standard layer usually works best for flat surfaces.
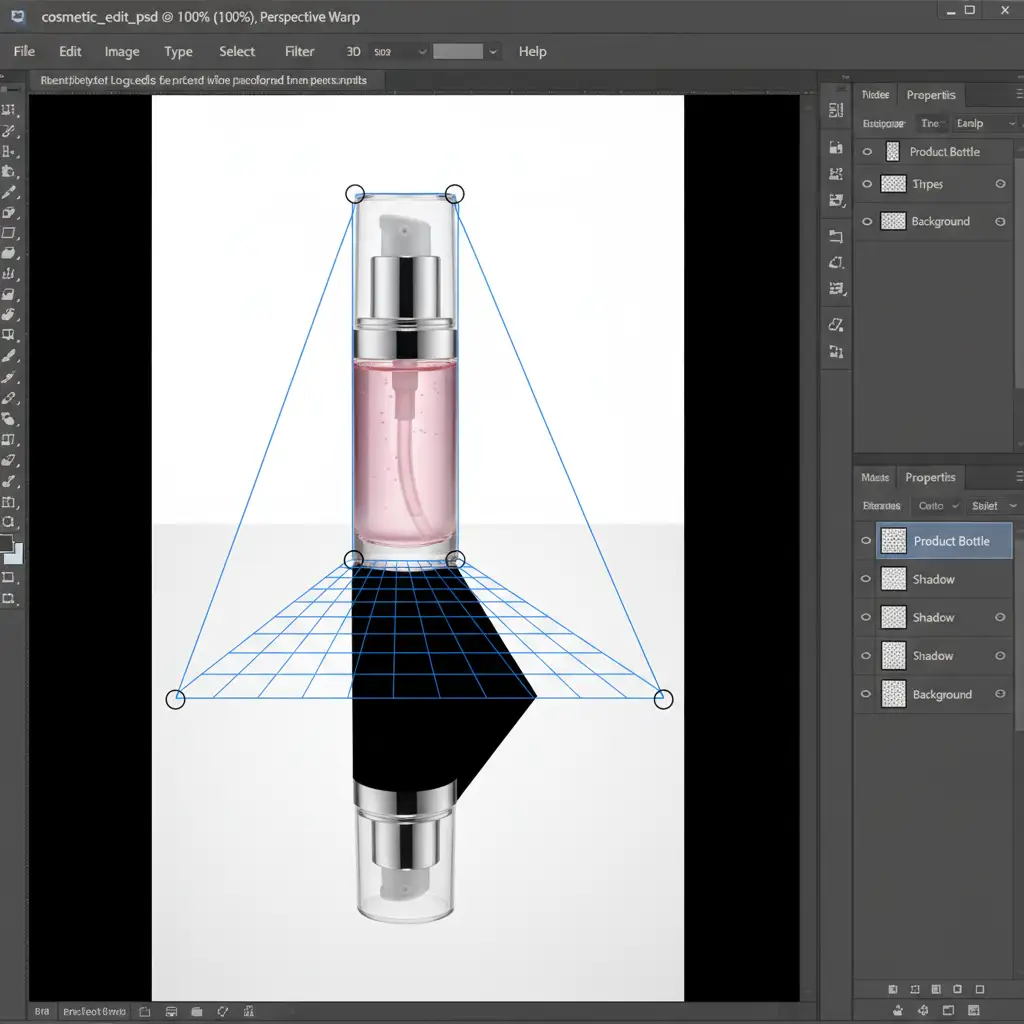
Method 3: The Technical Deep-Dive (Perspective Warp and Gradient Masks)
When dealing with tall products (like bottles or boxes) that require a long, accurate cast shadow, manual brushing isn’t enough. You need to warp the object’s actual shape.
- Duplicate your isolated product layer.
- Fill the duplicated layer entirely with black (press D, then Alt+Backspace).
- Move this black silhouette layer below your main product layer.
- Press Ctrl+T (Free Transform), right-click, and select Flip Vertical. Drag it down so the bases touch.
- Go to Edit > Perspective Warp. Draw a grid over the flipped shadow, press Enter, and drag the corner pins to lay the shadow flat against the surface plane, matching the perspective of the AI background.
- Apply a Gaussian Blur (around 15px) to soften the shadow.
- Real shadows fade as they stretch. To create this light falloff, add a layer masking to the shadow layer.
- Select the Gradient Tool (G), choose a black-to-white gradient, and drag it across the mask so the shadow slowly fades out the further it gets from the product.
Don’t Let AI Flaws Ruin Your Brand Trust
Adding realistic shadows for AI product photography is the difference between an amateur mockup and a high-converting ecommerce asset. While AI tools are incredible for ideation and background generation, they still require the human touch—and advanced Photoshop techniques—to achieve true photorealism.
Skip the hassle and let the professionals handle it.
If you are generating hundreds of AI product images and don’t have the time to manually paint contact shadows, execute perspective warps, or perfect light falloff, Image Work India and Cloud Retouch are here to help.
Our team of expert retouchers specializes in high-end ecommerce image editing. From precision clipping paths to rebuilding physics-based shadows that blend seamlessly with AI-generated lighting, we ensure your products look flawless, grounded, and ready to sell.
Contact Image Work India and Cloud Retouch today to elevate your AI product photography and boost your ecommerce conversion rates!


