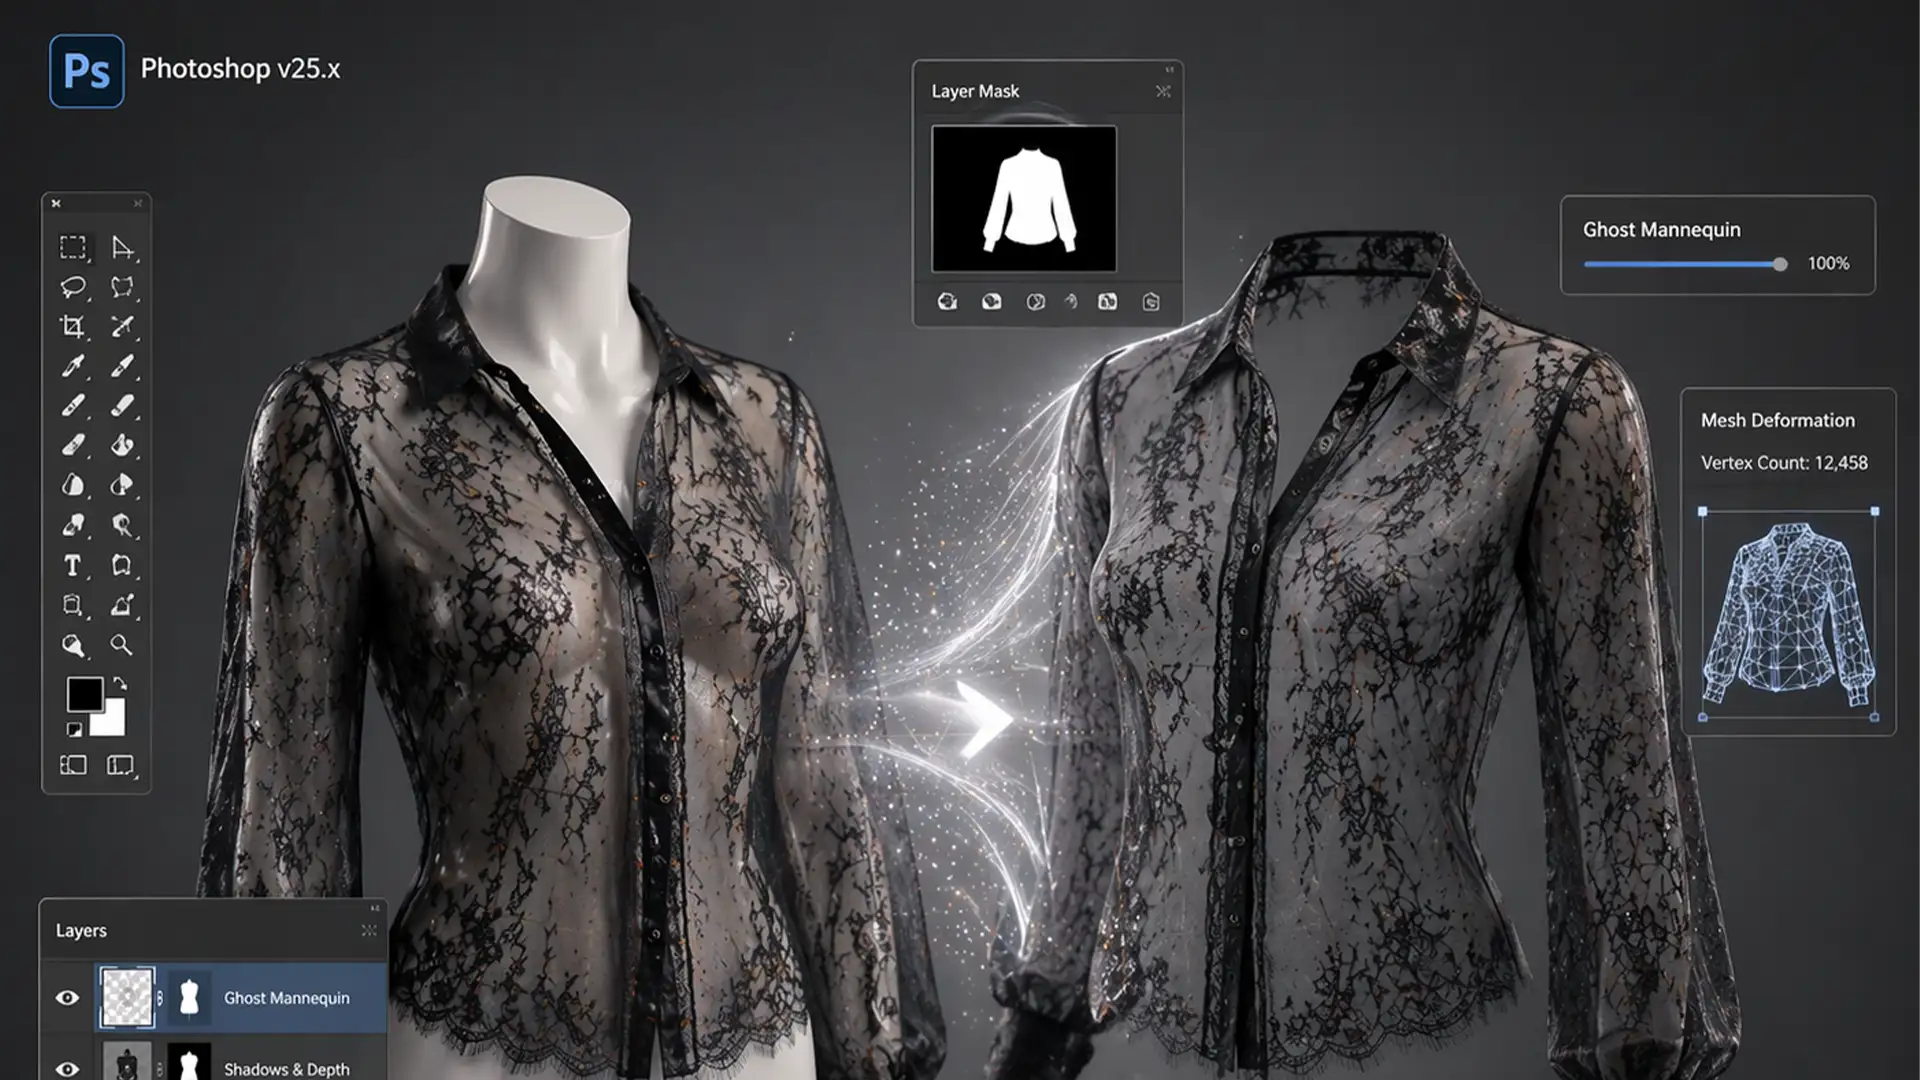
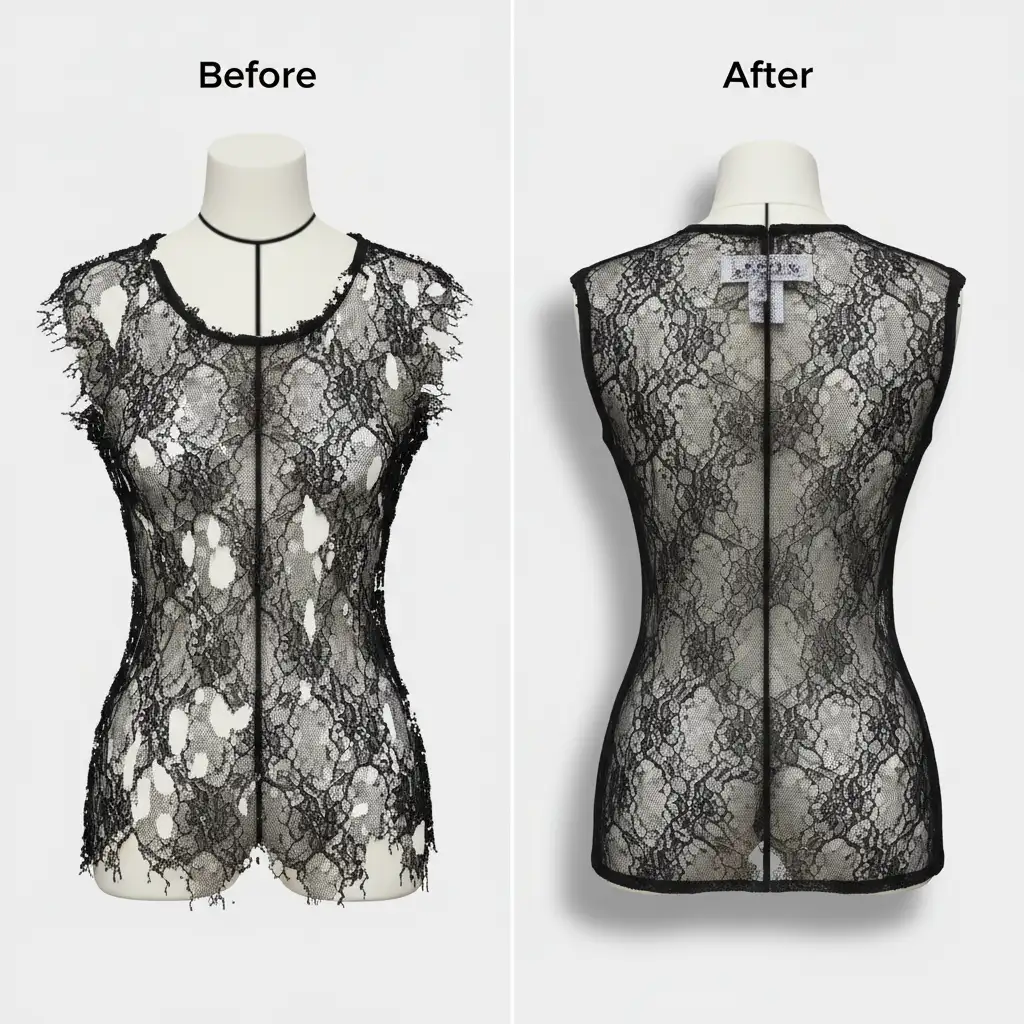
If you have ever tried to execute a ghost mannequin for sheer mesh and lace fabrics, you already know the ultimate frustration. Standard background removal tools like the Magic Wand or Quick Selection completely destroy the delicate alpha channel data. The result? Harsh, jagged edges, opaque patches blocking the fabric holes, and a muddy double-layer mess when you try to blend the inner back label shot with the sheer front.
Transparency is the ultimate test for apparel photo editors. In this guide, we are diving deep into advanced Photoshop v24.x and v25.x techniques to preserve intricate semi-transparent details. From luminosity masking to frequency separation, here is how you can achieve a flawless, high-end invisible mannequin effect.
Why Standard Tools Fail on Sheer Garments
When dealing with chiffon, lace weaves, or mesh, the camera captures a mix of the fabric’s color, the mannequin’s surface, and the shadows in between. Automated tools cannot differentiate between a white mannequin and a light-colored sheer thread. When you try to simply cut and paste the inner neck joint behind the front layer, you lose the natural opacity gradient, resulting in an unrealistic, flat image.
To fix this, we must rely on non-destructive editing techniques that target light values rather than hard pixels.
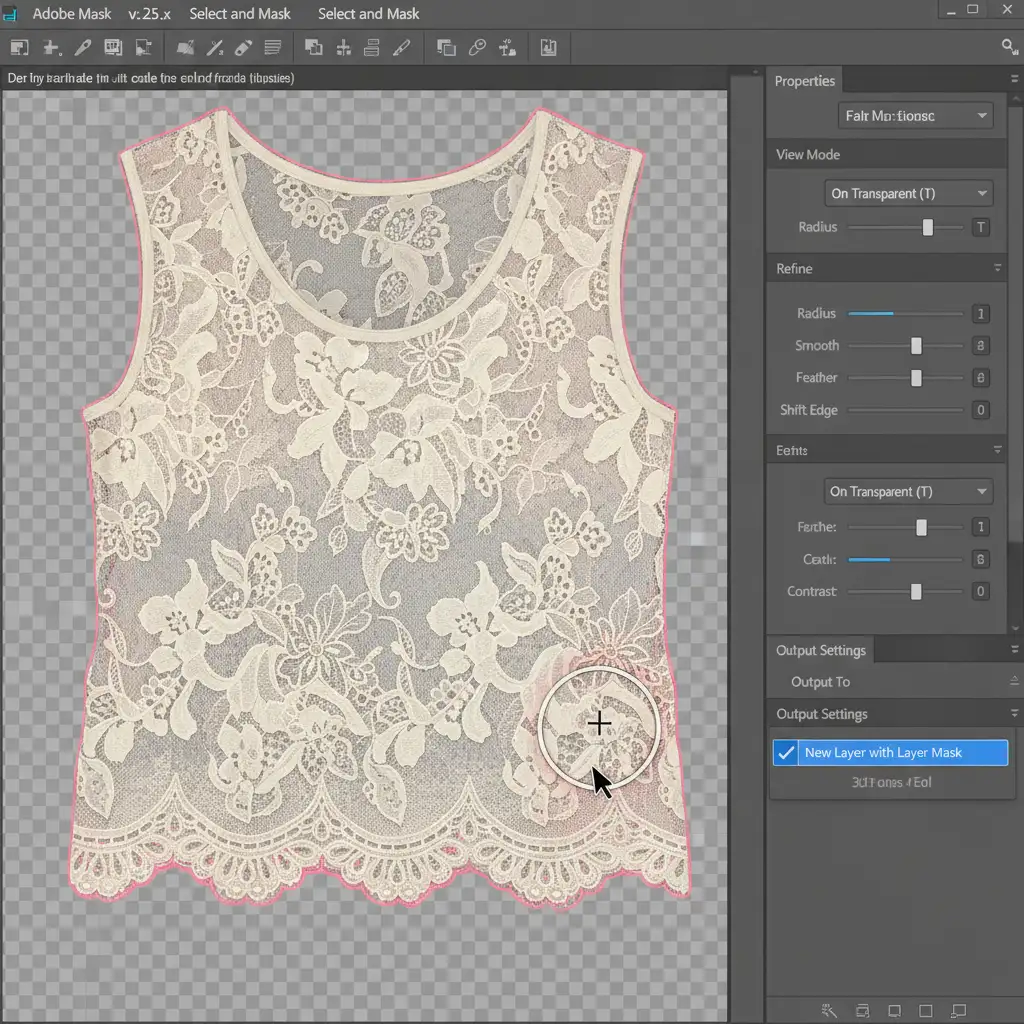
Method A: The Quick Fix (Select and Mask)
For garments with slightly denser mesh where you need a rapid turnaround, Photoshop’s updated Select and Mask workspace is your first line of defense.
Step-by-Step Workflow:
- Initial Selection: Use the Object Selection tool to grab the general outline of your sheer garment.
- Enter the Workspace: Open the Select and Mask Workspace.
- Refine the Weave: Select the Refine Edge Brush tool. Carefully paint over the lace edges and mesh cutouts. This tells Photoshop to calculate the micro-contrast between the fabric and the mannequin.
- Edge Shifting: To prevent the white ghosting of the mannequin from bleeding through, shift the edge negatively by exactly 10 percent.
- Output: Always output to a New Layer with Layer Mask to ensure non-destructive editing.
Method B: The Pro Workaround (Luminosity Masking)
When dealing with ultra-sheer chiffon or fine lace, the Quick Fix won’t cut it. You need to extract the exact opacity levels of the fabric using Luminosity Masking.
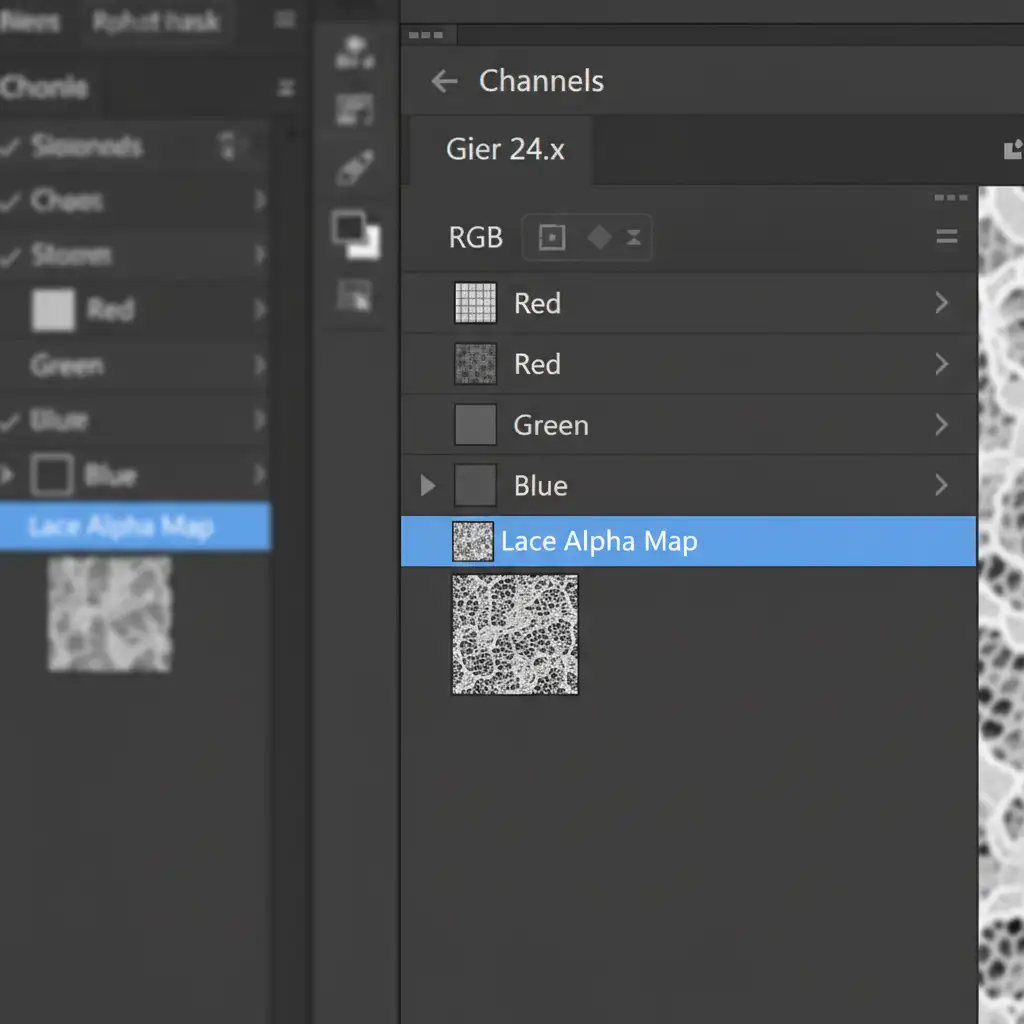
Creating the Alpha Channel Map
Instead of selecting the fabric, we are going to select the light passing through it.
- Duplicate and Desaturate: Duplicate your base front layer and completely desaturate it.
- Push the Contrast: Apply a Curves adjustment. Crush the blacks and push the whites to create a high-contrast black-and-white map of the lace weave.
- Load the Selection: Go to your Channels panel. Command-click (or Ctrl-click) the RGB channel to load this high-contrast map as an active selection. This is your precise Alpha Channel.
- Apply the Mask: Return to your Layers panel, select your original colored front garment layer, and apply the selection as a layer mask.
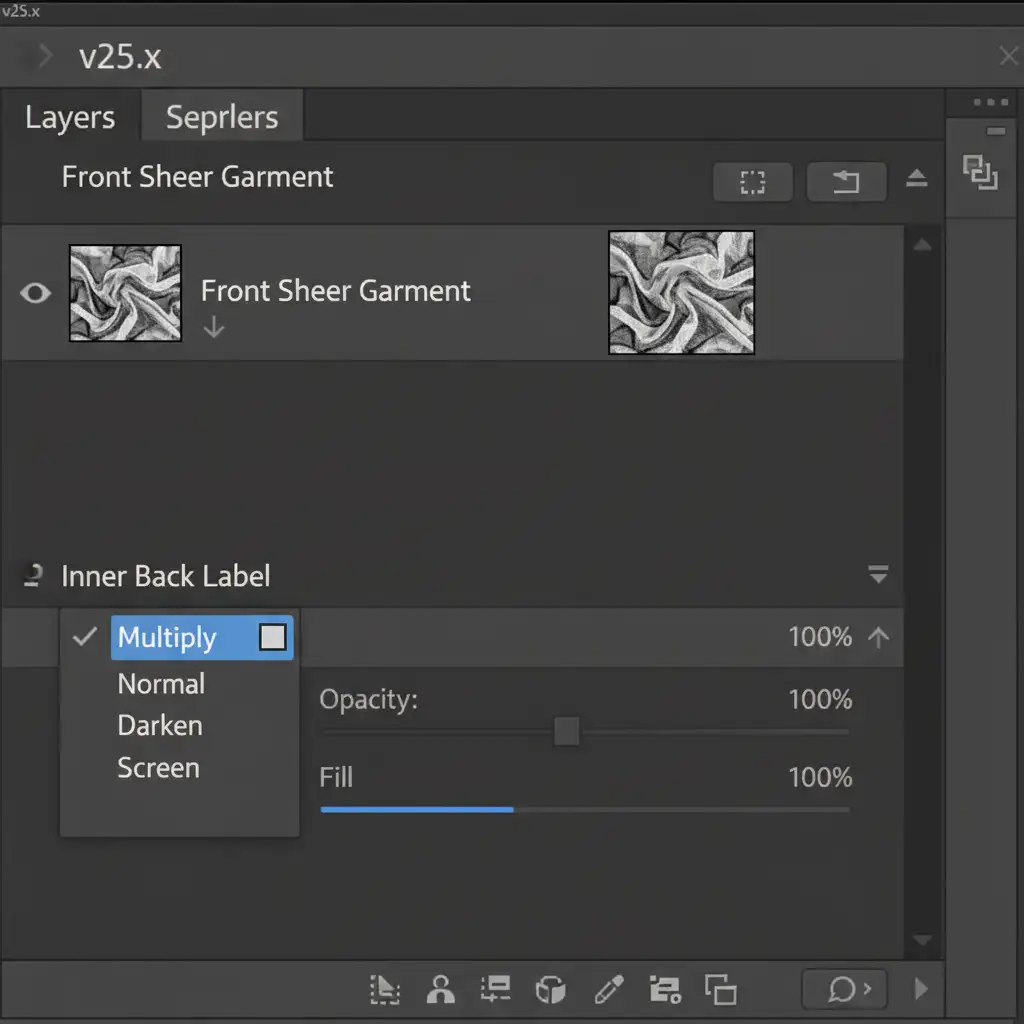
Blending the Inner Back Piece
Now you must merge the inner back neck joint (where the brand label sits) without causing double-layer muddiness.
Align your inner back shot behind your newly masked front sheer layer. Change the blend mode of the inner back layer to Multiply Blend Mode. This allows the front sheer texture to show through naturally, mimicking how light behaves in reality. You can use a soft brush to create an opacity gradient on the lower half of the inner back piece so it fades seamlessly into the garment.
Method C: The Technical Deep-Dive (Frequency Separation & Blend-If)
The hardest part of editing a ghost mannequin for sheer mesh and lace fabrics is removing the dark shadows cast by the physical mannequin behind the sheer fabric, without destroying the fabric’s texture.
Step 1: Frequency Separation
Use Frequency Separation to separate the garment’s texture (the lace threads) from its color/tone (the mannequin shadows).
- On the Low-Frequency (Color) layer, use a soft Mixer Brush to gently blend away the dark gray mannequin shadows, replacing them with the natural color of the sheer fabric.
- The High-Frequency (Texture) layer remains untouched, keeping the mesh weave perfectly sharp.
Step 2: Advanced Blend-If Sliders
To finalize the illusion, we use Blend-If Sliders to force the inner neck joint to show through only the gaps in the mesh.
Double-click the top front layer to open Layer Styles. Navigate to the “Underlying Layer” sliders. Alt-click (Option-click) the sliders to split them, gently dragging them to force the background to drop out of the mesh holes while retaining the opaque threads.

The Final Polish
Once your layers are blended, apply a subtle Clipping Mask with a Curves adjustment to match the lighting of the inner back piece to the front. A realistic drop shadow behind the final composite will ground the image.
The difference between a standard Magic Wand cut and a luminosity-masked sheer garment is night and day. One looks like a jagged, flat cutout; the other looks like a premium, floating piece of high fashion.
Outsource Your Complex Edits to the Experts
Mastering the ghost mannequin for sheer mesh and lace fabrics requires deep technical knowledge of Photoshop’s alpha channels, luminosity masking, and blend modes. It is incredibly time-consuming, and when you are processing hundreds of SKUs for a seasonal catalog, spending 45 minutes on a single sheer blouse simply isn’t scalable.
Struggling with complex sheer garments? You don’t have to do it alone. Our expert editors at Image Work India and Cloud Retouch specialize in pixel-perfect ghost mannequin edits for high-end fashion brands. We handle the most demanding fabrics—from delicate lace to ultra-sheer chiffon—ensuring your apparel looks flawless, realistic, and ready to sell.
[Contact Image Work India and Cloud Retouch today] to outsource your complex edits and elevate your e-commerce imagery!


