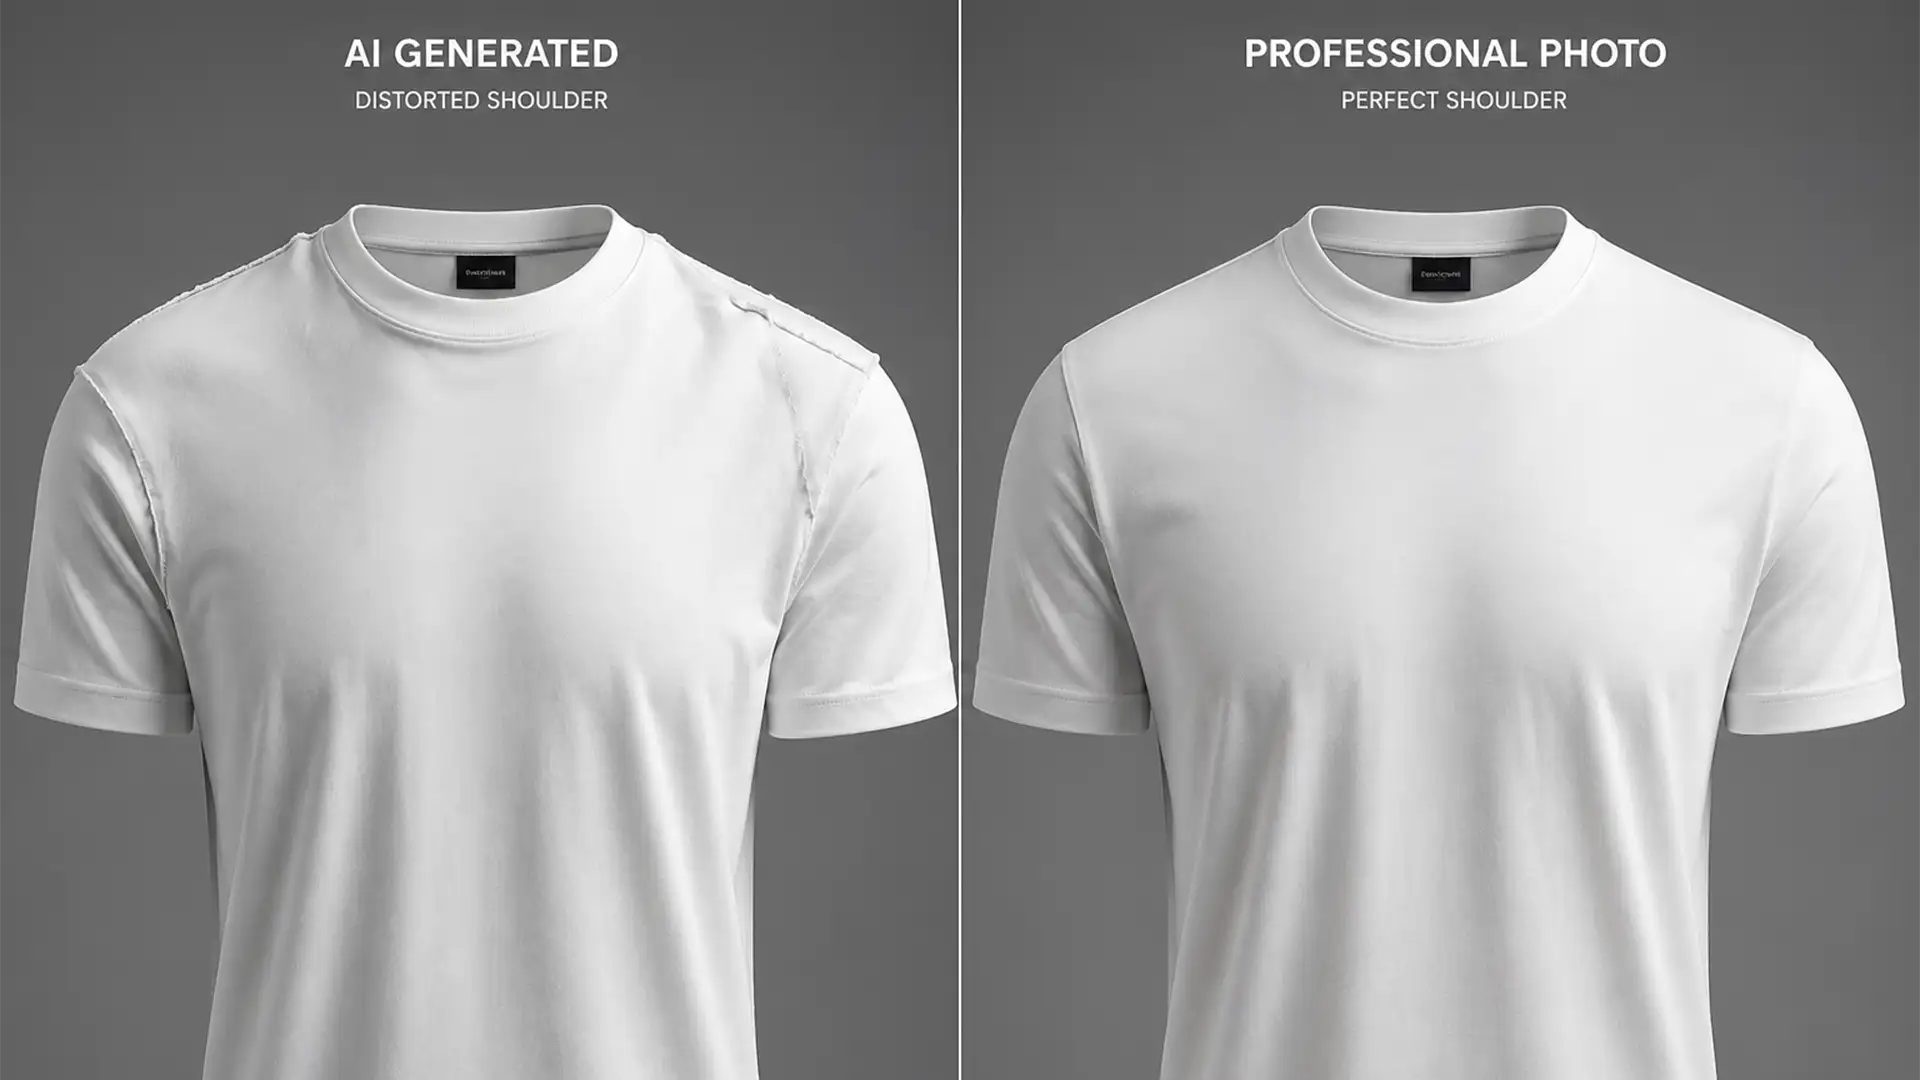
Are you constantly battling distorted seams and lopsided necklines after running your product images through automated editing tools? You are not alone. While AI tools are incredible for speeding up bulk edits, they consistently fail to understand the 3D structure of human anatomy. This results in the dreaded “shoulder warp”—where one side of a garment slopes unnaturally, ruining the professional look of your e-commerce catalog.
If you are struggling with fixing AI shoulder warp in clothing photos, relying on automated generation isn’t enough. To meet strict e-commerce quality standards, you need manual structural intervention. Here is the definitive, professional workflow to restore perfect symmetry and natural fabric drape to your ghost mannequin imagery.
Why AI Fails at Ghost Mannequin Symmetry
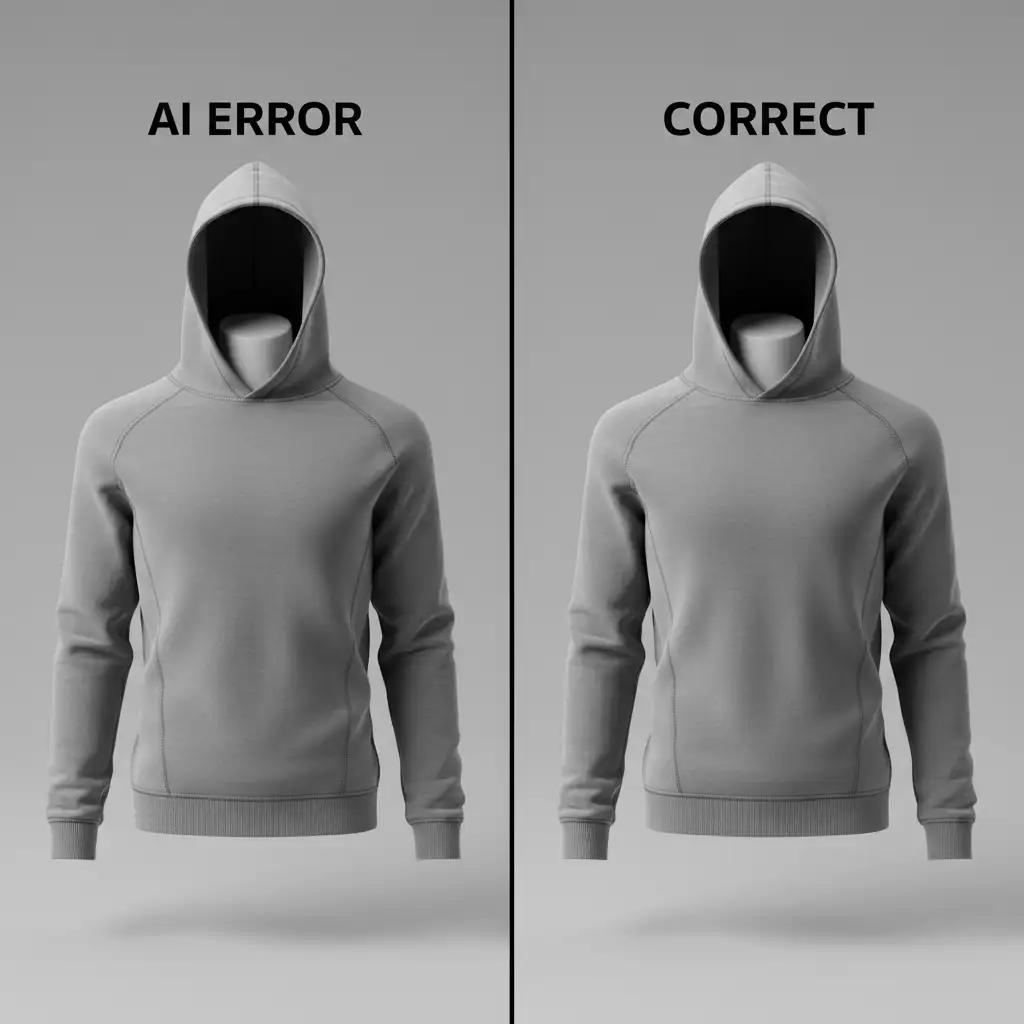
In recent versions of Adobe Photoshop (v24.x – v26.x) and dedicated AI-generation platforms, automated ghost mannequin features attempt to fill in the missing neck and shoulder areas. However, these tools lack spatial awareness regarding human anatomy.
Instead of generating accurate anatomical sloping, the AI often hallucinates flat, stretched, or asymmetrical fabric. These Generative Fill anomalies lead to severe fabric drape distortion, especially around the left and right deltoid or clavicle areas. To correct these symmetry errors, professional retouchers rely on a combination of layer masking blending, Smart Objects, and structural manipulation tools.
3 Professional Methods for Fixing AI Shoulder Warp in Clothing Photos
Depending on the severity of the fabric drape distortion, you can use one of three professional workflows to restore symmetry alignment.
Method 1: The Quick Fix (Symmetrical Duplication)
When one shoulder is perfectly generated but the other is a warped mess, symmetrical duplication is the fastest way to achieve structural harmony.
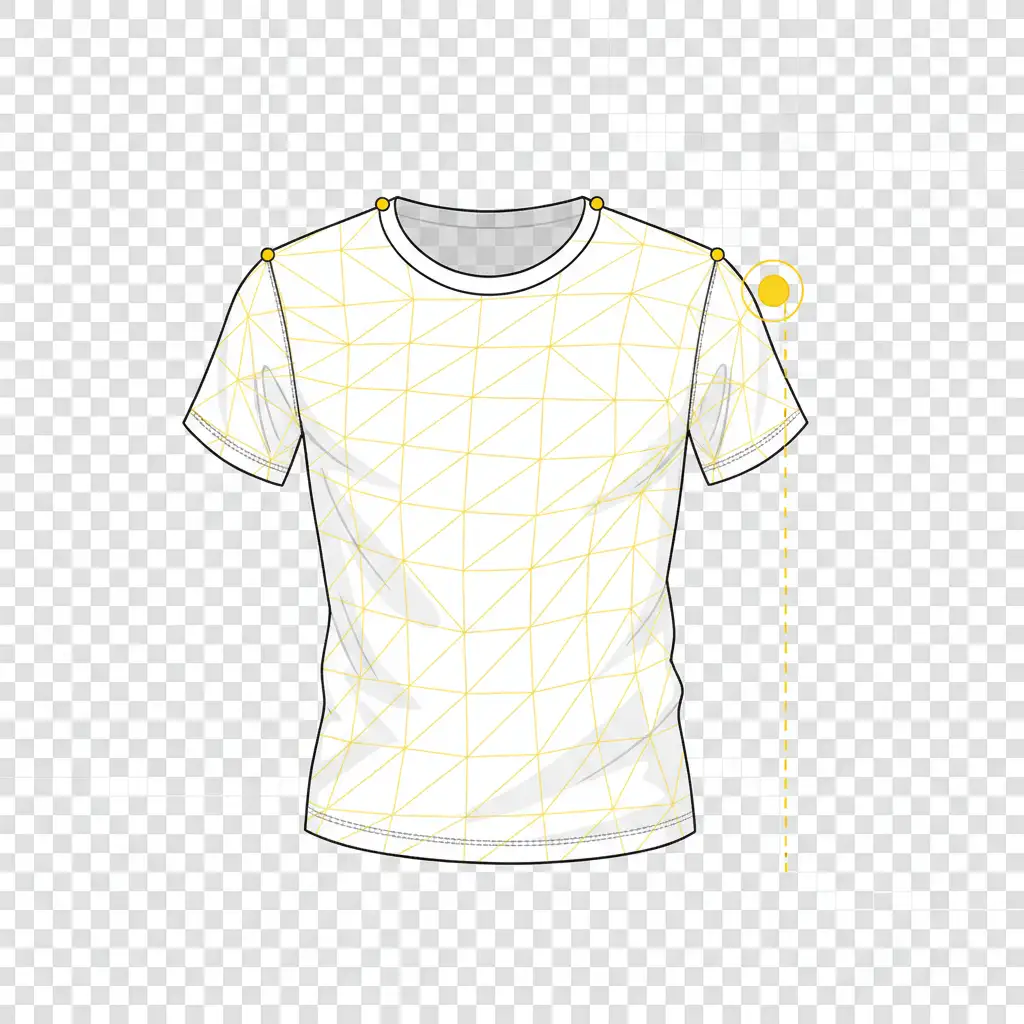
- Select the Good Side: Use the Rectangular Marquee Tool to select the anatomically correct half of the garment, starting exactly from the vertical center of the collar.
- Duplicate: Press Ctrl/Cmd+J to duplicate the clean half onto a new layer.
- Flip and Position: Go to Edit > Transform > Flip Horizontal. Drag the cloned shoulder to the opposite side and align the neckline.
- Blend the Seam: Apply a Layer Mask to the flipped layer. Use a soft, black brush to perform layer masking blending down the center seam, ensuring the fabric texture matches perfectly without a visible hard line.
Method 2: The Pro Workaround (Smart Object Liquify)
For minor structural issues where the fabric texture is intact but the anatomical sloping is slightly off, the Liquify tool offers precise control without destroying the original pixels.
- Protect the Pixels: Right-click your garment layer and select Convert to Smart Object. This ensures your edits remain non-destructive.
- Open Liquify: Navigate to Filter > Liquify.
- Isolate the Area: Select the Freeze Mask tool (shortcut F). Paint over the neckline, chest, and any good seams to lock them in place. This prevents accidental distortion of the core garment structure.
- Nudge into Place: Select the Liquify Forward Warp tool with a large, soft brush. Gently nudge the warped shoulder back into alignment, mimicking the natural slope of a human deltoid without stretching the fabric texture.

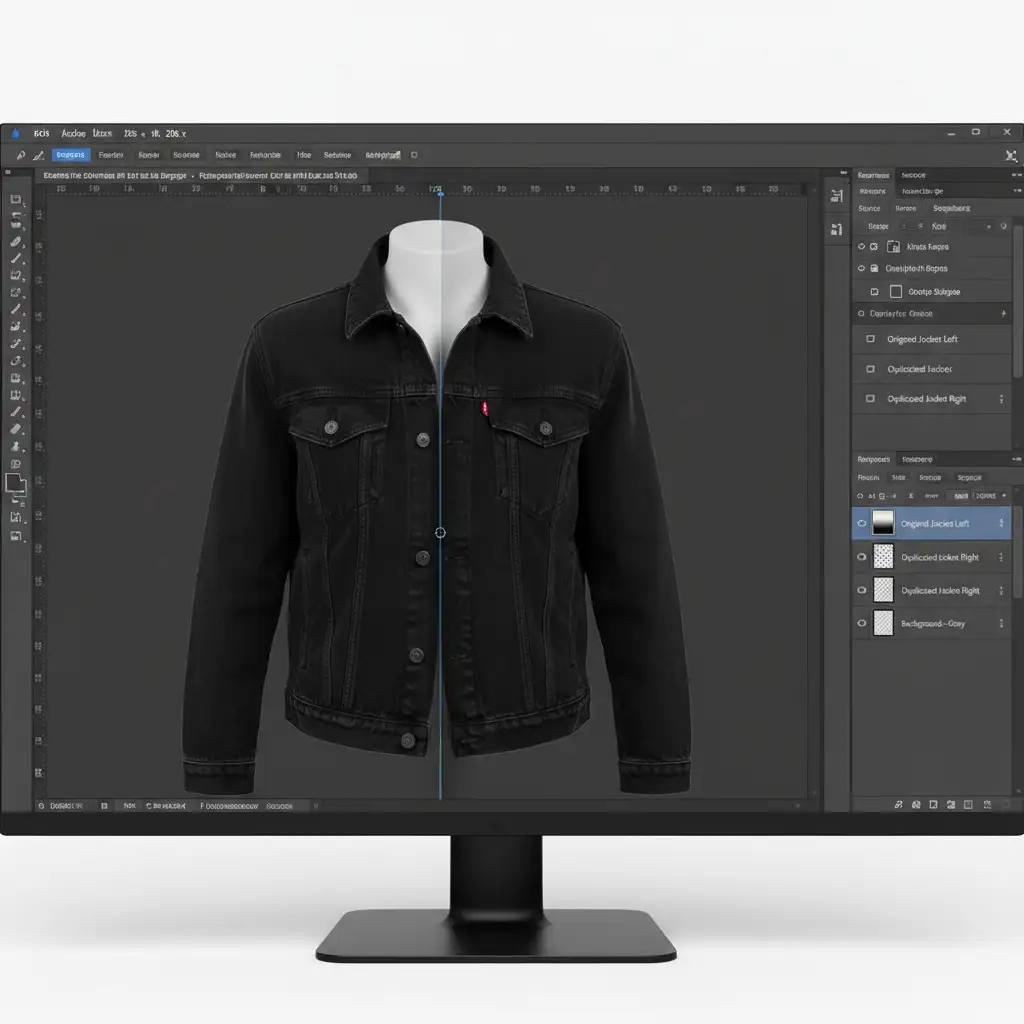
Method 3: The Technical Deep-Dive (Puppet Warp Matrix)
When dealing with severe ghost mannequin clipping errors where the shoulder is completely bent out of shape, the Puppet Warp tool provides the most advanced structural intervention.
- Isolate the Garment: Ensure your clothing item is isolated on a transparent layer.
- Activate the Mesh: Select Edit > Puppet Warp. A geometric mesh will appear over the garment.
- Set Anchor Pins: Place Puppet Warp pins along the collar, the center of the chest, and the “good” shoulder. These act as anchors to lock the correct anatomy in place.
- Manipulate the Warp: Place movement pins on the warped shoulder. Click and physically drag these pins to pull the fabric down or up, matching the correct anatomical slope of the opposite side.
- Adjust Depth: If the garment has overlapping fabric layers (like a folded collar), use the Pin Depth buttons in the top toolbar to dictate which part of the fabric sits in front.
Stop Fighting the AI—Let the Experts Handle Your E-commerce Edits
Fixing AI shoulder warp in clothing photos is a tedious, highly technical process. While tools like Puppet Warp and Smart Objects are powerful, manually correcting Generative Fill anomalies on hundreds of product images drains your time and resources.
Struggling with inconsistent AI product photos? Let the experts at Image Work India and Cloud Retouch handle your ghost mannequin edits. Our professional retouchers specialize in flawless ghost mannequin clipping, symmetry alignment, and natural fabric drape restoration, delivering pixel-perfect, anatomical accuracy for every single garment.
Stop settling for warped, unsalable product images. Contact Image Work India and Cloud Retouch today for professional e-commerce retouching services that elevate your brand.


