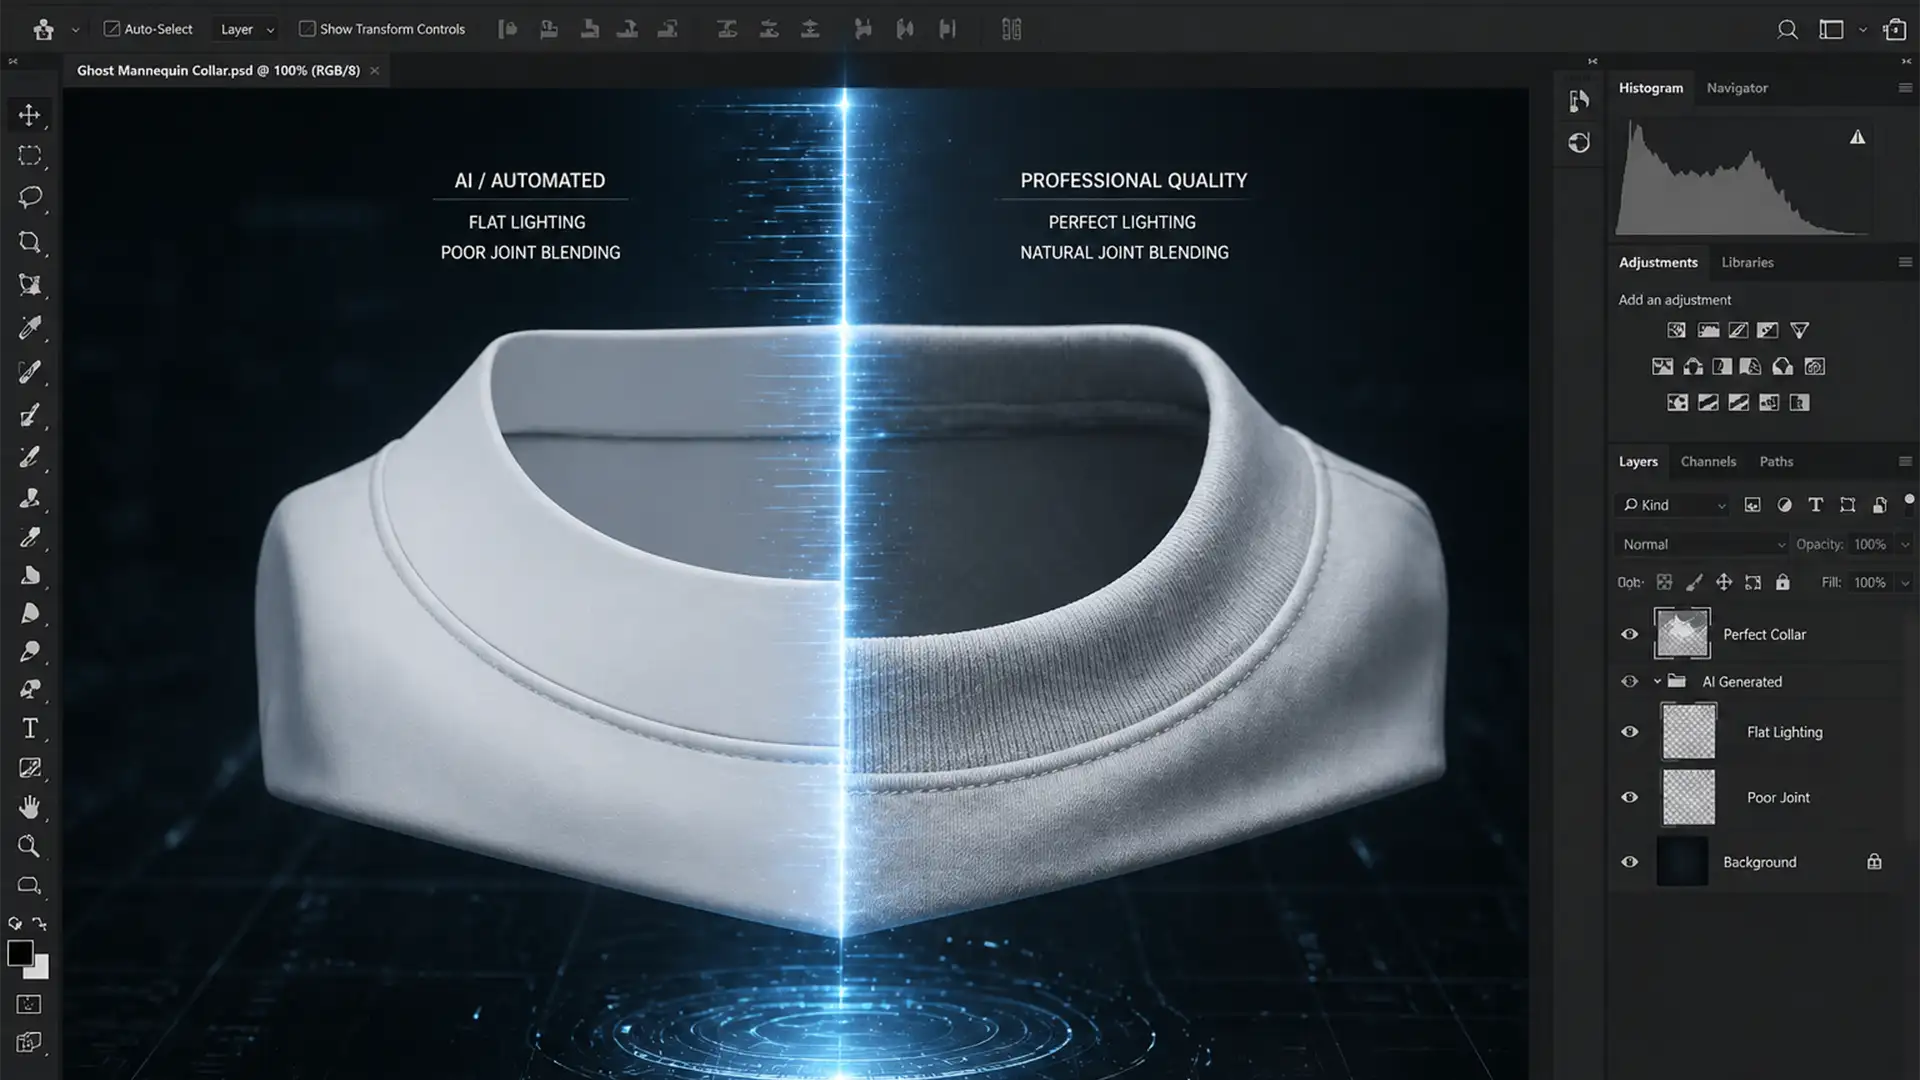
Are you staring at a ghost mannequin edit where the inner collar looks completely disconnected from the main garment? You are not alone. That “floating neck” ruins the 3D illusion, screams “amateur edit,” and ultimately hurts e-commerce conversion rates.
This happens because the main garment and the inner neck plate are often photographed under slightly different studio strobes. The result is a glaring neck joint lighting mismatch fix waiting to happen—contrasting color temperatures, mismatched shadow directions, and inconsistent luminosity.
In this guide, we will walk you through exactly how to blend these raster layers seamlessly in Photoshop CC (v24.x and newer) so the ambient occlusion and directional light falloff look entirely natural, without destroying the fabric’s micro-contrast.
Why the “Floating Neck” Happens in E-Commerce Edits
Creating the perfect ghost mannequin effect requires combining two separate photographs: the front of the garment on the mannequin, and the inside back (the neck plate) turned inside out. Because these shots are taken at different angles, the light hits the fabric differently.
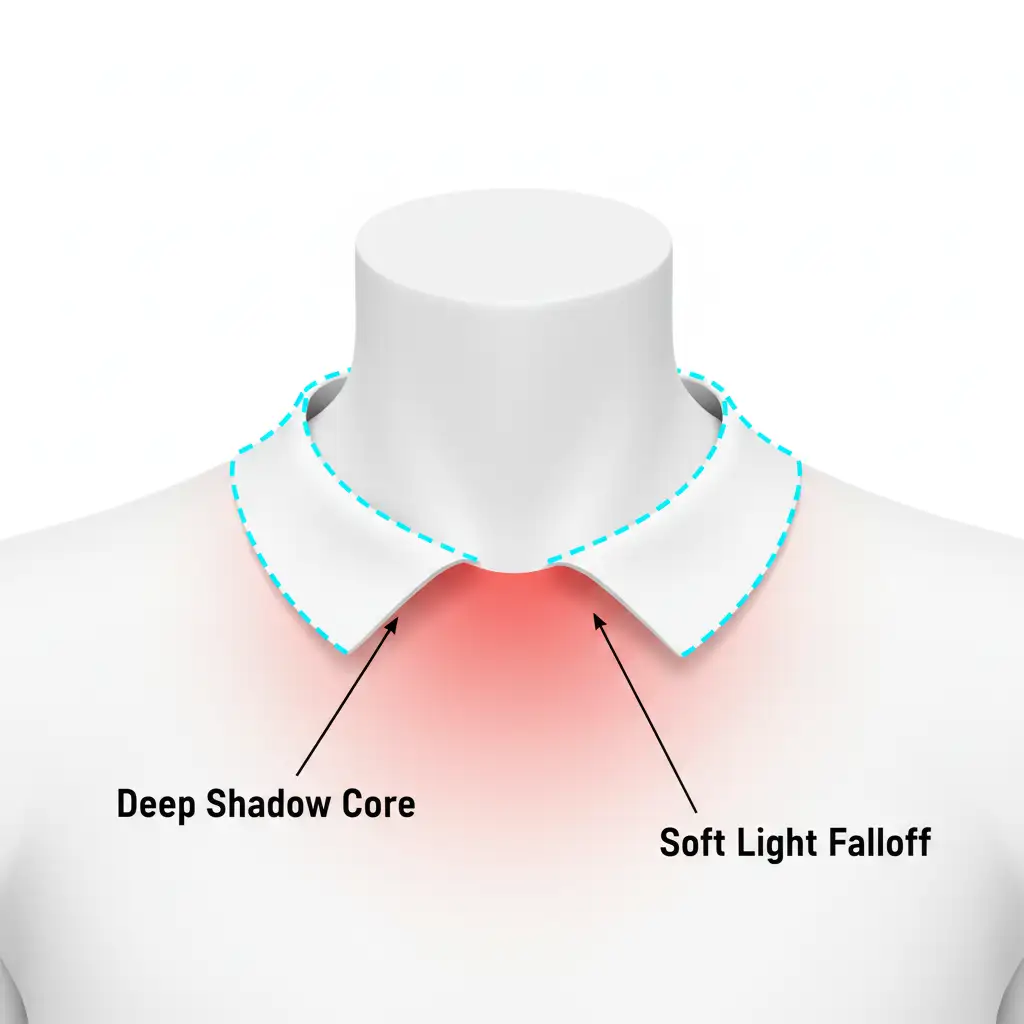
When you composite them, the luminosity and color temperature rarely align perfectly. To achieve professional realism, you must manually introduce the shadows that the front collar would naturally cast onto the back neck plate.
Here are three ways to execute a flawless neck joint lighting mismatch fix, ranging from a quick automated tool to advanced manual sculpting.
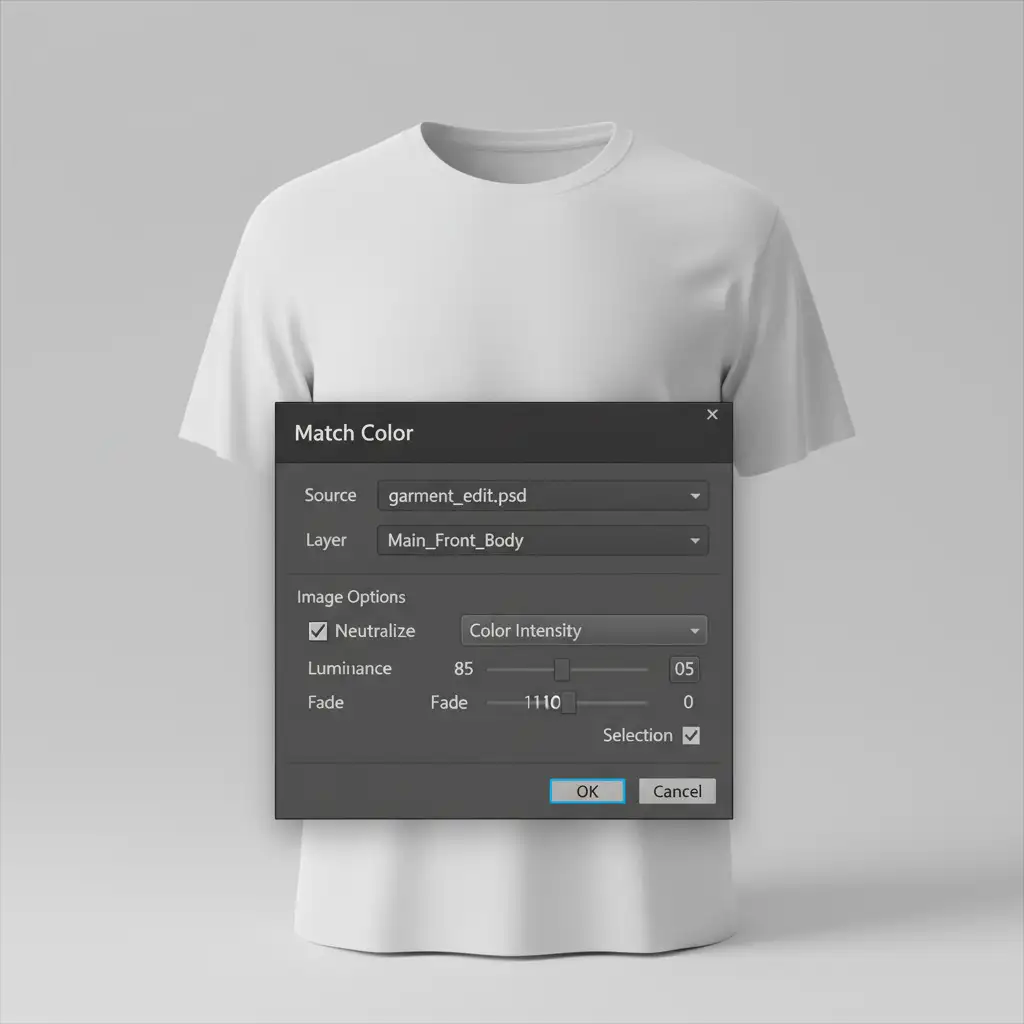
Method 1: The Quick Fix Using the Match Color Tool
If you are processing high-volume e-commerce batches and need a rapid solution, Photoshop’s built-in Match Color tool is your first line of defense.
- Select your isolated neck plate layer in the Layers panel.
- Navigate to Image > Adjustments > Match Color.
- In the dialog box, go to the “Image Statistics” section at the bottom.
- Set the “Source” to your current working document.
- Set the “Layer” drop-down to your main front garment layer.
- Gently adjust the Luminance and Color Intensity sliders until the neck plate harmonizes with the main body.
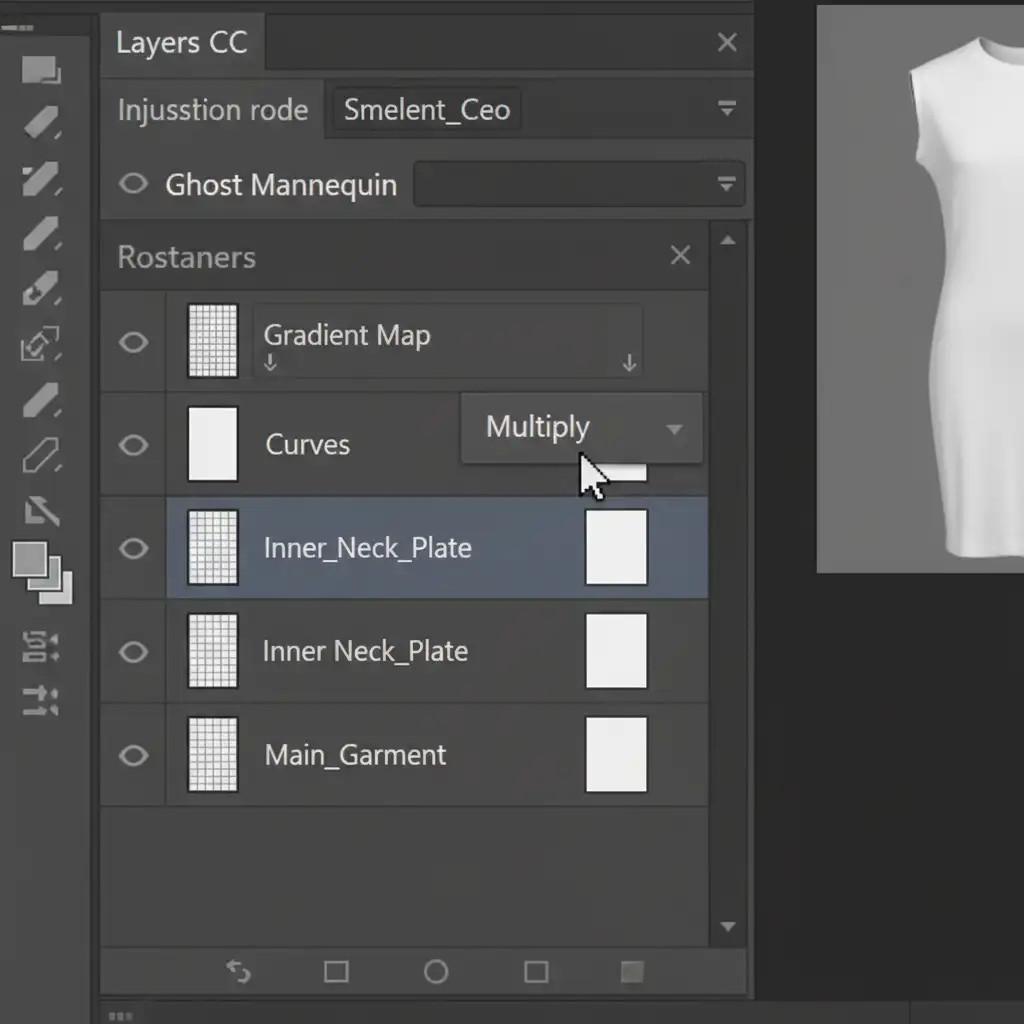
Method 2: The Pro Workaround with Curves and Gradient Maps
For professional e-commerce retouching, automated tools often fall short. To achieve true luminosity matching, you need non-destructive adjustment layers.
- Match the Exposure: Add a Curves adjustment layer directly above your neck plate layer. Hold Alt (or Option on Mac) and click between the layers to create a clipping mask. This ensures your adjustments only affect the neck joint. Pin the highlights, midtones, and shadows on the curve to perfectly match the main garment’s exposure.
- Simulate Ambient Occlusion: Create a Gradient Map adjustment layer and clip it to the neck plate as well.
- Set the gradient from Black to Transparent.
- Change the layer blending mode to Multiply or Linear Burn.
- Drag the gradient from the top of the collar downward to simulate the natural shadow cast by the front collar onto the back plate. Drop the opacity to 30-40% for realism.
Method 3: The Technical Deep-Dive – Non-Destructive Dodge and Burn
When dealing with complex textures like ribbed knitwear or silk, you need manual control over the directional light falloff. This is where the 50% gray dodge and burn technique shines.
- Create a new blank layer above your neck joint and apply a clipping mask.
- Go to Edit > Fill and choose 50% Gray.
- Change this layer’s blending mode to Overlay or Soft Light (both are contrast-based layer blending modes that render 50% gray invisible).
- Select the Burn tool (set to Midtones, 10% Exposure) to manually paint in the deep collar drop-shadow.
- Select the Dodge tool to gently lift flat shadows on the opposite side, ensuring the 3D lighting falloff perfectly mimics the main body.
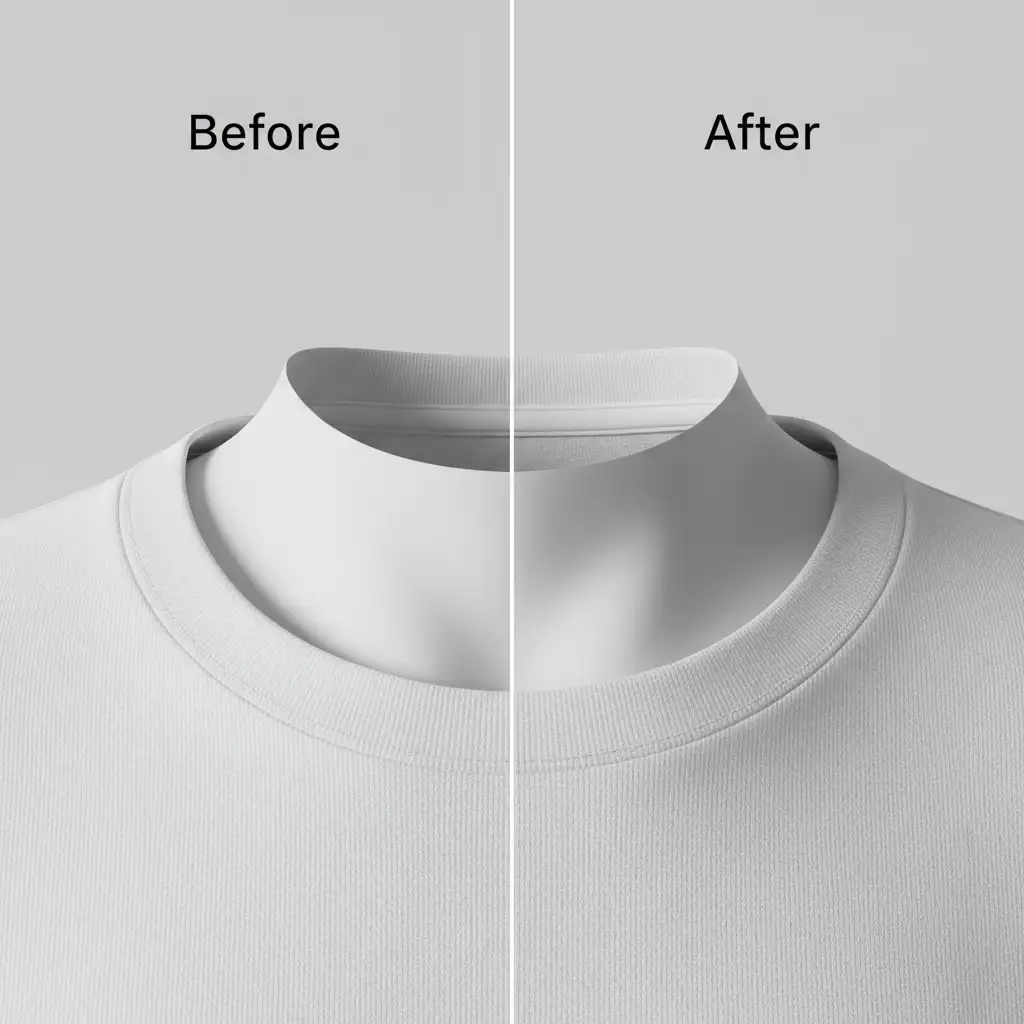
When painting your shadows, pay close attention to where the front fabric folds over. The shadow should be darkest directly beneath the seam and fade out softly as it moves down the inside of the garment.
Scale Your Apparel Retouching with Image Work India
Fixing a neck joint lighting mismatch on a single image is a great technical exercise. But what happens when you have a seasonal catalog of 5,000 garments that need flawless ghost mannequin composites by Friday?
Manual dodge and burn doesn’t scale well when deadlines are tight.
Struggling to get high-volume ghost mannequin edits looking realistic? Hire Image Work India and Cloud Retouch for pixel-perfect, scalable apparel retouching that drives sales. Our expert retouching teams specialize in complex e-commerce apparel composites, ensuring perfect luminosity matching, natural ambient occlusion, and flawless color consistency across your entire catalog.
Stop wasting hours tweaking Curves and Gradient Maps. Let us handle the heavy lifting so you can focus on growing your brand. Contact Image Work India today for a free trial of our ghost mannequin retouching services!


