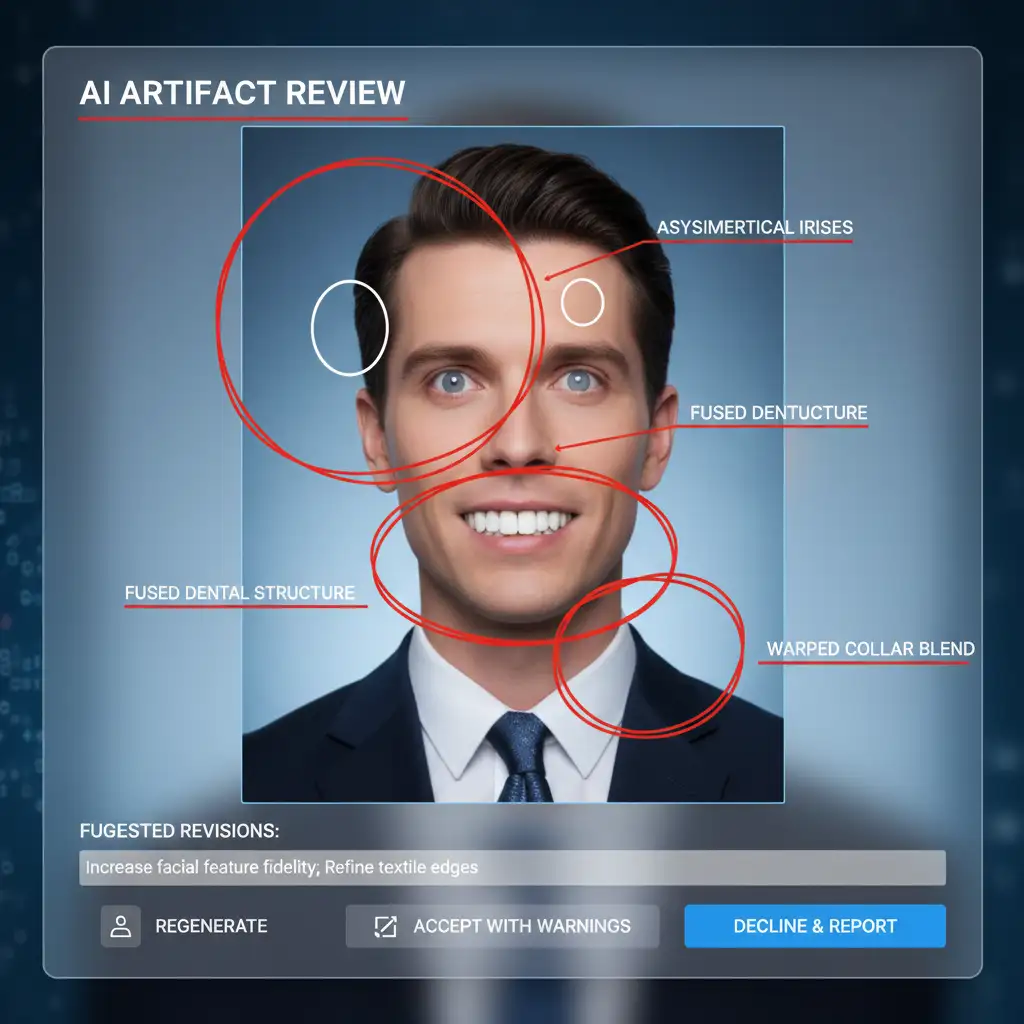
You just generated a batch of AI headshots using Midjourney v6 or an app like Remini. At first glance, they look incredible—until you zoom in. Suddenly, you notice the asymmetrical irises, fused teeth, warped neckties, and skin so perfectly smooth it looks like plastic. This is the dreaded “uncanny valley,” and using these photos on your LinkedIn or company website can actively damage your professional credibility. While AI generation is incredibly fast, it lacks the nuanced realism of true human identity. Here is exactly why your generated portraits need professional retouching, and how to fix them.
The “Uncanny Valley” Problem in AI Generated Portraits
AI headshot generators are trained on millions of images, but they don’t actually know what you look like. They guess. This guesswork leads to high-resolution images that suffer from glaring structural and textural anomalies.
Common technical issues include:
- Asymmetrical Irises: Pupils that are misshapen or pointing in slightly different directions.
- Fused Teeth: Dental structures that blend together into a solid white block.
- Inconsistent Fabric Textures: Suit lapels that melt into shirts or warped neckties.
- “Plasticky” Skin: Over-smoothed faces entirely lacking natural pores or fine lines.
To restore a natural human touch, you need professional retouching for AI headshots. Let’s break down the technical workflow required to reverse over-smoothed details and reconstruct your true identity.
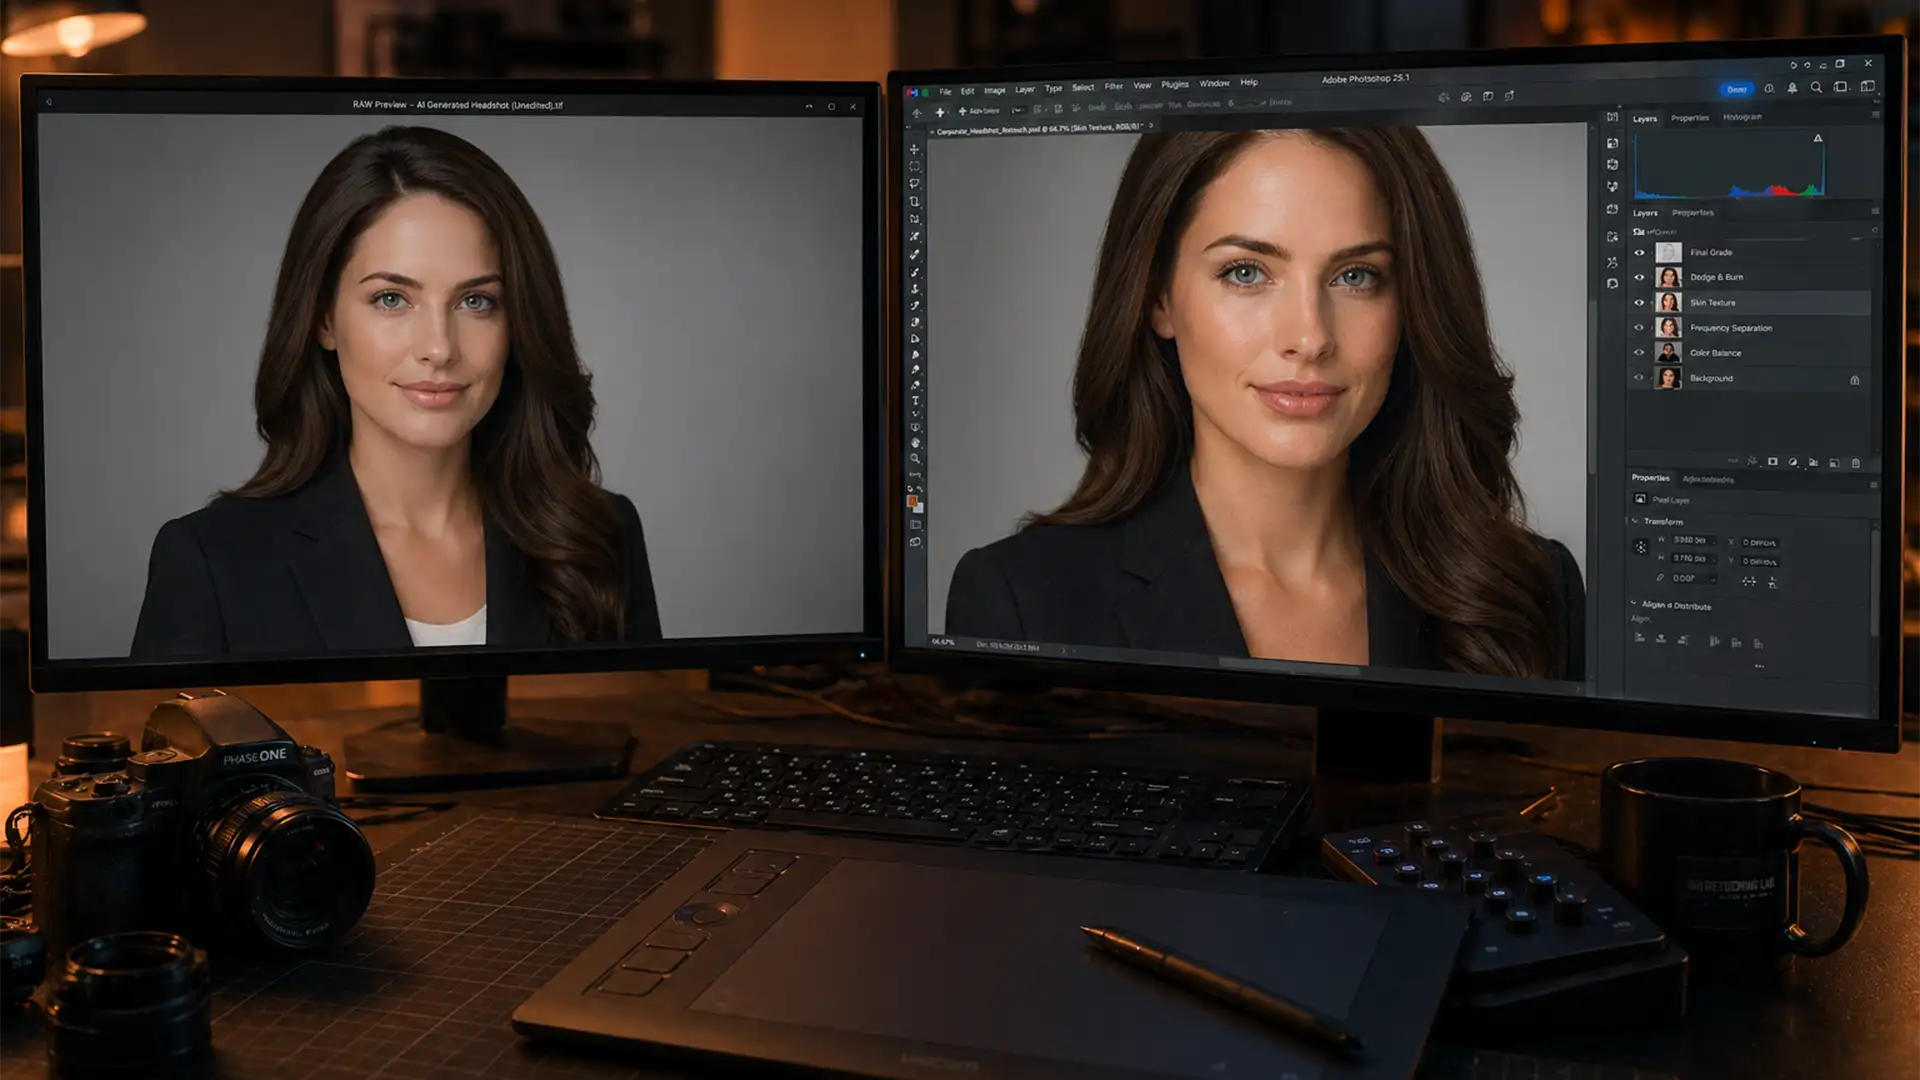
How to Fix Common AI Artifacts in Photoshop (v24.x – v25.x)
Fixing an AI headshot requires a blend of traditional raster editing and targeted AI removal tools. Here is the step-by-step technical breakdown.
Method A: The Quick Fix for Structural Artifacts
When dealing with melted clothing or fused hair strands, Adobe Photoshop’s latest AI tools are your best first line of defense.
- Select the Remove Tool (J) from your toolbar.
- Carefully brush over minor anomalies like stray, floating hairs or anomalous background artifacts.
- For larger structural issues (like a malformed collar), use the Lasso tool to make a selection, then utilize Generative Fill. Type a simple prompt like “crisp suit lapel” to replace the warped AI artifacts with structurally sound elements.
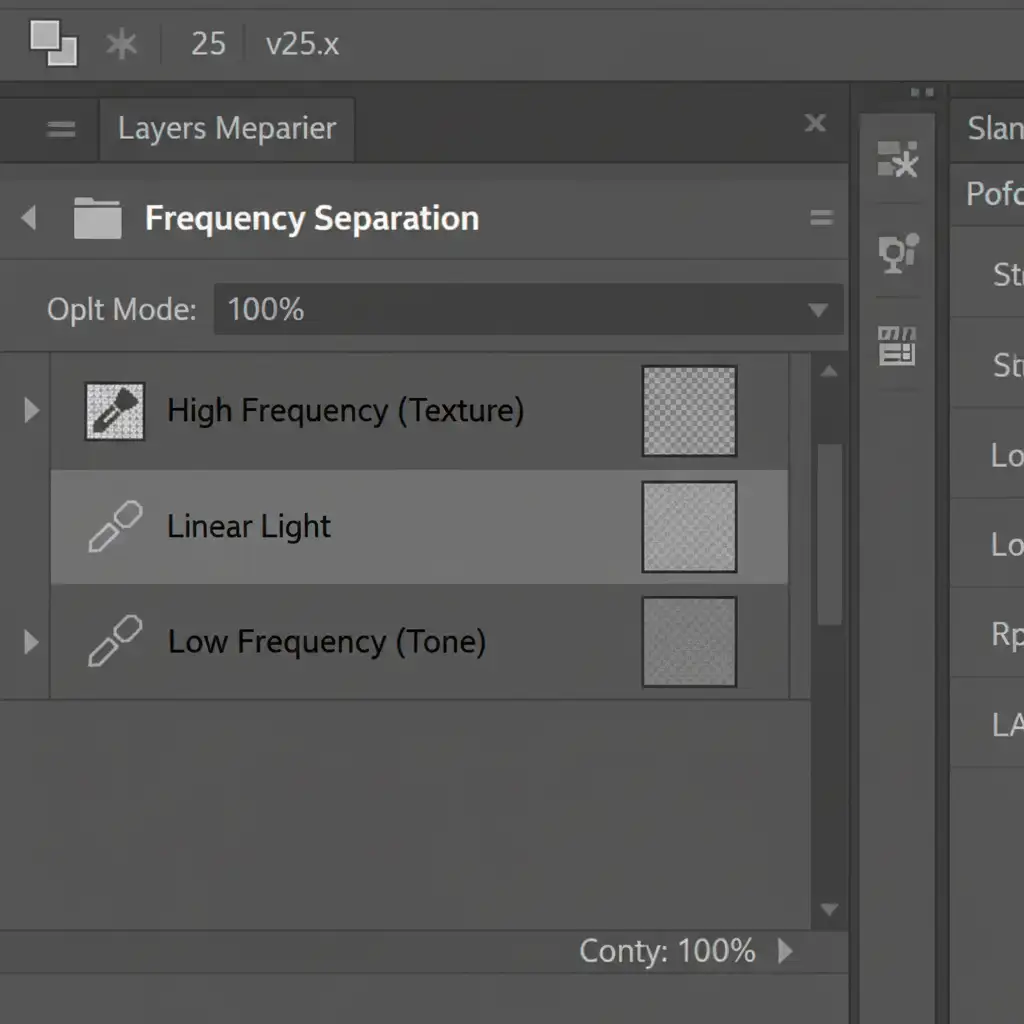
Method B: Skin Texture Reconstruction via Frequency Separation
AI generators notoriously destroy skin texture, resulting in a waxy appearance. To fix “plasticky” AI skin, you need to implement Frequency Separation—a technique that separates the image’s texture from its underlying tone.
- Duplicate your base layer twice. Name the bottom “Low Frequency” (Tone) and the top “High Frequency” (Texture).
- Apply a Gaussian Blur to the Low Frequency layer until the pores disappear.
- Apply Image (Image > Apply Image) to the High Frequency layer to extract the texture.
- Because the AI image lacks texture to begin with, you must perform Skin Texture Reconstruction. Create a new layer set to Soft Light.
- Go to Filter > Noise > Add Noise. Add 1-2 percent, Monochromatic, Uniform noise to reintroduce realistic skin pores.
- Use traditional Dodge and Burn techniques on a separate layer to map out realistic facial contours that the AI flattened.
Method C: The Technical Deep-Dive for Identity Restoration
The biggest flaw of AI headshots is that they often look like a highly attractive stranger, not you. To restore actual human identity, you must rely on advanced Compositing.
- Bring in the client’s original, unedited reference photo.
- Select real features (eyes, teeth, beauty marks) and copy them into your AI document. Convert these layers to Smart Objects for non-destructive scaling.
- Position the real features over the AI features. Use advanced Layer Masking with a soft brush to seamlessly blend the edges.
- The AI image and the real photo will have different lighting. To fix this, create a Curves adjustment layer and clip it directly to your composited feature layer. Adjust the RGB curves to perfectly match the AI’s lighting environment.
- Once matched, you can Rasterize the final composited elements if you need to apply destructive pixel-level refinements.
The Final Result: A Flawless Human Touch
By combining artifact removal, skin texture reconstruction, and precise compositing, you bridge the uncanny valley. The result is a professional headshot that benefits from the idealized lighting of AI, but retains the authentic, trustworthy identity of the actual human subject.

Let the Experts Perfect Your Professional Image
Fixing AI-generated anomalies requires a deep understanding of advanced Photoshop techniques, lighting theory, and human anatomy. If you don’t have the time or technical expertise to execute Frequency Separation and complex compositing, you don’t have to settle for an uncanny portrait.
Don’t let an artificial artifact ruin your professional image. Hire the expert retouchers at Image Work India and Cloud Retouch. We specialize in professional retouching for AI headshots, seamlessly blending the speed of AI with a flawless, natural human touch.
[Contact Image Work India and Cloud Retouch today to rescue your AI headshots!]


