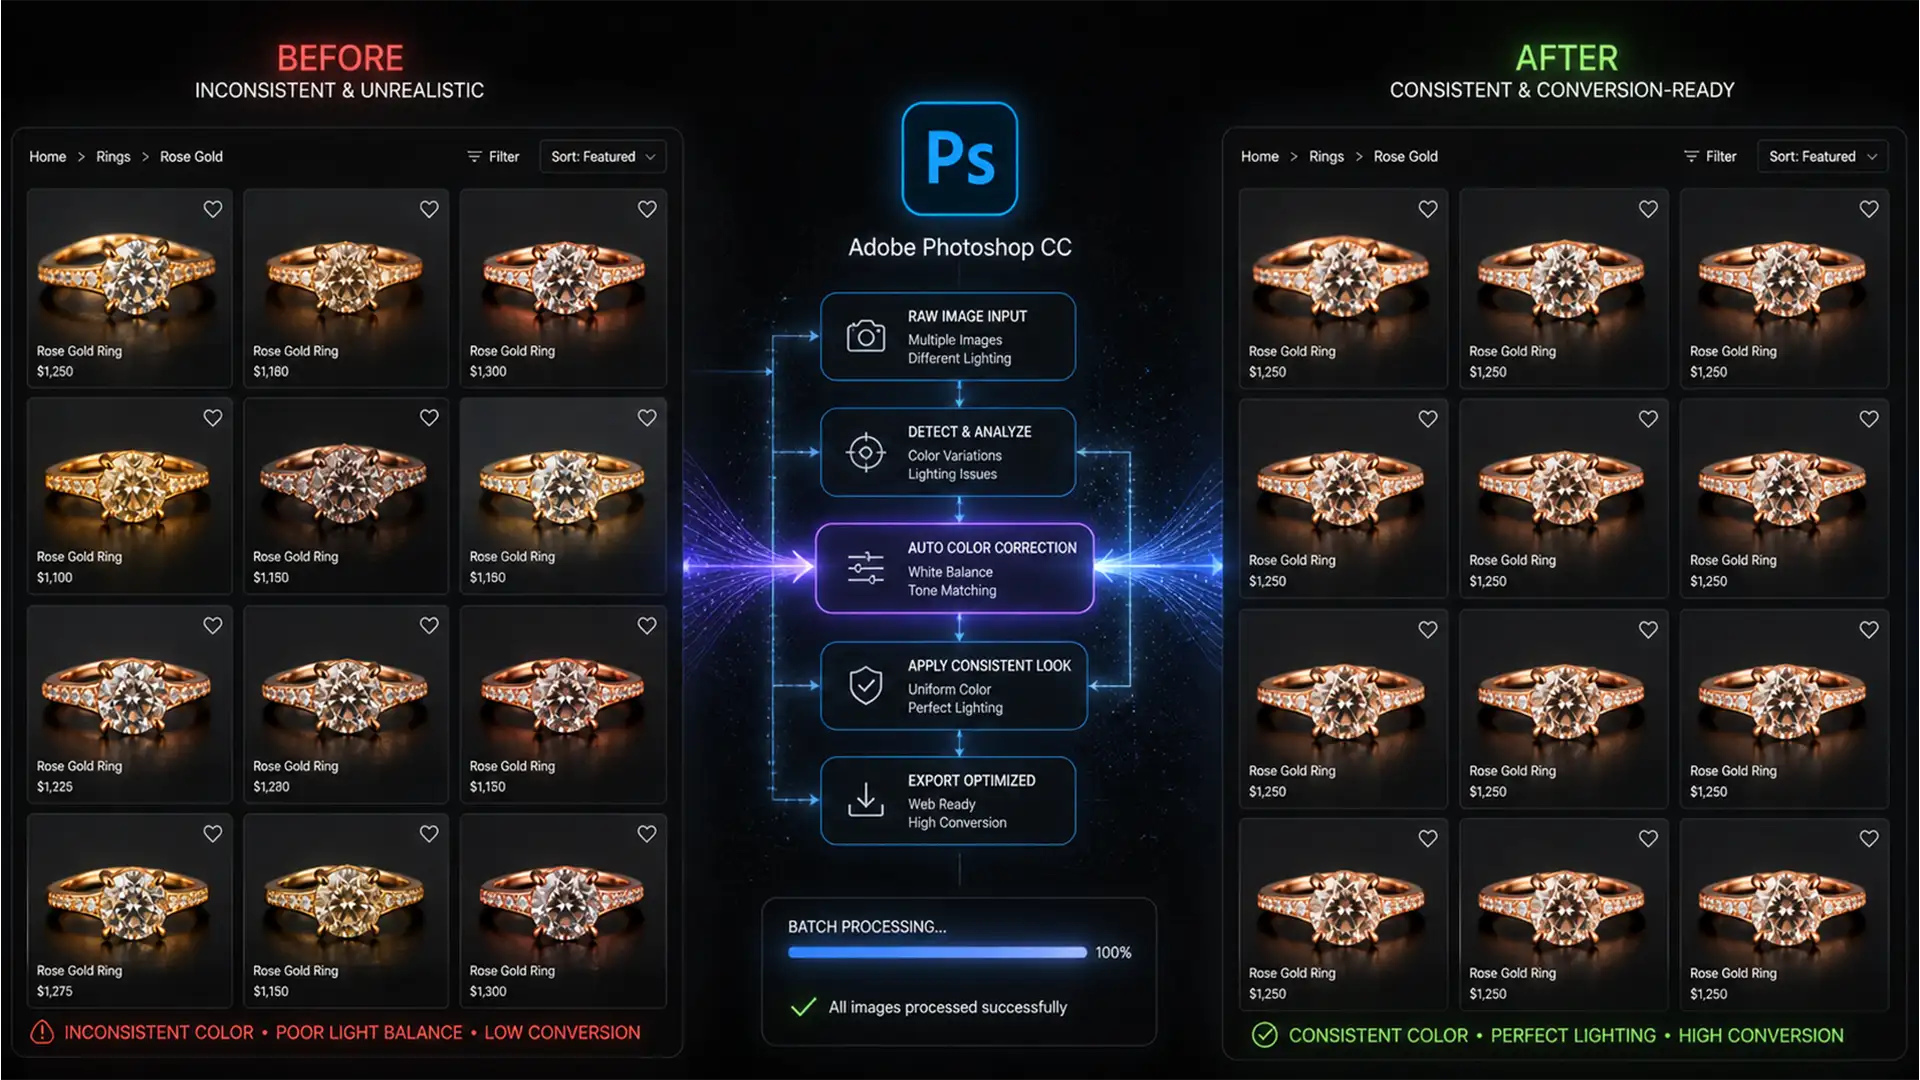
E-commerce jewelers know the painful truth: inconsistent metal tones kill conversion rates. You shoot a beautiful new catalog, but slight variations in flash power, ambient light, and studio reflections cause your rose gold pieces to shift drastically. One ring looks brassy, the next looks like dark copper. When customers see these variations on a product grid, premium jewelry suddenly looks cheap.
Manually tweaking selective colors for hundreds of photos isn’t just exhausting—it’s inaccurate. To build a flawless catalog, you need to match rose gold color photoshop batch processing. Standardizing your metal tones requires a mathematical approach using an RGB Benchmark, not subjective visual guessing.
Here is the definitive guide to automating perfect rose gold tones across your entire jewelry catalog using Adobe Photoshop CC v24.x and v25.x.
Why Rose Gold Requires a Mathematical RGB Benchmark
Rose gold is notoriously difficult to photograph consistently because it is a delicate alloy of gold, copper, and silver. When light hits it differently, the camera sensor picks up varying dominance in the red and yellow channels.
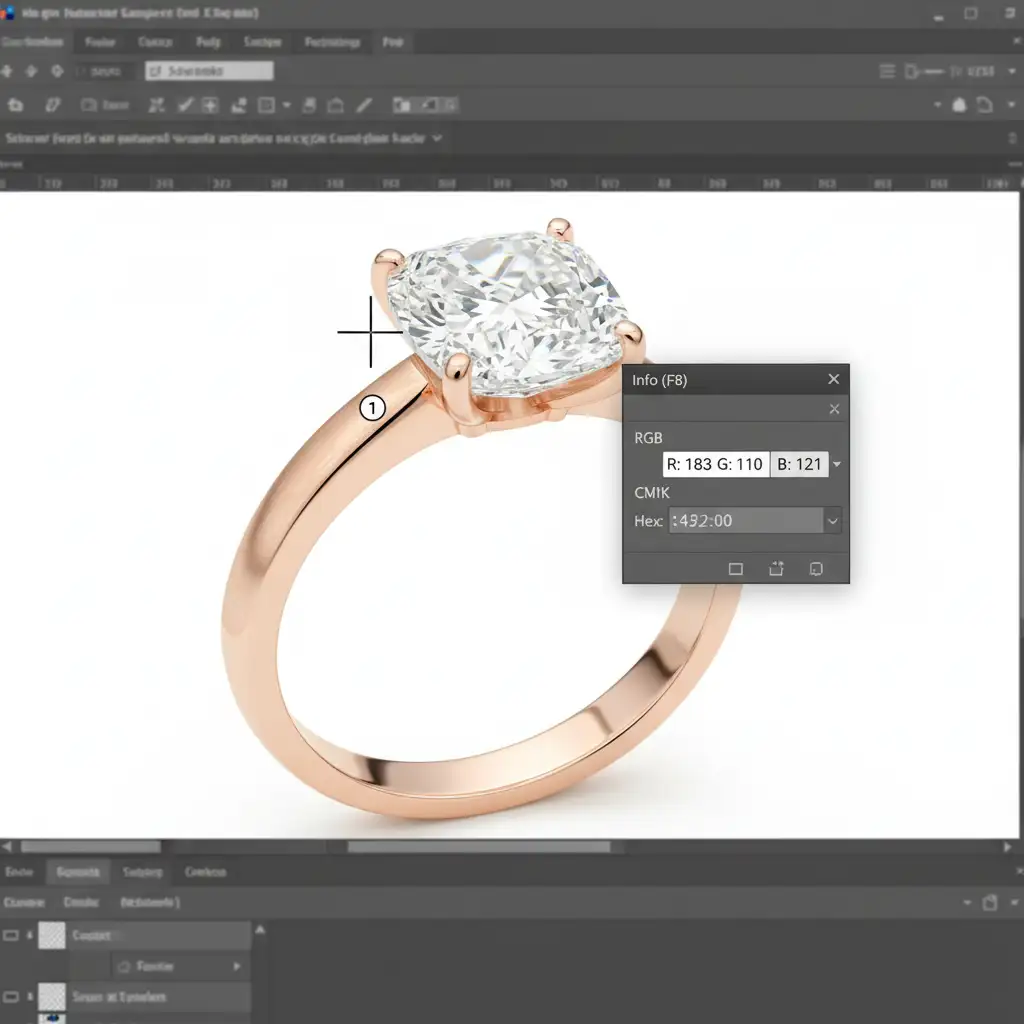
To achieve a perfect batch match, professional retouchers rely on a specific RGB Benchmark. For ideal midtone rose gold, your target values should hover around R:183, G:110, B:121. Hitting these exact numbers across an entire batch requires utilizing Photoshop’s automation tools to lock in your color grading.
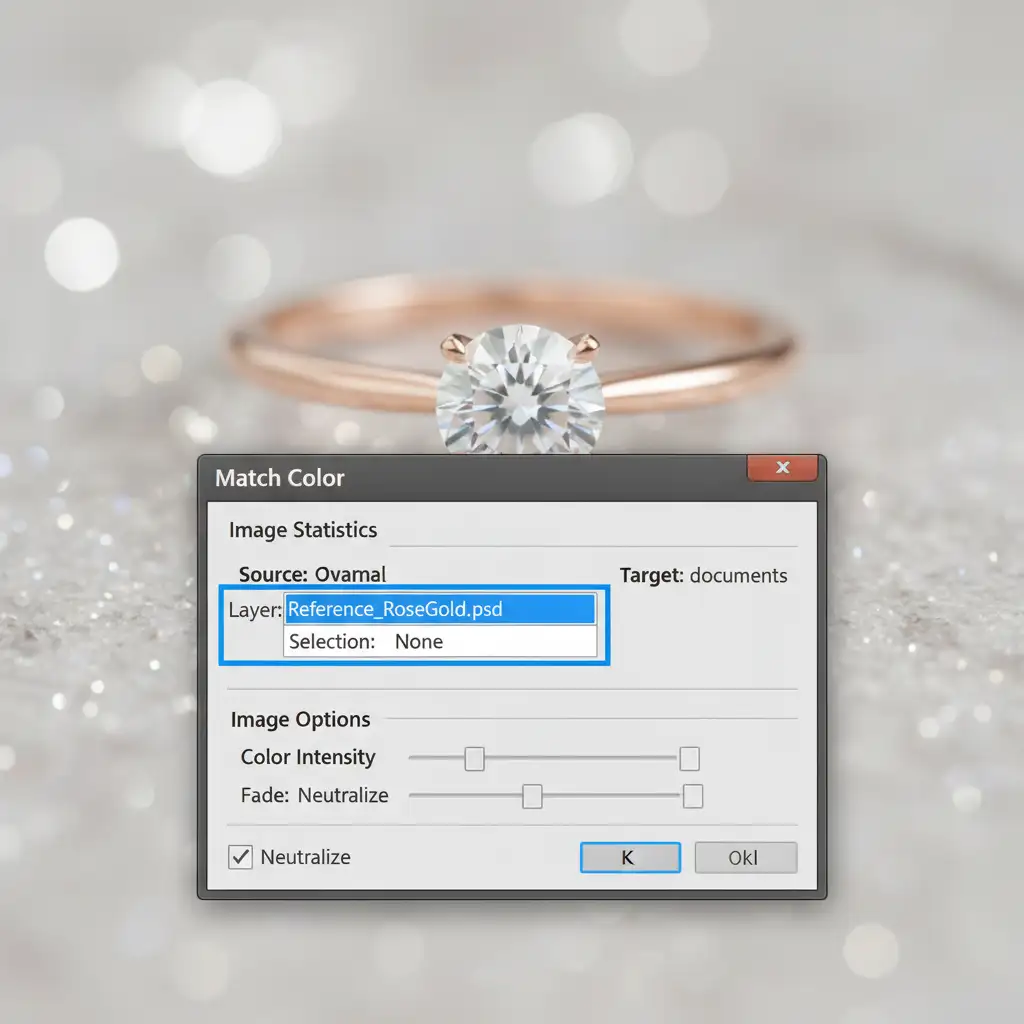
Method 1: The Quick Fix Using Match Color Adjustment
If you have a small batch of images and need a rapid solution, Photoshop’s built-in Match Color tool is your best starting point. It analyzes the color statistics of a perfectly toned reference image and applies them to your target image.
Step-by-Step Workflow
- Open your “Reference Image” (a photo with the perfect rose gold tone).
- Open your “Target Image” (the photo that needs correction).
- On the Target Image, navigate to Image > Adjustments > Match Color.
- In the dialog box, go to the Image Statistics section.
- Set the Source dropdown to your Reference Image document.
- Fine-tune the Luminance and Color Intensity sliders until the target matches the reference, achieving a perfect luminosity match. Click OK.
Method 2: The Pro Workaround – Curves, Color Samplers, and Actions
For true consistency across a massive catalog, visual matching isn’t enough. You need to use the Color Sampler Tool to read the exact pixel values and a Curves Adjustment Layer recorded into an Action for batch processing.
1. Set Your Color Sampler
Select the Color Sampler Tool (hidden under the Eyedropper tool). In the top options bar, set the sample size to 3×3 Average to ensure you aren’t grabbing a dead pixel. Click on a midtone area of the rose gold jewelry. This will open the Info Panel, displaying your current RGB values.
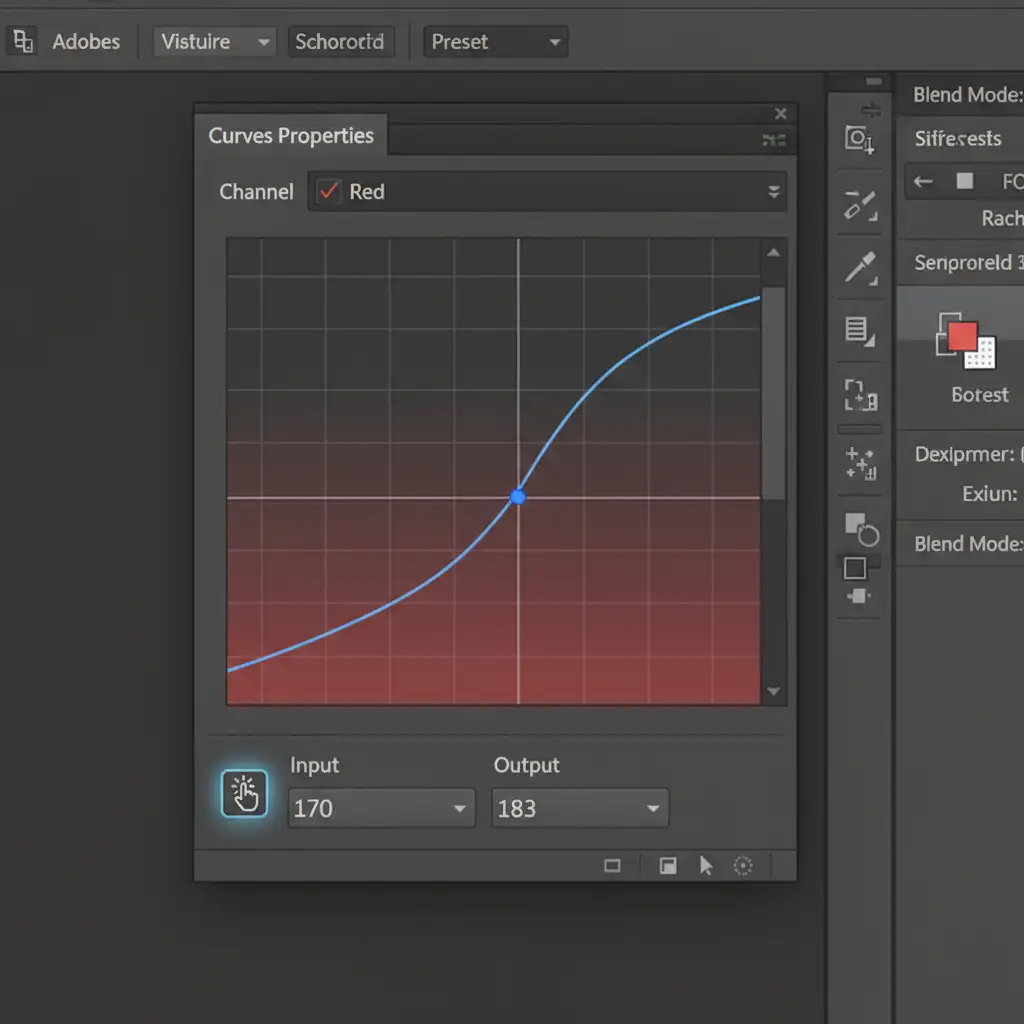
2. Record the Curves Action
- Open the Actions Panel (Window > Actions) and click the + icon to begin Action Recording. Name it “Rose Gold Batch Fix”.
- Create a new Curves Adjustment Layer.
- Select the targeted adjustment tool (the hand with pointing finger icon in the Curves panel) to lock onto your sampled midtone point.
- Switch between the Red, Green, and Blue channels in the Curves panel. Adjust the input/output points mathematically to hit your target RGB Benchmark (R:183 G:110 B:121).
- Click the Stop button in the Actions Panel.
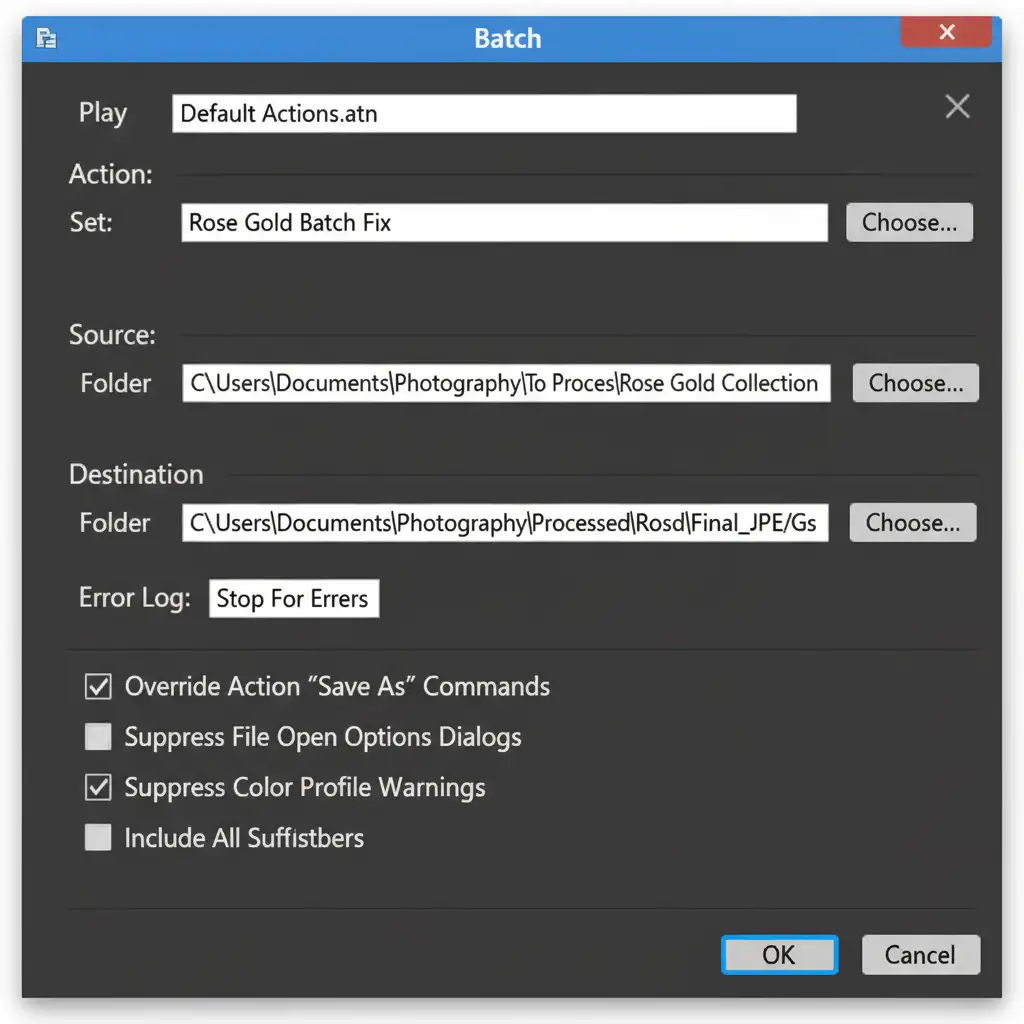
3. Deploy via Batch Automate
Now that the math is recorded, apply it to your entire folder of raw catalog images. Go to File > Automate > Batch. Select your “Rose Gold Batch Fix” action, choose your Source Folder containing the unedited images, and set your Destination Folder. Click OK and watch Photoshop perfectly color-correct hundreds of images in minutes.
Method 3: The Technical Deep-Dive – Camera Raw XML Syncing and Droplets
If your jewelry images require heavy Color Grading alongside basic color correction, utilizing the Camera Raw Filter combined with a Photoshop Droplet is the ultimate enterprise-level workflow.
Creating the Camera Raw Preset
- Open your base image in the Camera Raw Filter (Filter > Camera Raw Filter).
- Navigate to the Color Mixer and Color Grading panels to dial in the exact rose gold tint, neutralizing harsh yellow casts and boosting magenta midtones.
- Save these exact settings as a new Camera Raw Preset.
- Record a new Photoshop Action that simply applies this specific Camera Raw Preset to an image and saves it.
Building the Droplet
A Photoshop Droplet turns your Action into a standalone mini-application on your desktop.
- Go to File > Automate > Create Droplet.
- Choose where to save the Droplet (e.g., your Desktop) and select the Action you just created.
- Now, you can literally drag and drop folders containing hundreds of jewelry images directly onto the Droplet icon on your desktop. Photoshop will launch in the background and instantly batch process the perfect rose gold tone across every file.
Stop Losing Sales to Bad Color Grading
Learning to match rose gold color photoshop batch workflows will save you hundreds of hours, but it still requires deep technical knowledge of RGB benchmarks, color theory, and software automation. If your e-commerce catalog is suffering from inconsistent metal tones, you don’t have to fix it alone.
Struggling with inconsistent metal tones in your jewelry catalog? Let the expert retouchers at Image Work India and Cloud Retouch build a flawless, color-accurate batch processing pipeline for your brand. Our dedicated jewelry retouching teams ensure every ring, necklace, and bracelet shines with perfect, true-to-life color, guaranteed to boost your conversion rates. [Contact us today for a free trial edit!]


