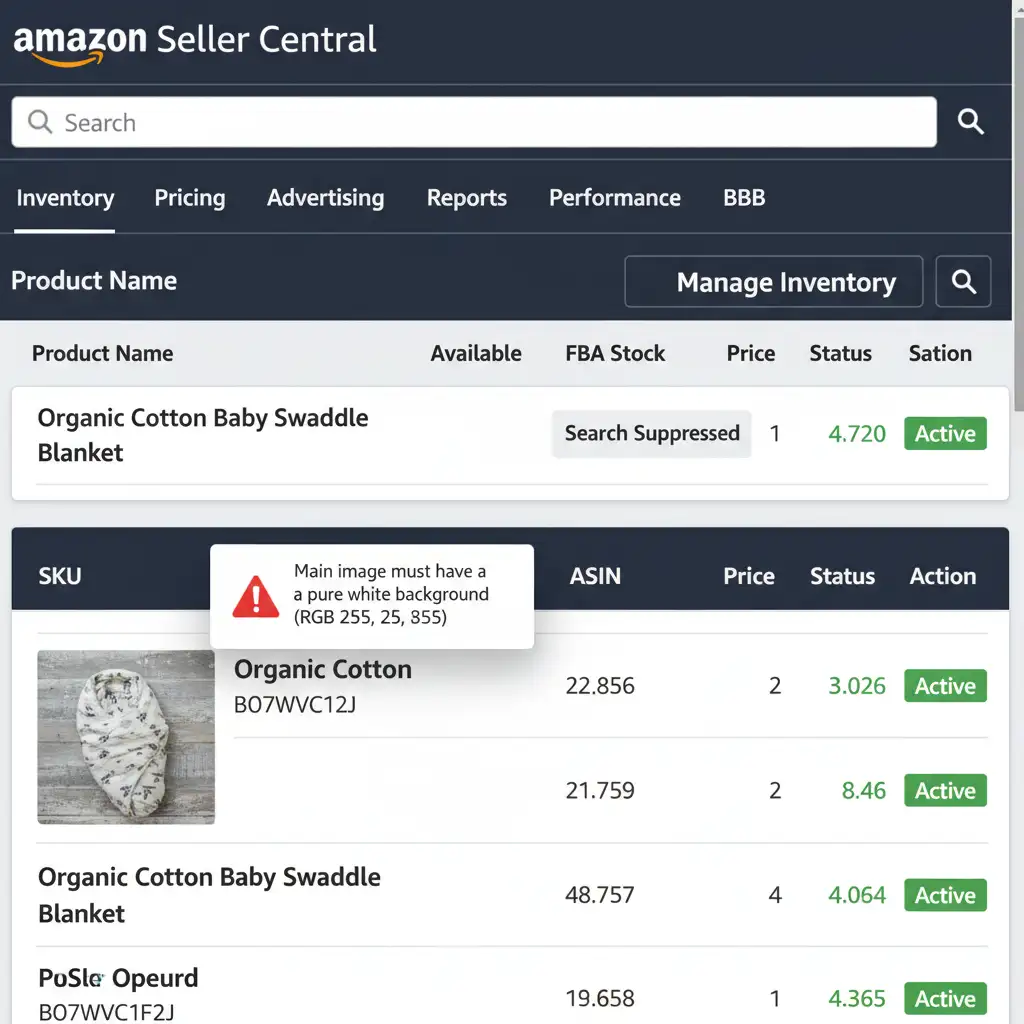
You launch a new product, optimize your listing, and run your PPC campaigns—only to suddenly see your sales flatline. You check Seller Central and find the dreaded “Search Suppressed” warning. The culprit? Your main product image.
While automated background removal tools are incredibly fast, they are notorious for causing Amazon AI image suppression halo removal issues. These tools often leave microscopic grey, blue, or semi-transparent pixel halos around your product due to AI anti-aliasing errors. Amazon’s strict visual recognition bots immediately detect these soft raster masking flaws, flagging the image for failing to meet the mandatory pure white background standard.
In this guide, we will break down the exact Photoshop workflows required to strip away these AI artifacts, achieve a perfect hex code FFFFFF background, and get your listings active again.
Why Amazon’s A9 Algorithm Rejects AI Background Removals
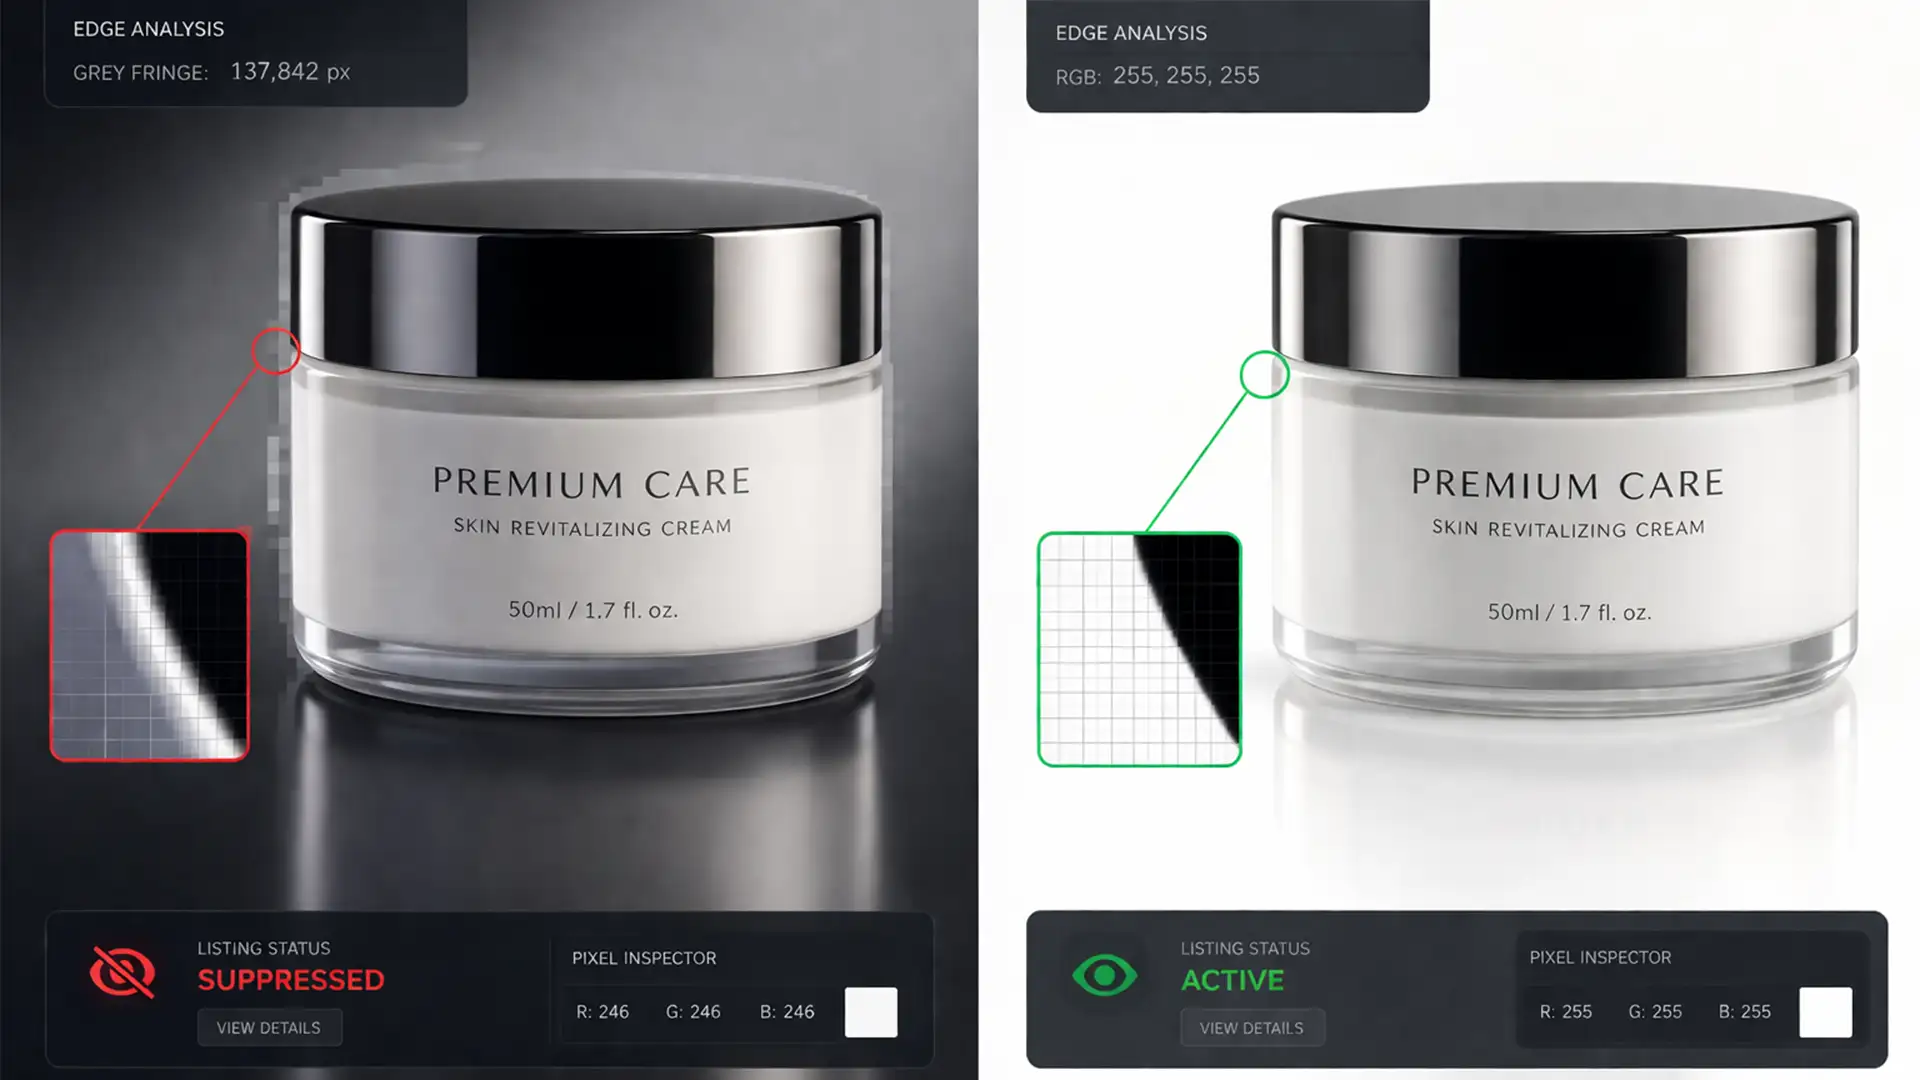
Amazon requires all main product images to have a pure white background. This doesn’t mean “mostly white” or “off-white”—it means exactly RGB 255 255 255.
When you use the Photoshop Contextual Task Bar or web-based AI background removers, the software struggles to establish a hard, definitive edge. Instead, it relies on soft masking to blend the product into the canvas. This creates a 1-3 pixel border of residual color from the original background. While invisible to the naked eye at normal zoom, Amazon’s automated quality bots scan the pixel data, detect the halo, and trigger an immediate image suppression.
3 Photoshop Workflows to Fix AI Edge Halos
To guarantee 100% marketplace compliance, you must move beyond one-click AI tools and apply precise edge refinement techniques. Here are the three best methods to salvage your suppressed images.
Method 1: The Quick Fix (Shift Edge Technique)
If your product has relatively smooth edges, you can quickly choke the AI mask inward to hide the halo.
- Open your image in Photoshop and convert your product layer into a Smart Object to protect the original pixel data.
- Select your subject using the Object Selection Tool. You will see the standard marching ants around your product.
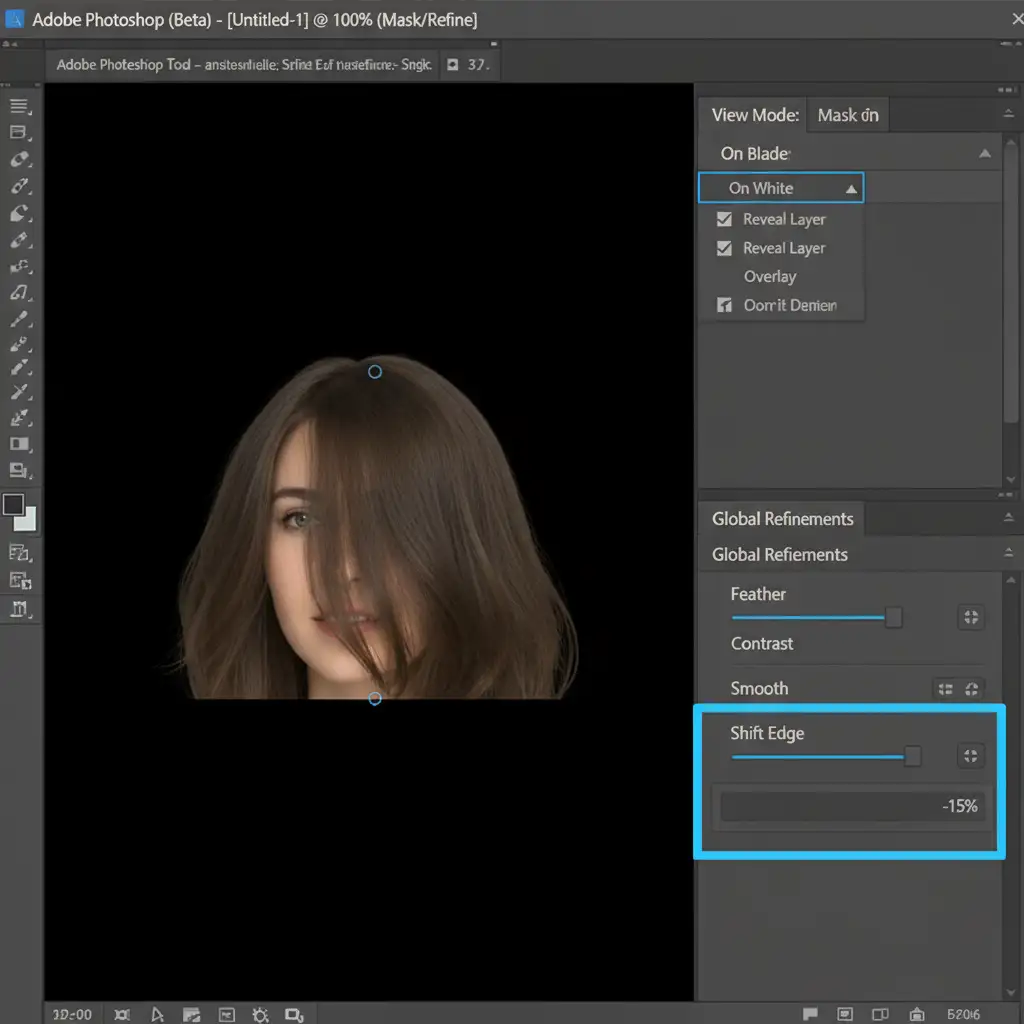
- Open the Select and Mask workspace.
- Change the View Mode to On Black (shortcut: ‘A’). This high-contrast view will immediately reveal the light-colored AI halo.
- Navigate to the Global Refinements panel and drag the Shift Edge slider to -10% or -15%. This forces the mask inward, cutting off the anti-aliasing errors.
- Set the Output To dropdown to New Layer with Layer Mask and click OK.
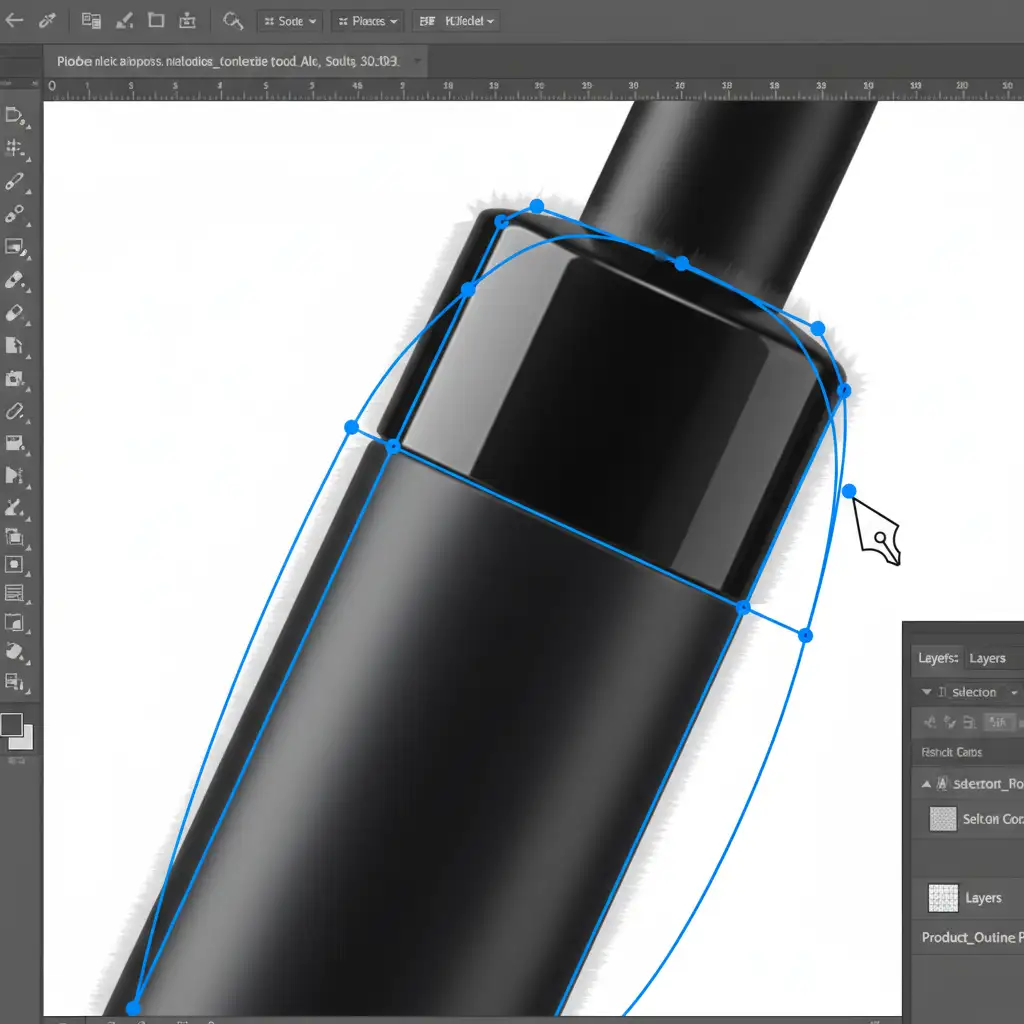
Method 2: The Pro Workaround (Manual Clipping Path)
For absolute perfection—and the standard used by top-tier e-commerce agencies—you must ditch AI raster masking entirely and use vector paths. A clipping path provides a mathematically perfect edge that Amazon’s bots cannot dispute.
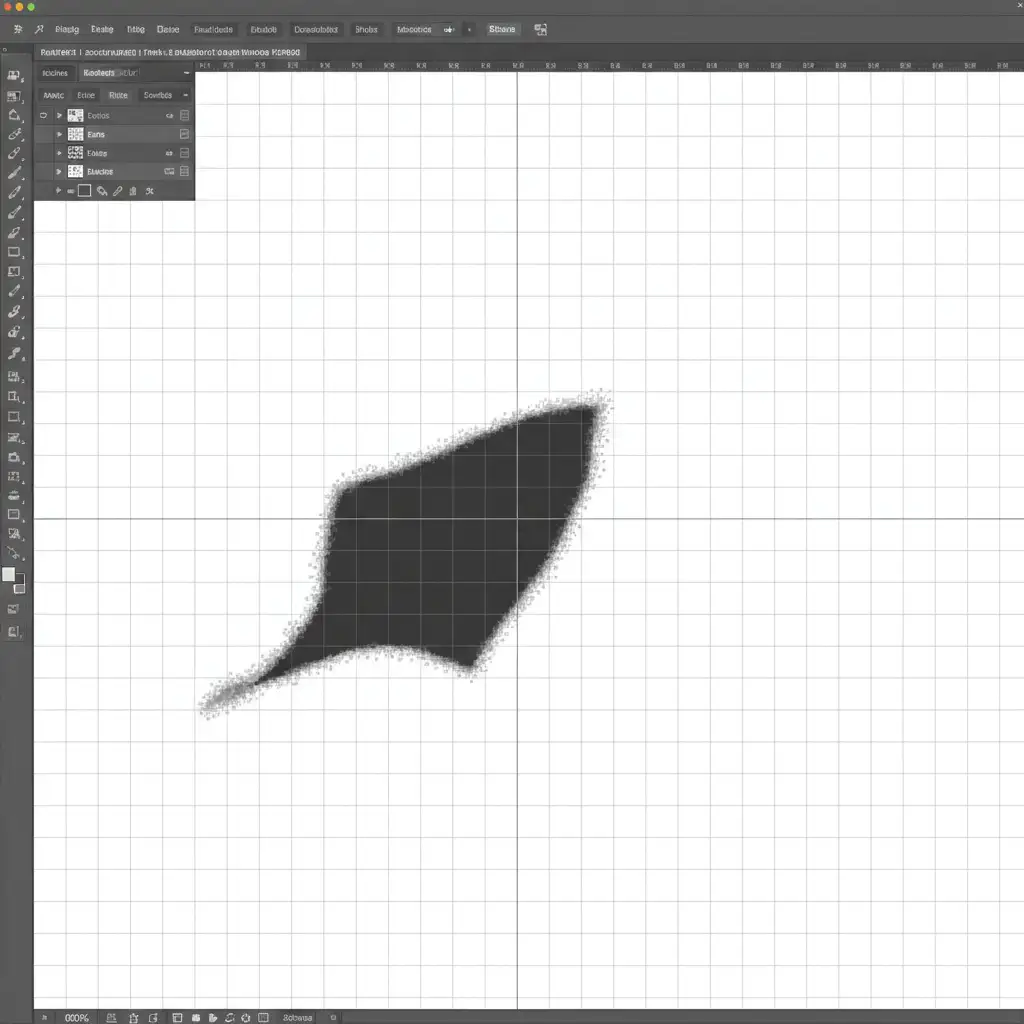
- Select the Pen Tool (P).
- Carefully plot anchor points to draw a path exactly 1 to 2 pixels inside the actual boundary of your product. This completely bypasses the contaminated edge pixels.
- Once the path is closed, right-click and choose Make Selection. Apply a tiny 0.5-pixel feather to prevent the edge from looking unnaturally sharp.
- Inverse the selection and delete the background, or apply the path directly as a vector mask.
Method 3: The Technical Deep-Dive (Defringe for Complex Edges)
Products with complex edges—like faux fur, hair, or frayed fabrics—cannot be clipped with a Pen Tool without looking fake. For these, you need advanced pixel matting.
- Duplicate your subject layer.
- Go to Layer > Matting > Defringe. Set the width to 1 or 2 pixels. Photoshop will automatically analyze the edge and strip away the residual background artifact pixels.
- Alternative Manual Fix: Lock the transparent pixels on your layer. Select the Clone Stamp or Brush tool, set the blend mode to Darken or Multiply, and carefully paint over the light halo pixels using the true colors sampled from the edge of your subject.
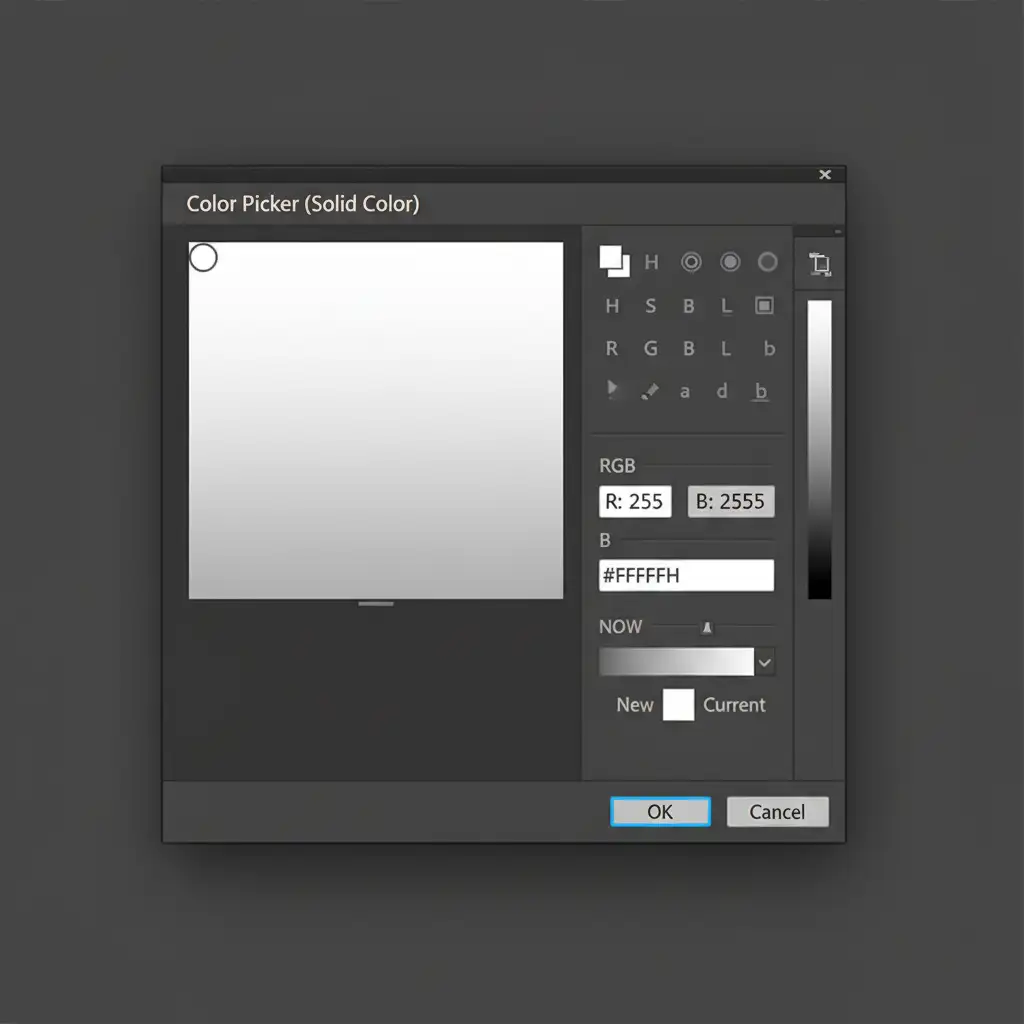
The Final Step: Verifying Your Pure White Background
Regardless of the method you choose, you must ensure the background layer beneath your product is mathematically pure white.
Add a Solid Color adjustment layer beneath your product. Open the Color Picker and ensure the values are strictly set to RGB 255 255 255 (or hex code FFFFFF).
Stop Dealing with Amazon Suppressions—Let the Experts Handle It
Fixing an Amazon AI image suppression halo removal issue takes time, patience, and advanced Photoshop skills. When you have hundreds or thousands of SKUs, manually plotting clipping paths and defringing edges is a massive drain on your resources.
You don’t have to do this yourself.
At Image Work India and Cloud Retouch, our team of professional retouchers specializes in high-volume e-commerce image editing. We don’t rely on automated AI shortcuts that get your listings banned. We provide hand-drawn clipping paths, flawless edge refinement, and guaranteed RGB 255 255 255 backgrounds that meet 100% of Amazon’s strict marketplace guidelines.
Ready to protect your listings and boost your conversions? Contact Image Work India and Cloud Retouch today for flawless, Amazon-ready product images.


