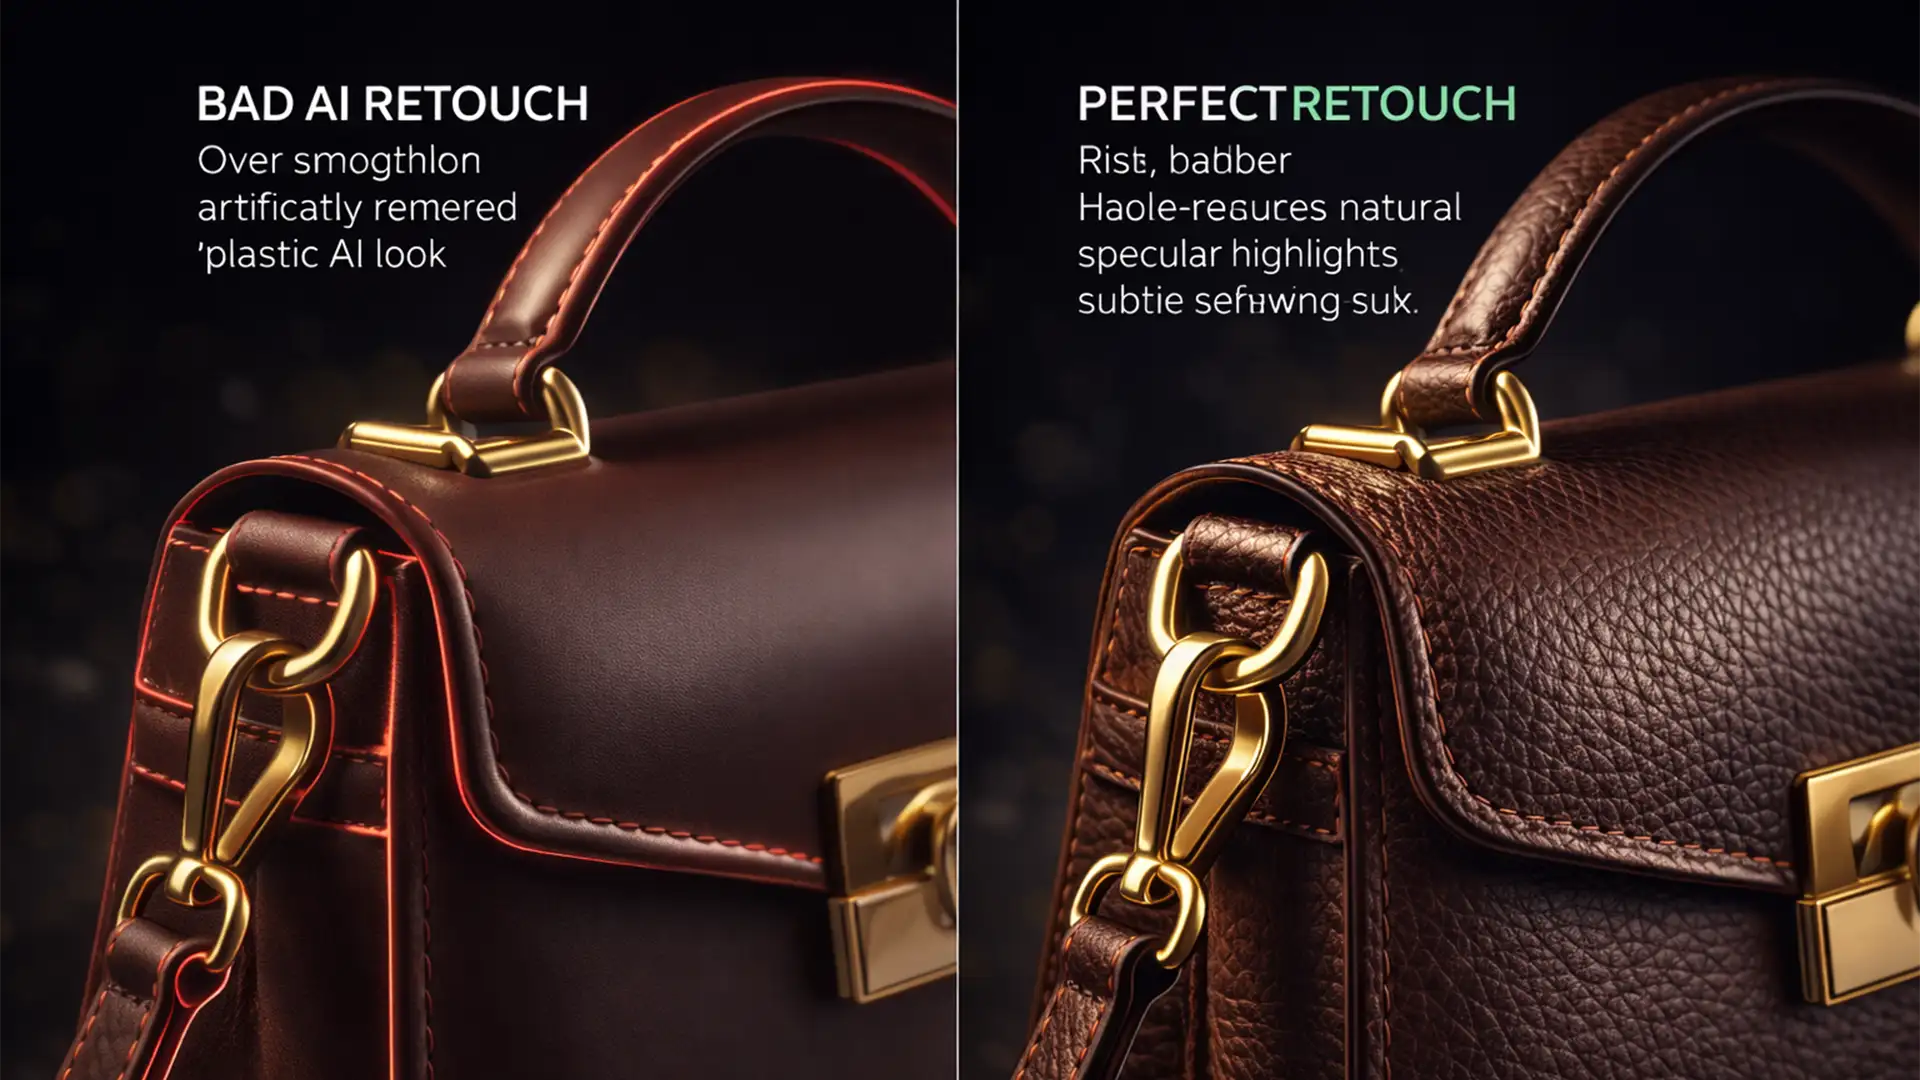
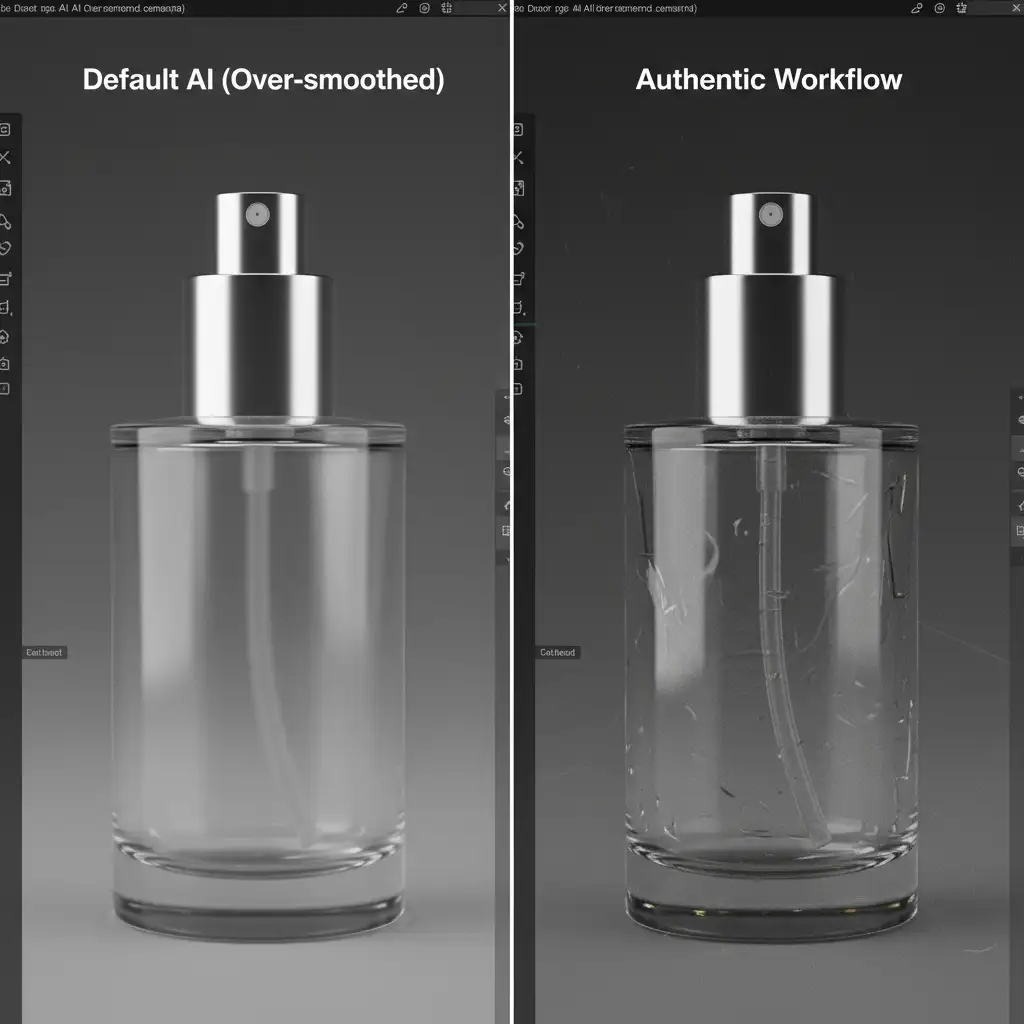
Over-polished, artificial product images are actively killing your e-commerce conversion rates. Modern buyers are highly sensitive to the “uncanny valley” effect; if a product looks artificially rendered rather than photographed, buyer trust vanishes instantly. While modern AI tools like Photoshop v25.x Generative Fill are incredible for speeding up tedious tasks like extending backgrounds or removing complex reflections, their diffusion models inherently over-smooth surfaces. They strip away the native noise floor, specular highlights, and vital micro-textures that make a product look real.
To maintain buyer confidence without sacrificing speed, you need an authentic AI product retouching workflow. Here is exactly how to leverage AI for efficiency while keeping the realistic, tactile qualities of your original RAW file.
The Technical Flaw in Default AI Retouching
When you apply AI generative tools or built-in Neural Filters to a high-resolution e-commerce shot, the software replaces pixel data based on predictive diffusion models. The problem? AI does not understand the unique sensor grain of your specific camera or the physical properties of the material it is generating.
The result is a “plastic” aesthetic. The AI patches often lack the camera’s natural noise, making the edited zones stand out as completely sterile compared to the rest of the image. Fixing this requires a non-destructive workflow that forces AI to play nicely with traditional high-end retouching techniques.
3 Methods for an Authentic AI Product Retouching Workflow
Whether you need a rapid fix for a high-volume catalog or a meticulous deep-dive for a hero banner, these three methods will restore realism to your AI edits.
Method A: The Quick Fix Using Opacity Blending
If you are processing hundreds of SKUs and need a fast way to reduce the artificial look of an AI-generated background extension or surface cleanup, Opacity Blending is your first line of defense.
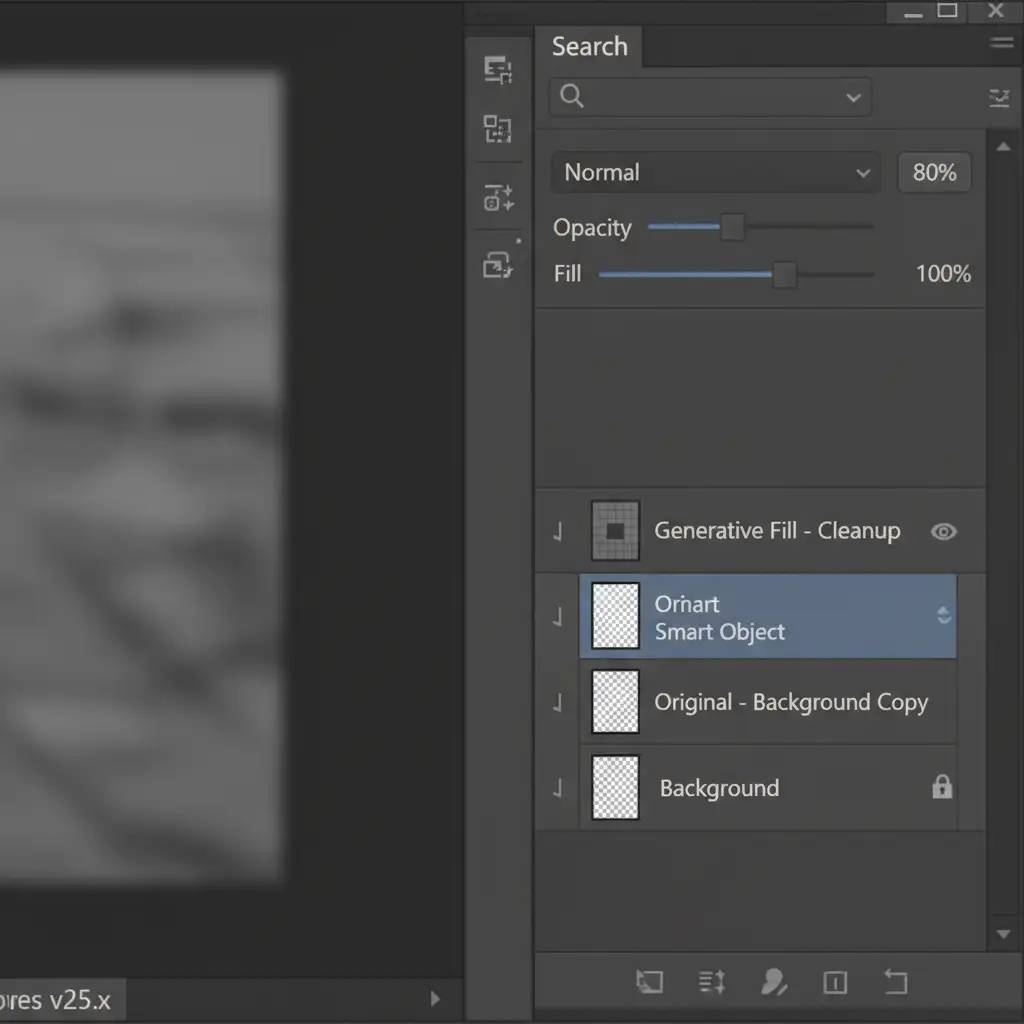
By default, Photoshop outputs Generative Fill results at 100% opacity, completely obliterating the underlying pixels. By simply reducing the AI-generated layer’s opacity to between 70% and 85%, you allow the original texture, native sensor grain, and minor, realistic imperfections from the base image to bleed through. This instantly grounds the AI patch in reality, reducing the sterile, rendered look.
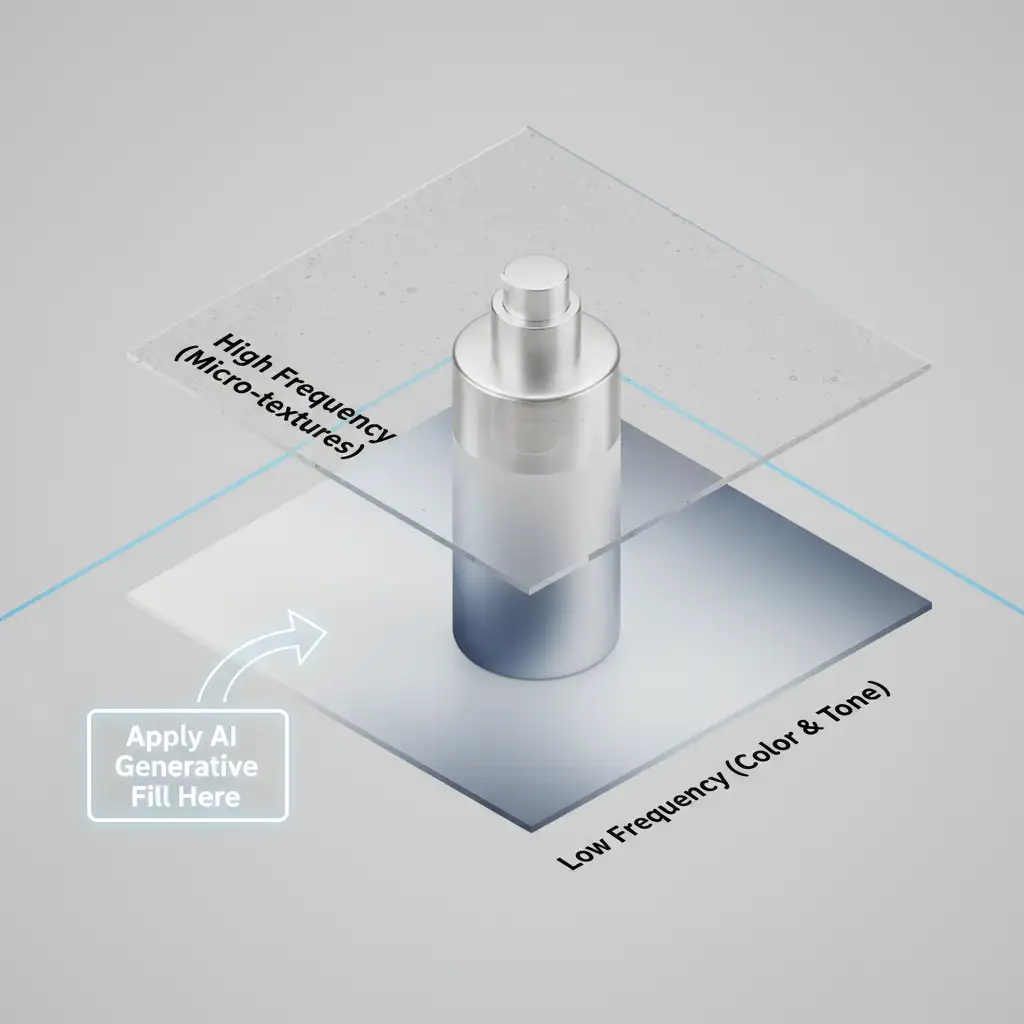
Method B: The Pro Workaround – Frequency Separation with AI
For high-end product photography—such as jewelry, leather goods, or electronics—opacity blending isn’t enough. You need absolute control over the micro-textures. This is where combining AI with Frequency Separation becomes the ultimate authentic AI product retouching workflow.
Frequency Separation divides your image data into two distinct layers: a High-frequency layer containing all the texture (pores, scratches, leather grain) and a Low-frequency layer containing the color, tone, and lighting gradients.
- Duplicate your base layer twice.
- Apply a Gaussian Blur to the lower duplicate (Low layer).
- Apply an Apply Image calculation (or High-pass filter workflow) to the upper duplicate (High layer) to extract the texture.
- The Secret: Apply your Generative Fill or Neural Filters only to the Low-frequency layer.
This allows you to fix harsh lighting gradients, color banding, or large structural blemishes using AI, while the original High-frequency texture layer remains perfectly intact on top.
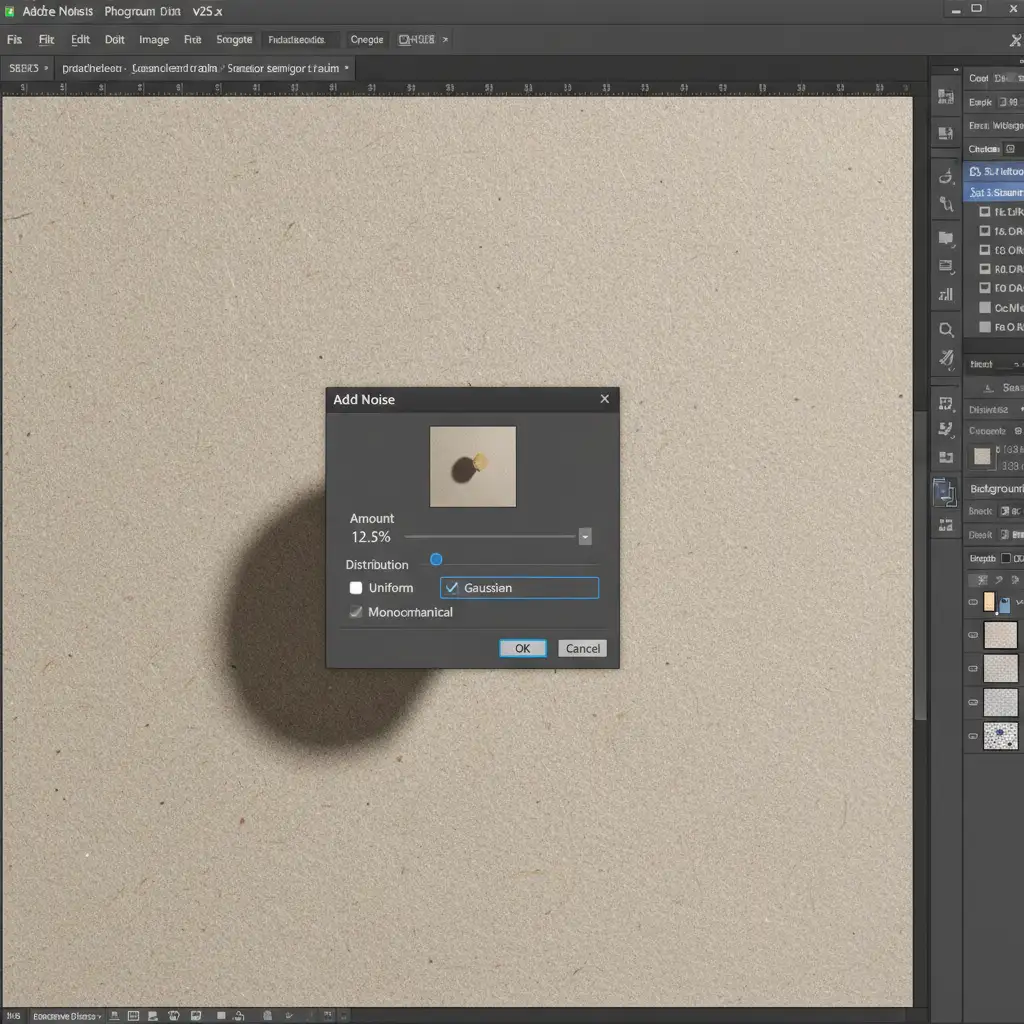
Method C: The Technical Deep-Dive – Noise Matching
Even with advanced RAW processing, AI patches generated over completely blank areas (like extending a seamless background) will lack the camera’s natural noise floor. A perfectly smooth AI background next to a product with natural sensor grain is an immediate giveaway that the image is manipulated.
To achieve true authenticity, you must manually generate and match the noise.
- Create a new blank layer above your AI edits.
- Fill the layer with 50% Gray (Edit > Fill > 50% Gray).
- Change the layer blending mode to Overlay or Soft Light.
- Navigate to Filter > Noise > Add Noise.
- Select Monochromatic and Gaussian distribution.
- Zoom in to 200% and carefully adjust the Amount slider until the artificial grain structure precisely matches the native noise floor of the original RAW file.
Scale Your E-Commerce Imagery Without Losing Authenticity
Balancing the incredible speed of AI with the high-end realism required to convert modern shoppers is a highly technical balancing act. If your internal team is struggling to implement an authentic AI product retouching workflow, or if you simply don’t have the time to manage complex layers, opacity blending, and noise matching at scale, let the experts handle it.
At Image Work India and Cloud Retouch, our professional retouchers specialize in hybrid workflows. We combine the rapid scalability of AI with meticulous, hand-crafted finishing techniques to deliver conversion-optimized product imagery that looks flawlessly real.
Stop letting the “uncanny valley” ruin your sales. Contact Image Work India and Cloud Retouch today to get authentic, high-converting product photos that build absolute buyer trust.


