You’ve just spent hours capturing the perfect overlapping dataset for a 3D model. But when you run the point cloud generation in RealityCapture or Agisoft Metashape, the result is a disaster. Floating artifacts, texture bleed, and messy background noise have fused directly into your 3D mesh. Sound familiar?
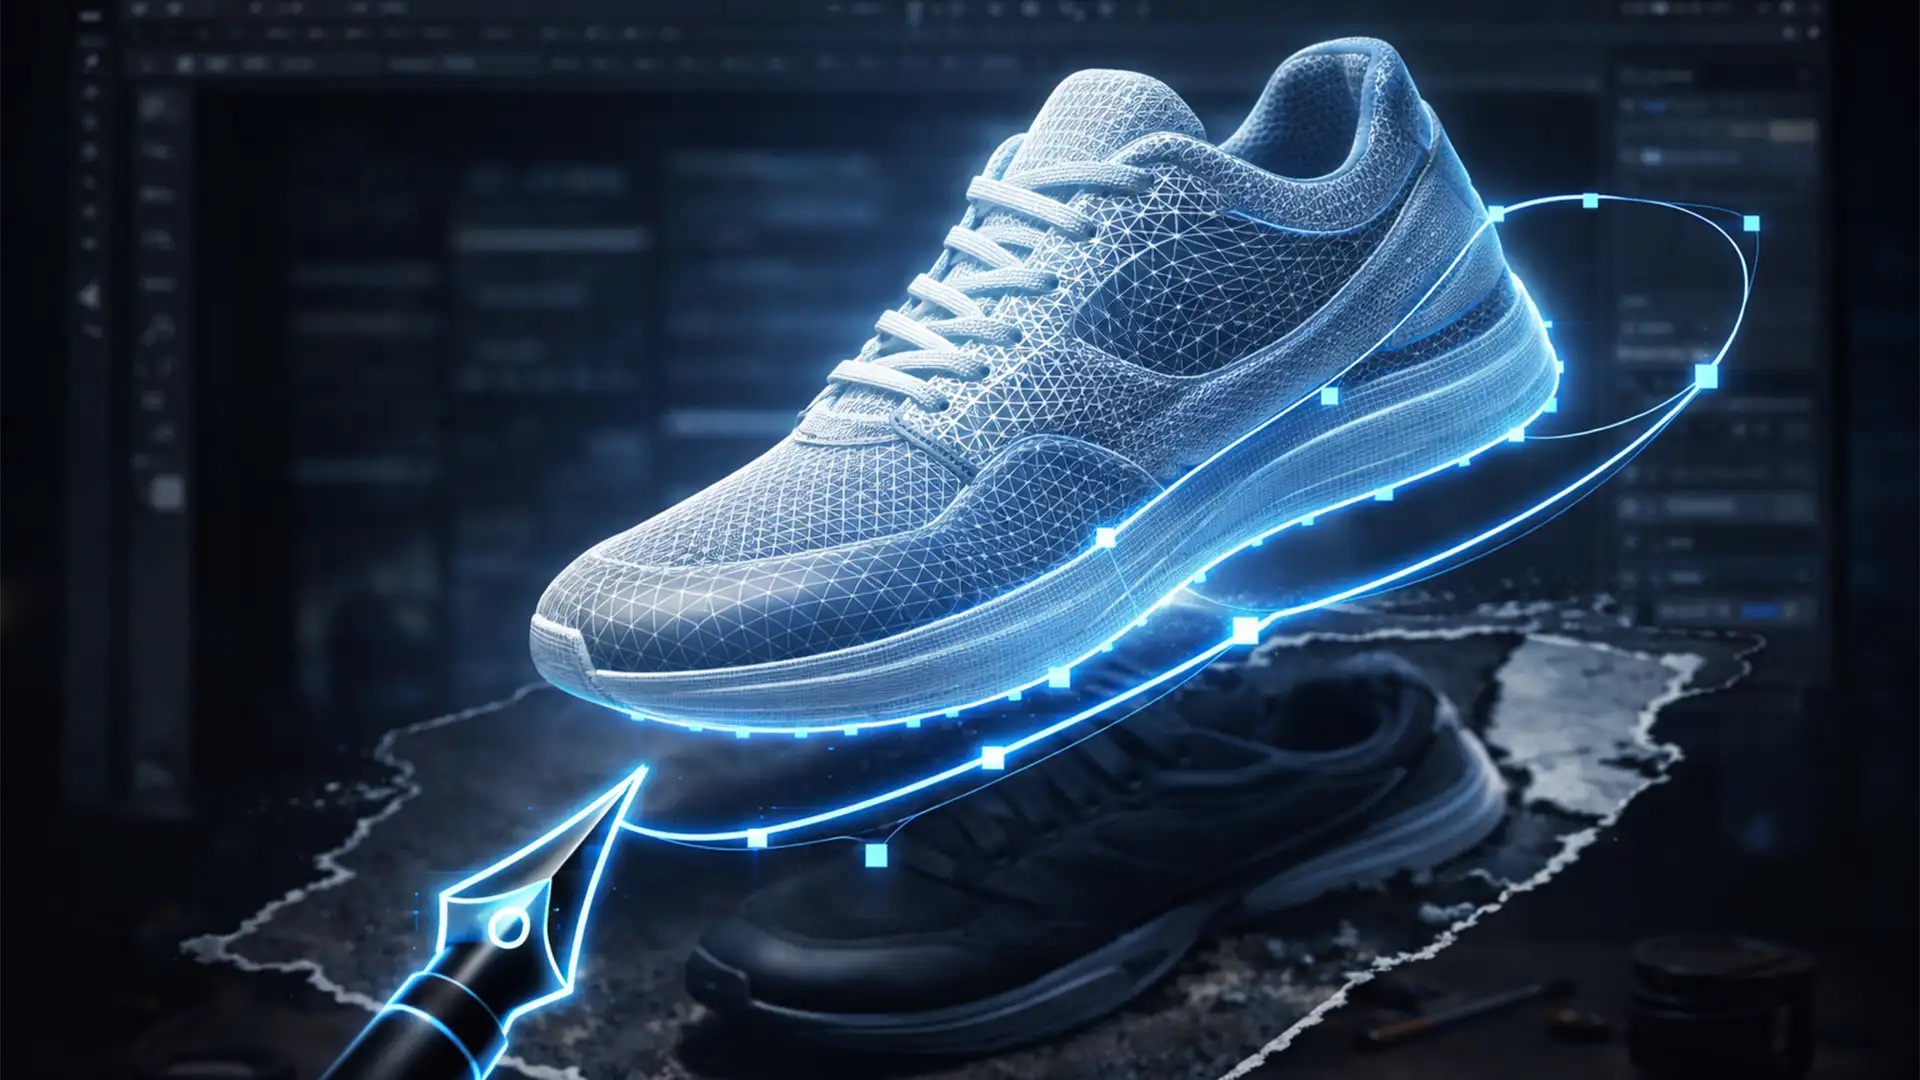
The culprit is rarely your camera setup. It’s the software misinterpreting shadows, background elements, or reflective surfaces as physical geometry. The ultimate fix isn’t endlessly tweaking your rendering settings-it’s applying a precise clipping path for 3D photogrammetry textures to your source 2D images before the rendering engine ever sees them.
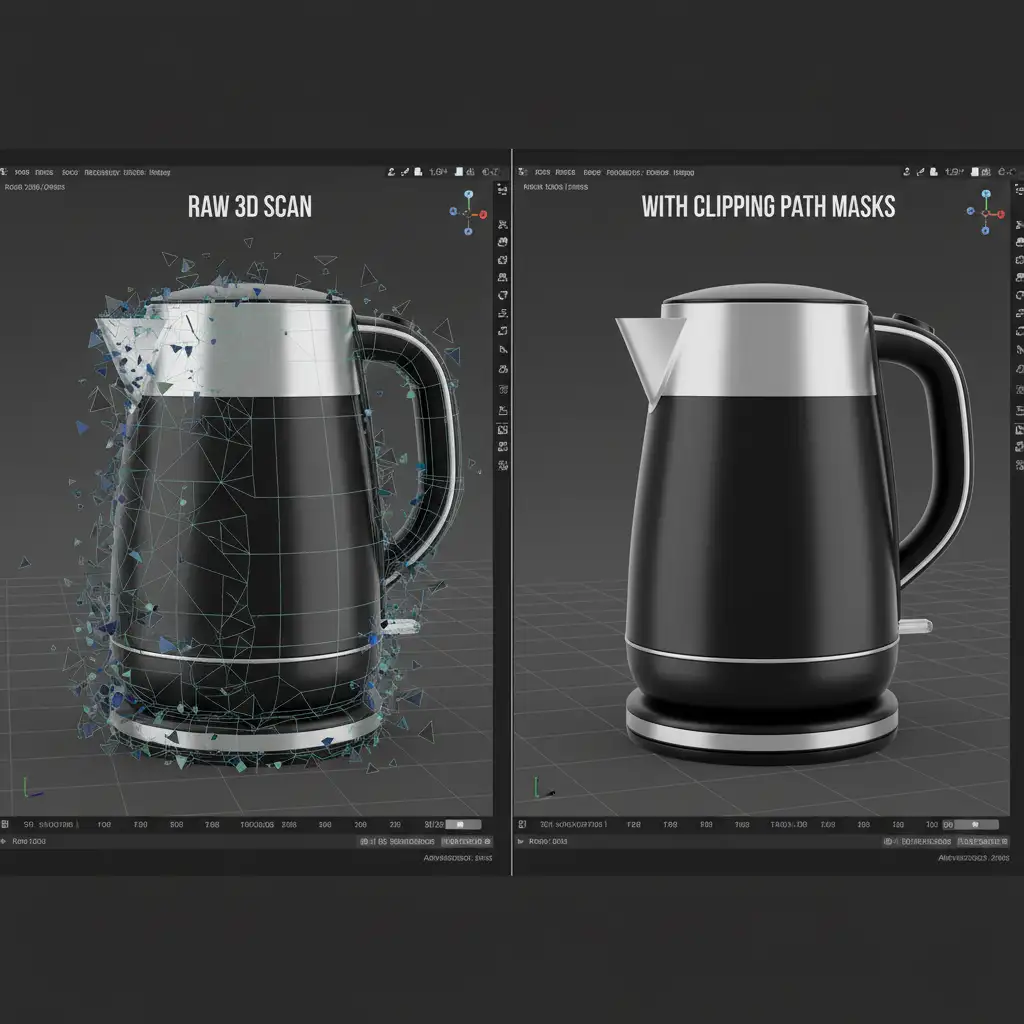
Here is exactly how to use vector paths and alpha masks to eliminate background noise and create flawless, lightweight AR models.
Why Photogrammetry Fails: The Problem with Background Noise
In 3D photogrammetry, software like RealityCapture v1.2, Agisoft Metashape v2.x, and Meshroom compile hundreds of overlapping 2D images to calculate depth and geometry.
However, these engines struggle with:
- Reflective Surfaces: Bouncing light tricks the software into thinking the background is part of the object.
- Harsh Shadows: Dark gradients are often calculated as solid geometry, leading to bloated polygon counts.
- Texture Bleed: Background colors wrap around the edges of your final texture map, ruining the realism of the AR model.
When the rendering engine processes this bad data during point cloud generation, it creates floating artifacts-random chunks of distorted mesh hovering around your primary subject.
How a Clipping Path for 3D Photogrammetry Textures Fixes the Mesh
To force the 3D rendering engine to process only the target object, you need to isolate the subject in every single source photo.
By drawing a hand-crafted vector path around the product and converting it into an alpha mask (strict black and white values), you tell the photogrammetry software exactly what data to ignore. The black areas of the mask become transparent, ensuring zero background data is calculated into the 3D mesh.
Step-by-Step Guide: Masking Photogrammetry Datasets
Depending on your dataset size and the complexity of your subject, there are three main ways to handle background isolation.
Method A: The Quick Fix (Built-in Software Masks)
If you shot your subject on a perfectly lit, high-contrast, solid background (like a green screen), you can attempt to use built-in tools.
- Open Agisoft Metashape v2.x.
- Navigate to the Mask by Background or Color Range feature.
- Select the background color to key it out.
The Catch: This method frequently fails on reflective edges or subjects with complex transparency, leaving you with jagged geometry.
Method B: The Pro Workaround (Photoshop Pen Tool & Alpha Masks)
For high-end AR models, you must rely on manual vector paths.
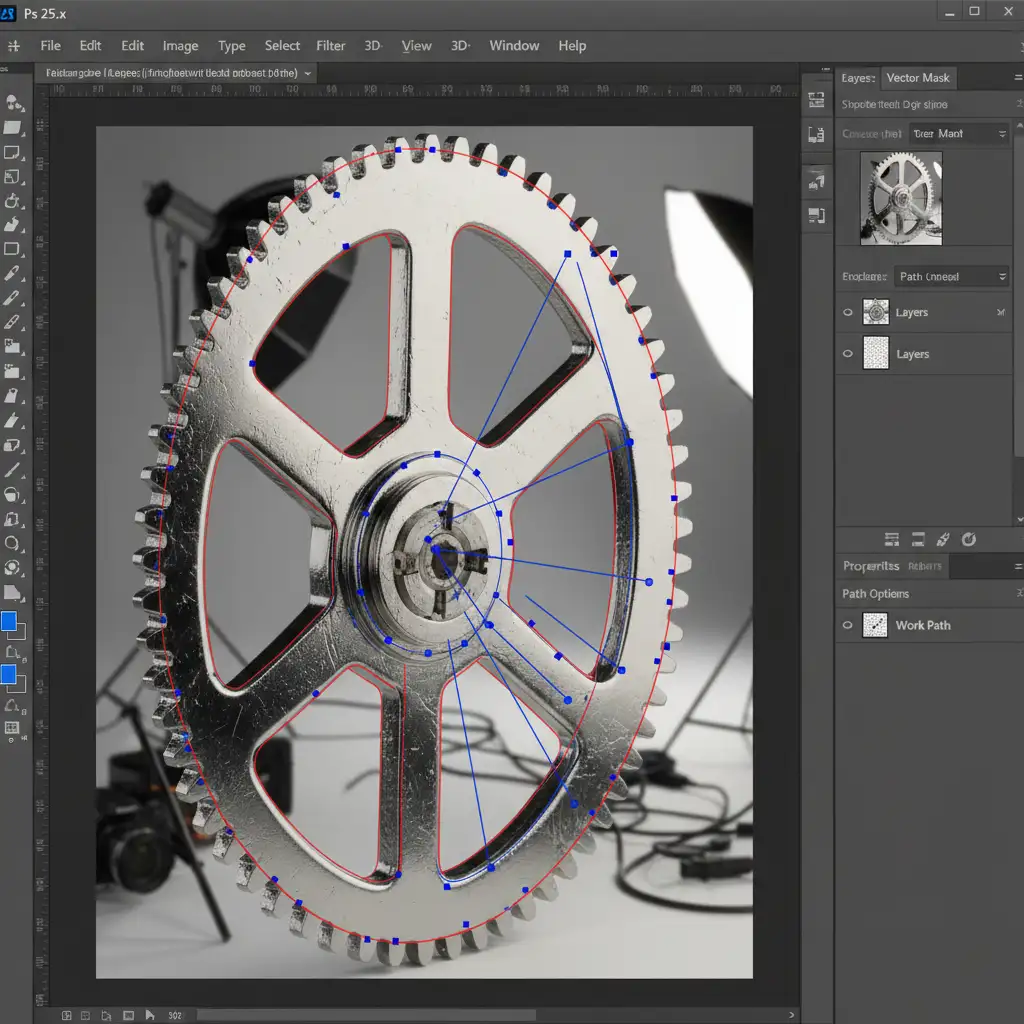
- Open your source images in Adobe Photoshop v25.x.
- Select the Pen Tool (P) and draw a precise vector path around the subject, cutting slightly inside the edge to avoid capturing background pixels.
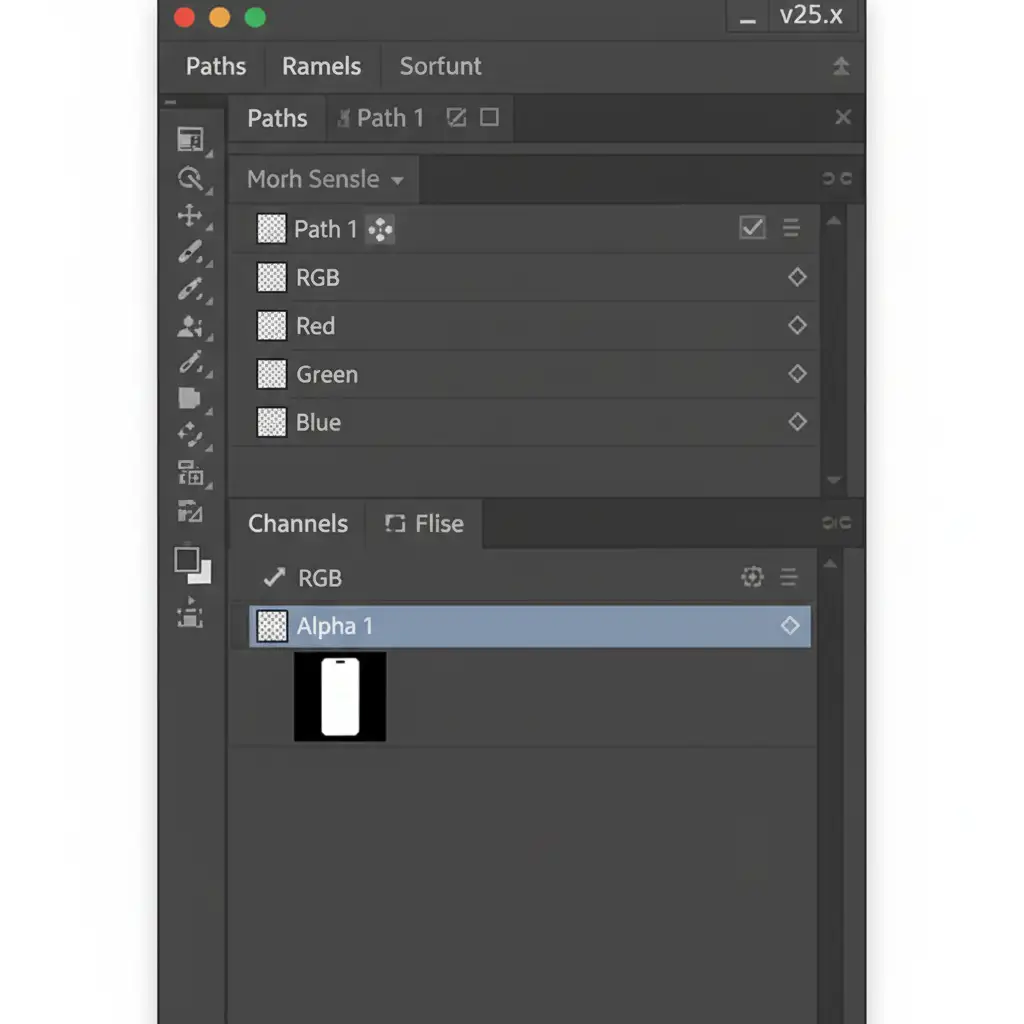
- Save the path in the Paths Panel.
- Ctrl-click (or Cmd-click) the saved path to make a selection.
- Switch to the Channels Panel and create a new Alpha Mask (the subject should be pure white, and the background pure black).
- Export the image as a PNG or TIFF with transparency enabled.
When imported into Meshroom or RealityCapture, the software will completely ignore the masked background data.
Method C: The Technical Deep-Dive (Batch Processing 100+ Images)
Photogrammetry datasets often contain hundreds of images. Manually exporting masks one by one is inefficient.
- Draw the Paths: Have a professional team draw the vector paths on all 100+ images and save the PSD files.
- Create a Photoshop Action: Record an action that loads the active path, fills the background with black and the subject with white, and flattens the image.
- Use Image Processor Pro: Run a batch script to apply this action across the entire folder of PSDs.
- Save to a Masks Directory: Output these files as high-res JPEGs or TIFFs into a designated “Masks” folder. Ensure the mask filenames are identical to the original source photos.
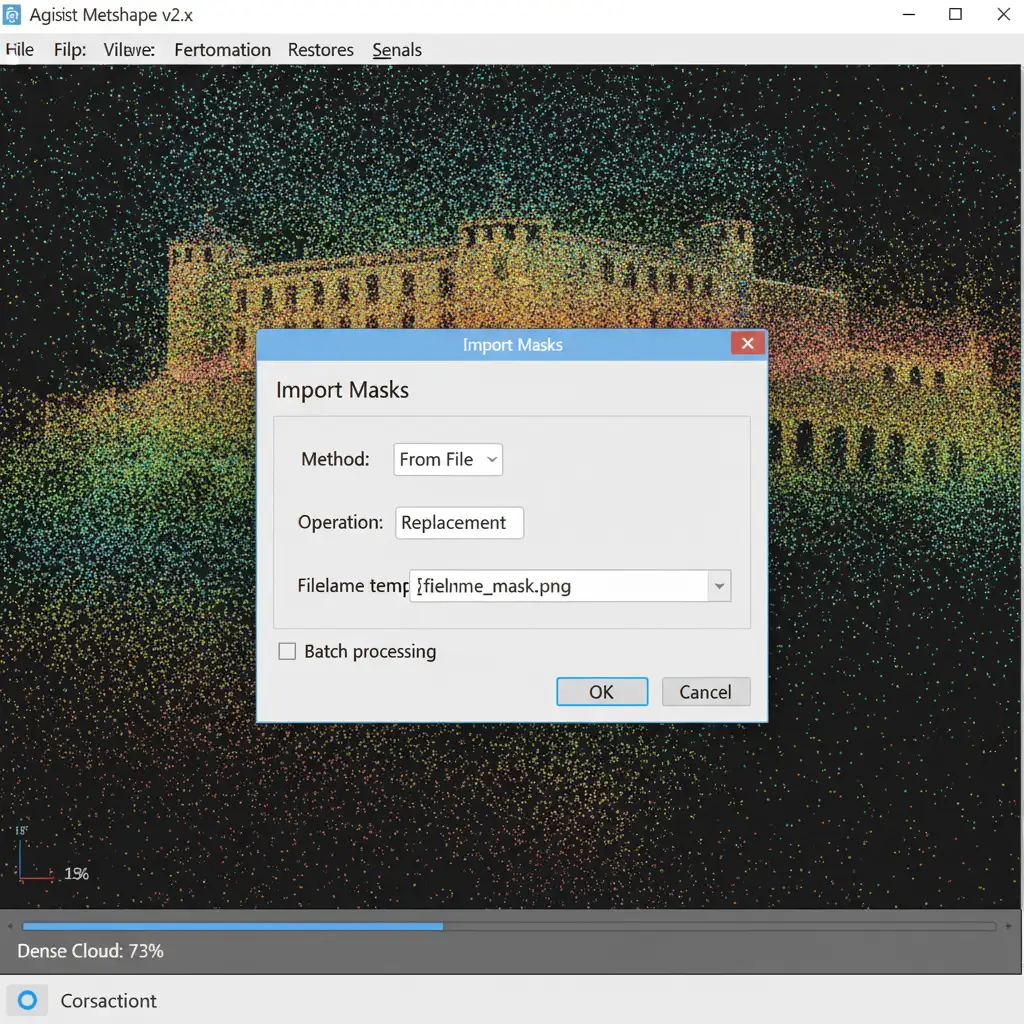
- Link in 3D Pipeline: In your 3D software, import the source photos, then use the “Import Masks” dialogue to link the folder. The software will automatically pair the alpha masks to the corresponding photos based on the filenames.
Why High-End AR Requires Hand-Drawn Vector Paths
Automated AI background removal tools might seem tempting, but they lack the sub-pixel accuracy required for professional 3D meshes. AI tools often blur edges or leave behind micro-pixels of background data. In a 3D pipeline, a single pixel of leftover shadow can extrude into a massive, jagged spike on your final 3D mesh.
A hand-drawn clipping path for 3D photogrammetry textures guarantees a hard, mathematical edge. This results in:
- Cleaner Geometry: Zero floating artifacts or jagged spikes.
- Optimized Texture Maps: No texture bleed, meaning your AR model looks photorealistic from every angle.
- Faster Rendering: The software doesn’t waste CPU power calculating background noise.
Scale Your 3D Pipeline with Image Work India and Cloud Retouch
Creating a clipping path for 3D photogrammetry textures is the undisputed secret to flawless AR models-but drawing precise vector paths for hundreds of overlapping photos is a massive bottleneck for any 3D artist.
You shouldn’t be spending your valuable time tracing edges in Photoshop.
Image Work India and Cloud Retouch specialize in enterprise-grade photo editing for 3D pipelines. We provide hand-drawn, pixel-perfect vector paths and pre-formatted alpha masks for massive photogrammetry datasets. Whether you are scanning 50 products or 5,000, our expert retouchers will deliver perfectly masked source files so you can skip the clean-up and go straight to rendering.
Stop fighting with floating artifacts. Contact Image Work India and Cloud Retouch today for a free trial, and let us optimize your AR pipeline.


