You have thousands of flat PNGs and JPEGs sitting in your catalog, perfectly edited, but completely static. As retail shifts heavily toward spatial commerce, the demand for interactive AR try-ons and 360-degree views is making standard imagery obsolete. The critical bottleneck? Extracting volume, depth, and physical material properties from a flat 2D image. Converting a 2D ghost mannequin to 3D product visualization requires more than a simple software export—it requires rebuilding the garment from the ground up to handle missing back-side data and flat, baked-in lighting.
If you are trying to migrate your existing catalog into Blender v4.0, CLO 3D, or Marvelous Designer, this guide breaks down the exact technical workflows to bridge the gap between flat pixels and interactive polygons.
The Spatial Commerce Bottleneck: Why 2D Isn’t Enough
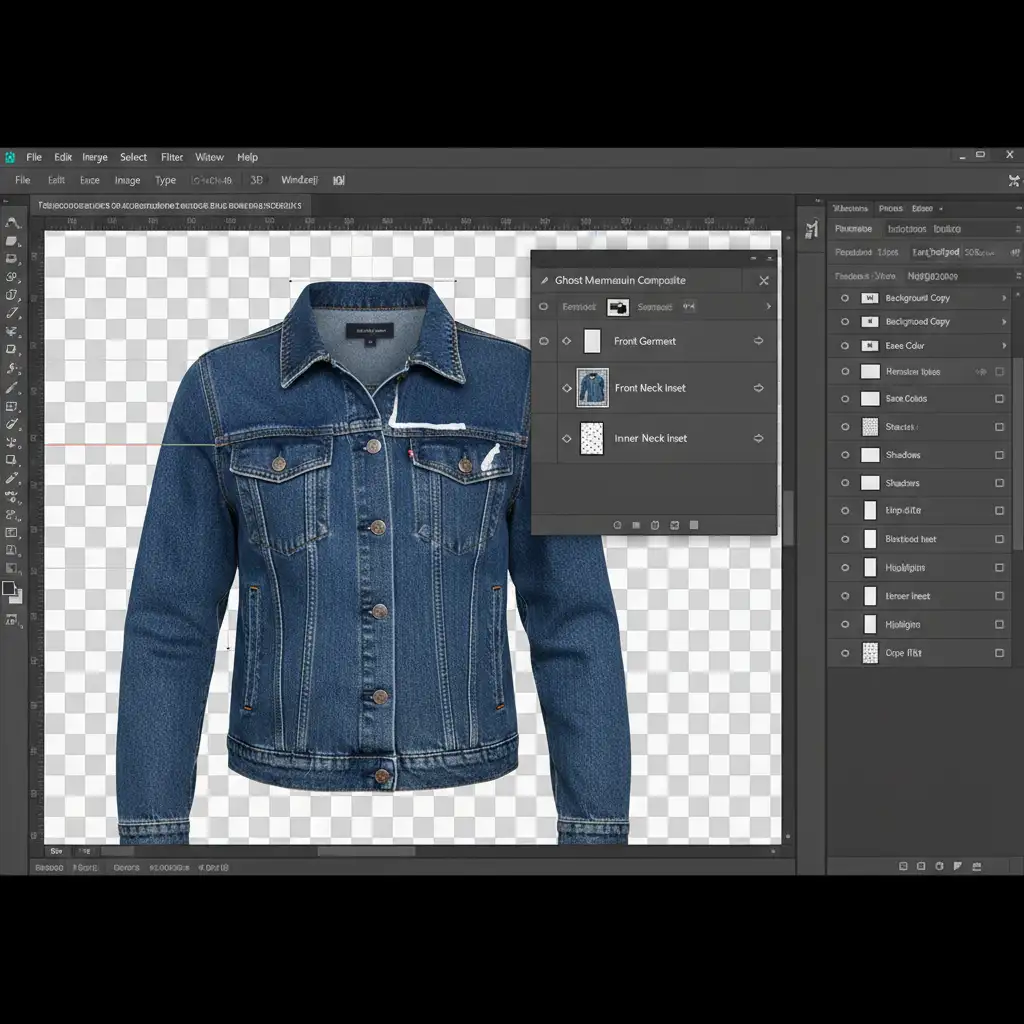
Traditional ghost mannequin photography is created by compositing multiple images in Adobe Photoshop to create an invisible body effect. While excellent for standard web catalogs, these flat images lack the spatial data required for ARCore and ARKit.
The primary technical hurdles when moving to 3D include:
- Missing Back-Side Data: A standard front-facing ghost mannequin shot provides zero data about the rear of the garment.
- Baked Lighting: Shadows and highlights are permanently baked into the 2D texture, which clashes with dynamic 3D lighting environments.
- Mesh Generation Limits: Creating optimized, low-poly meshes (under 100k polygons) suitable for WebGL without losing garment detail requires strict retopology.
To solve this, 3D artists rely on three distinct pipelines to salvage existing 2D catalog data and build spatial assets.
3 Workflows to Convert Ghost Mannequins into 3D Assets
Method A: The AI Generation Approach
If you have multi-angle ghost mannequin shots (front, back, sides), AI mesh generation offers a rapid starting point.
- Ingestion: Feed the multi-angle 2D shots into an AI topology tool like Luma AI or CSM.ai.
- Base Mesh Generation: The AI analyzes the silhouettes and generates a rough, high-poly 3D mesh.
- Cleanup: Import the raw OBJ file into Blender v4.0. Because AI-generated meshes often have messy geometry, you must perform manual retopology to reduce the polygon count below 100k, ensuring it is lightweight enough for web viewing.
Method B: The Projection Mapping Method
This is a professional workaround for teams who already have a library of generic 3D garment shapes but need to apply specific, high-resolution catalog textures to them.
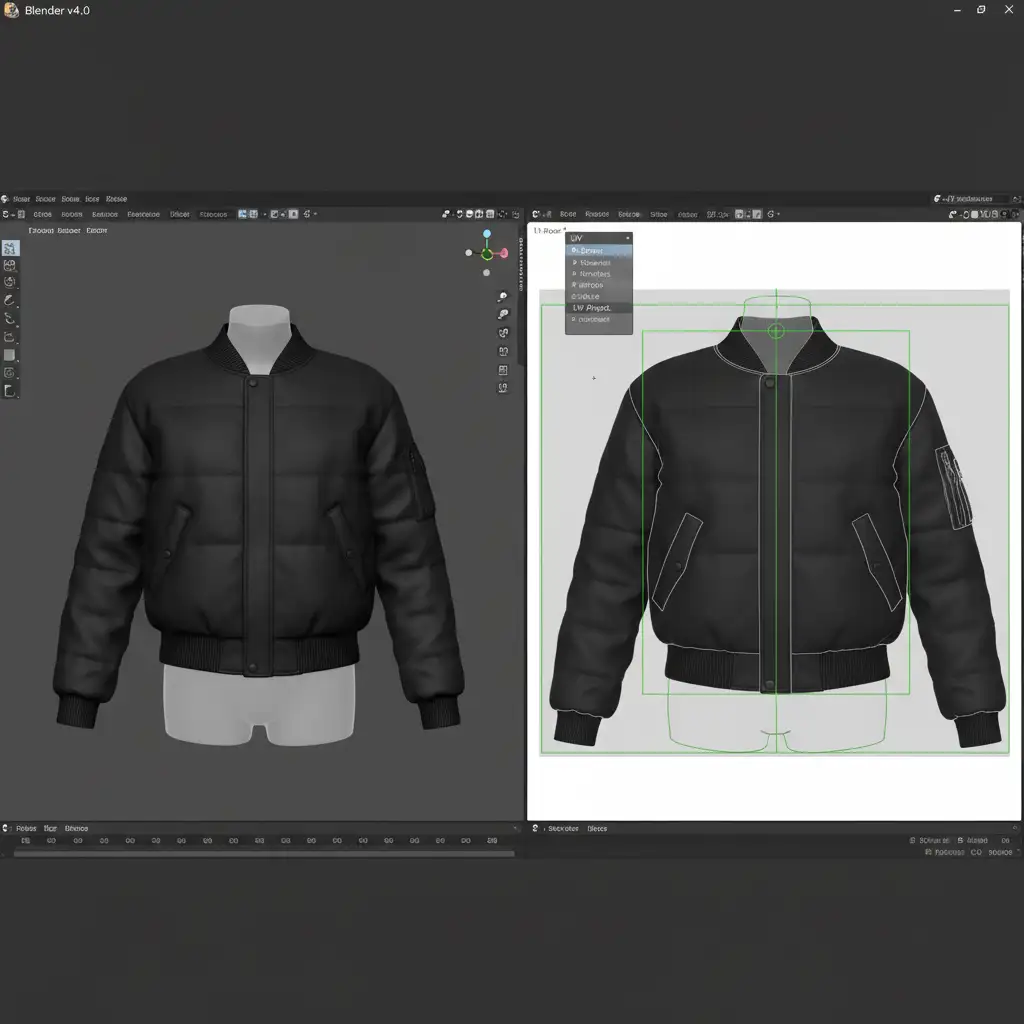
- Import Base Mesh: Load a pre-built base 3D garment mesh (like a generic t-shirt or hoodie) into Blender v4.0.
- UV Unwrapping: Carefully unwrap the UVs of the 3D model to match the proportions of your flat photography.
- Texture Projection: Use Blender’s Projection Mapping tools to project your high-resolution 2D ghost mannequin photography directly onto the 3D surface.
- Seam Painting: Because the projection only covers the front, you must manually clone and paint out the seams along the sides and back using Blender’s texture painting workspace.
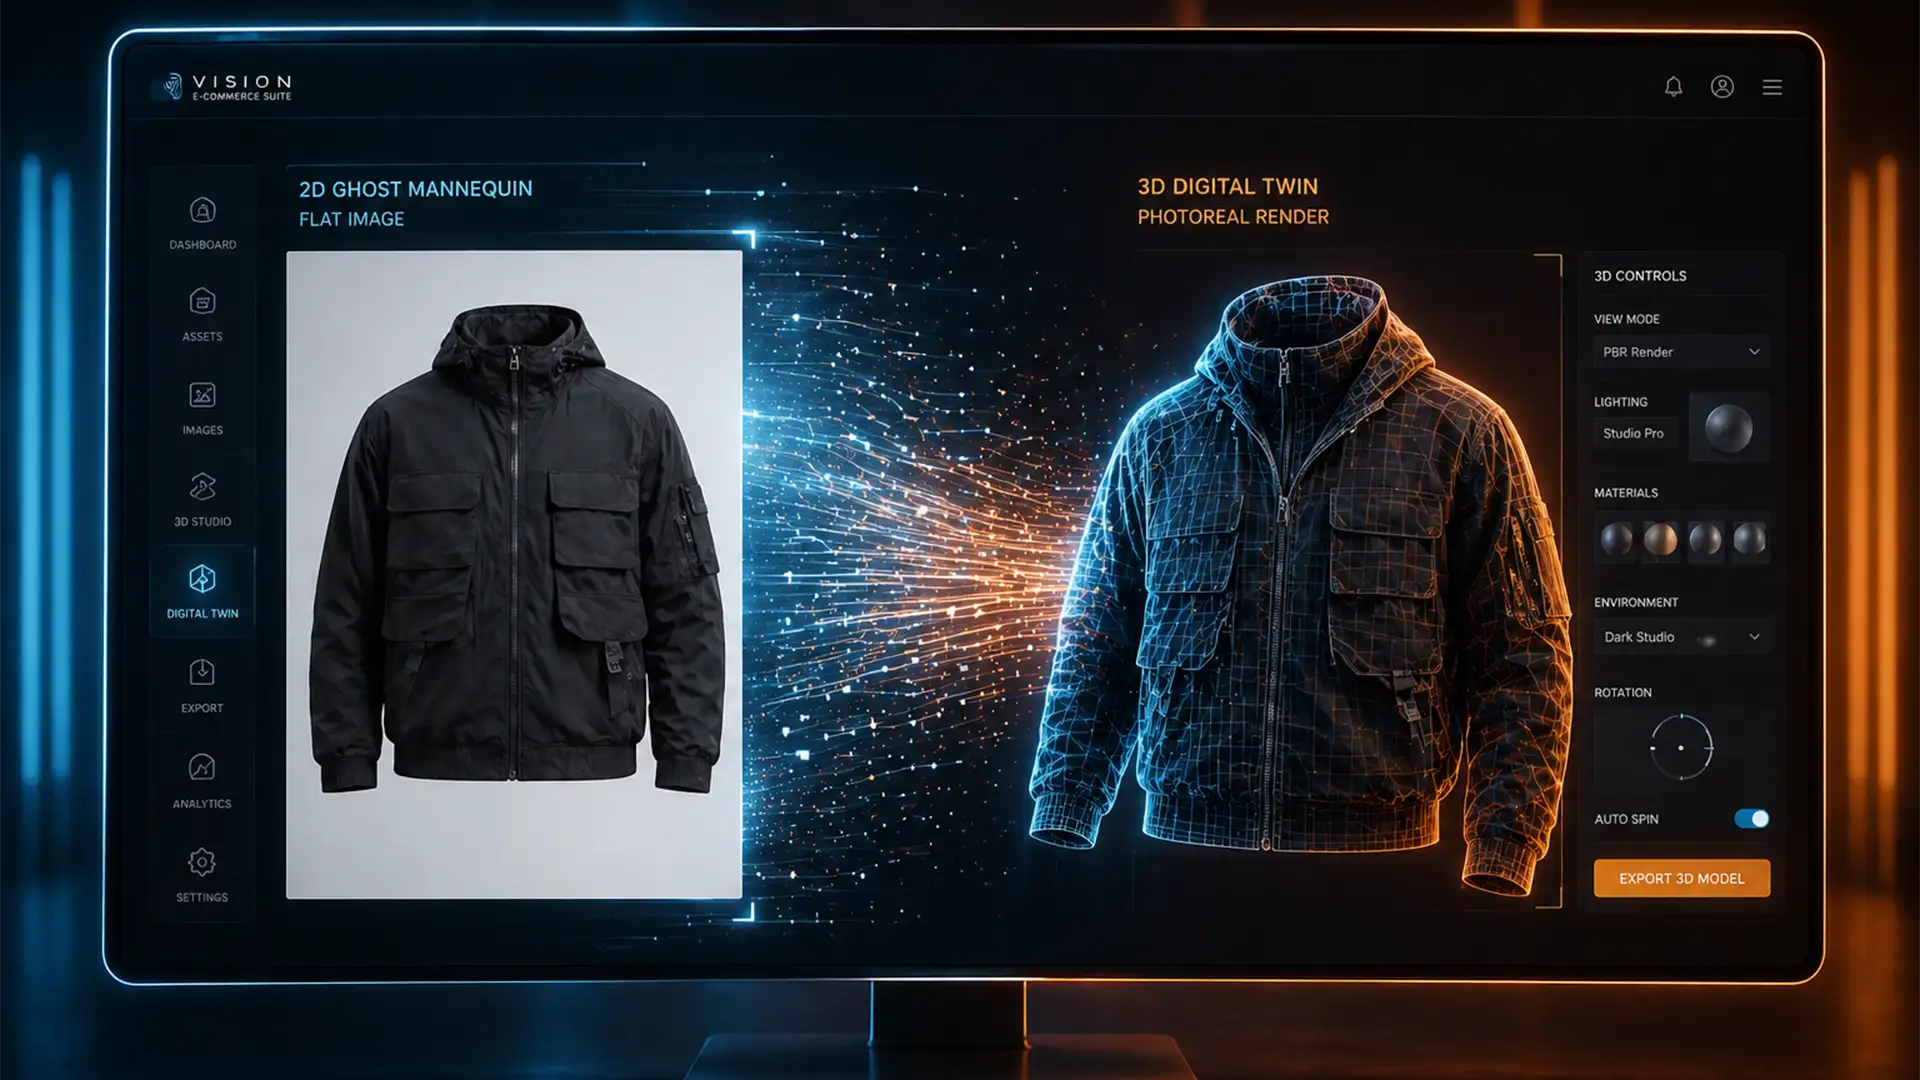
Method C: The Digital Twin Deep-Dive
For luxury brands requiring pixel-perfect physical accuracy, the Digital Twin method is the gold standard. Instead of faking the 3D geometry, you rebuild the garment exactly how it was sewn.
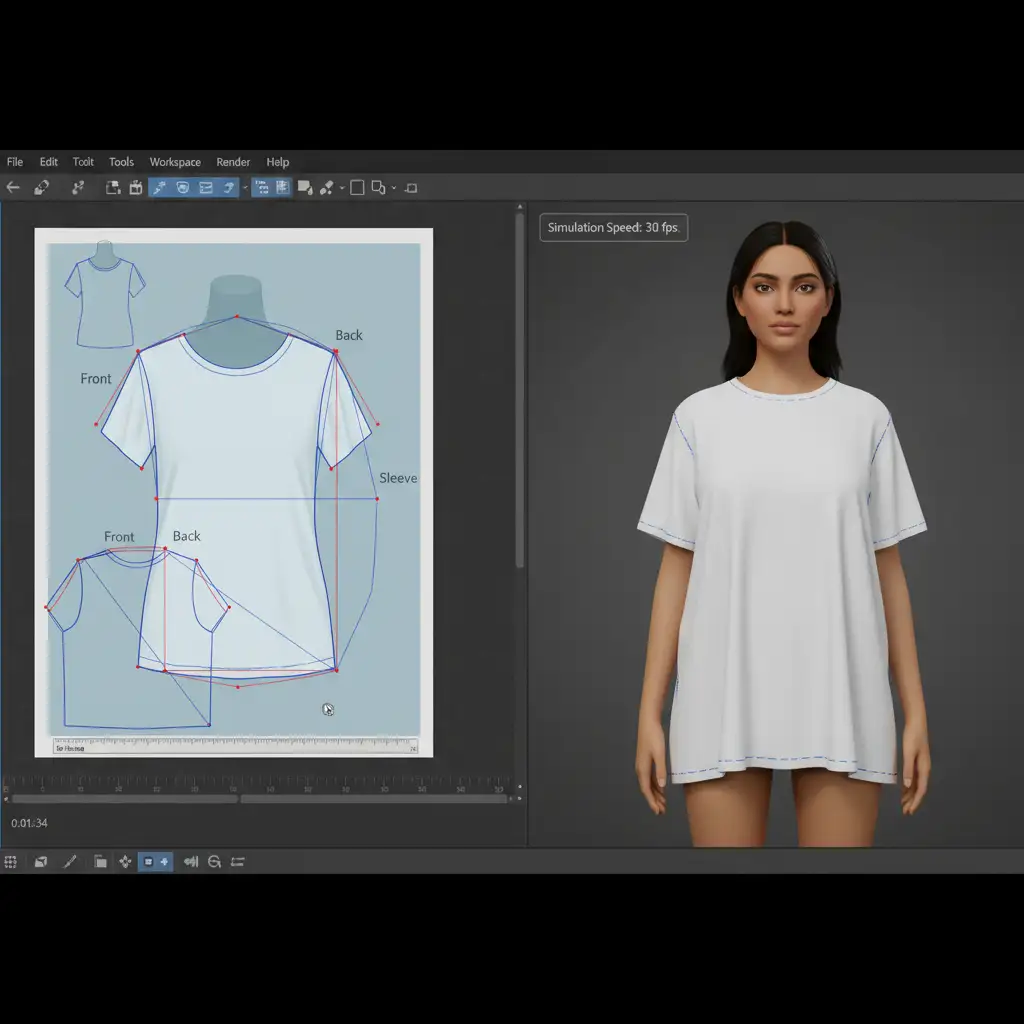
- Tracing Patterns: Import your 2D ghost mannequin image into CLO 3D or Marvelous Designer as a reference plane. Trace the exact silhouettes to create digital sewing patterns.
- Simulation: Stitch the digital patterns together over a 3D avatar and simulate the physical drape, mimicking the exact folds seen in the original photograph.
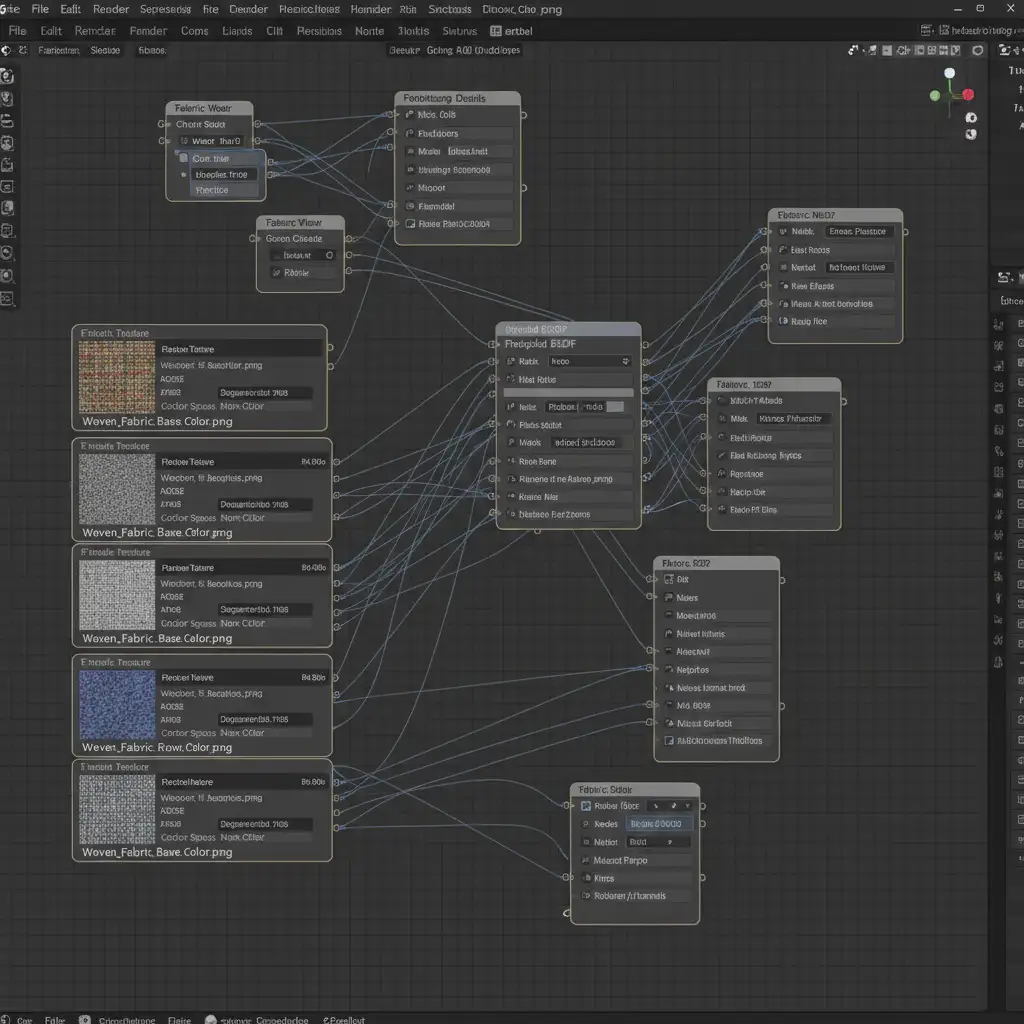
- Material Application: Export the mesh and use Adobe Substance 3D to apply accurate PBR Materials (Physically Based Rendering), separating the base color, roughness, and normal maps to react dynamically to light.
- Export: Package the final model into the glTF standard for Android/Web and the USDZ format for Apple’s AR ecosystem.
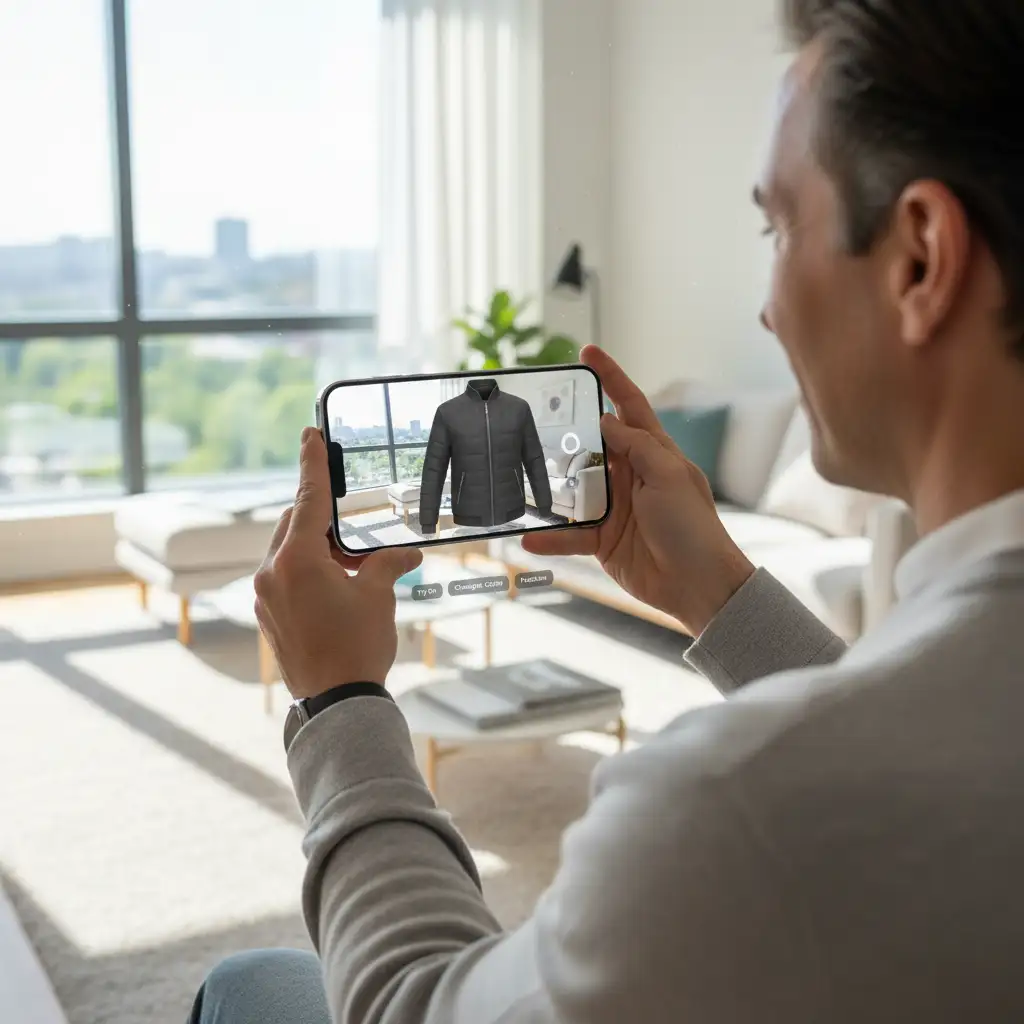
Optimizing for the AR Experience
The ultimate goal of this pipeline is to get your products into the customer’s physical space. Once your 3D models are built, textured, and compressed, they can be deployed via ARKit or ARCore directly on your e-commerce product pages. Customers can click an icon and instantly project a true-to-scale digital twin of your garment into their living room.
Scale Your Spatial Commerce Migration with Image Work India
Transitioning a single 2D ghost mannequin to 3D product visualization takes hours of skilled retopology, UV unwrapping, and material node configuration. Converting an entire catalog of thousands of SKUs is an incredibly resource-intensive bottleneck that can stall your spatial commerce roadmap.
You don’t have to build this pipeline from scratch. Image Work India and Cloud Retouch specialize in high-volume, pixel-perfect 2D to 3D conversions. Our team of expert 3D artists utilizes advanced digital twin workflows, CLO 3D modeling, and strict WebGL optimization to turn your static ghost mannequin imagery into interactive, AR-ready USDZ and glTF assets.
Ready to future-proof your catalog? Contact Image Work India and Cloud Retouch today to scale your 3D migration with precision, speed, and affordability.


