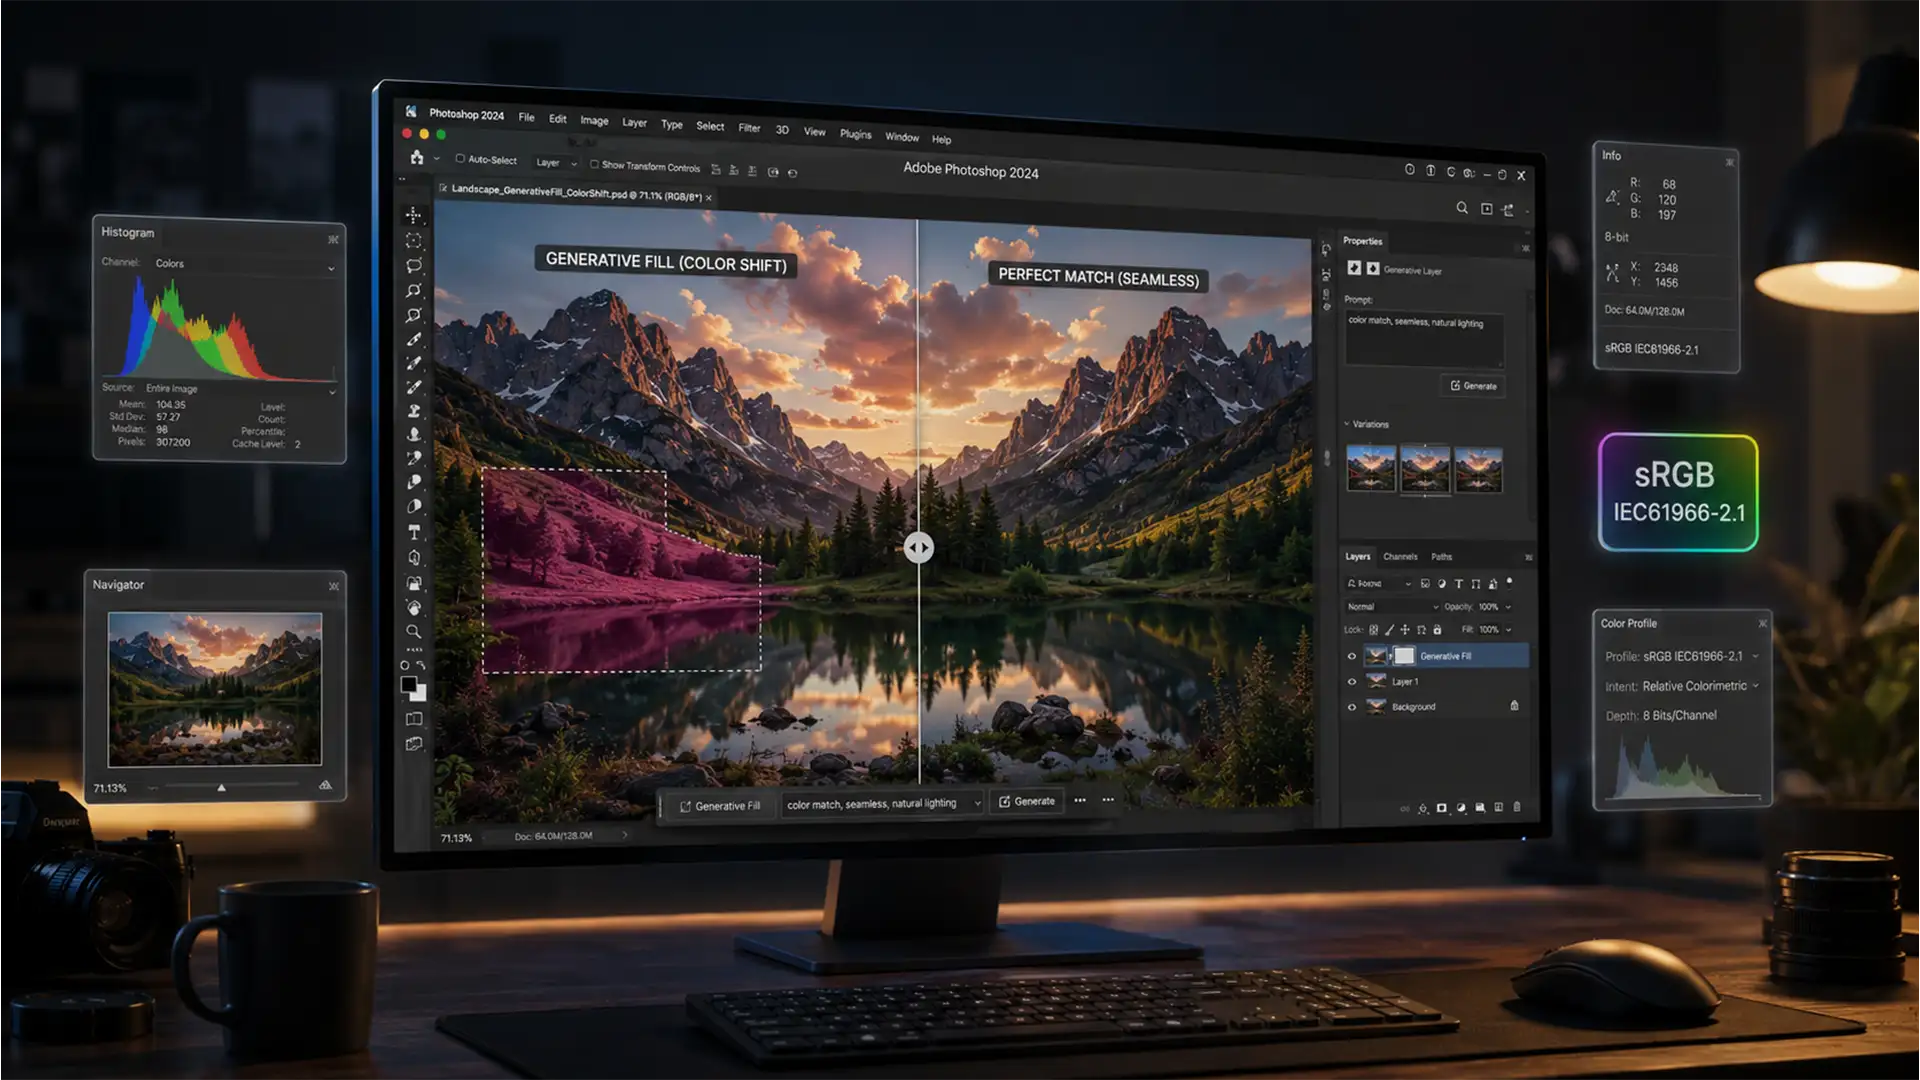
You have just spent hours perfecting a complex composition, only to hit “Generate” and watch Adobe Firefly spit out a washed-out, color-shifted patch that ruins the entire image. If you are struggling to fix Photoshop Generative Fill color shift issues, you are not alone. In the 2024 and 2025 releases (v25.0 through v26.x), users frequently report severe desaturation or noticeable yellow and magenta tints along the generation seams.
This is not a random glitch; it is a fundamental color management conflict between your local workspace and the cloud. Here is the exact technical breakdown of why this happens and how to fix it permanently.
Why Does Generative Fill Change Colors?
The technical root of this problem lies in Adobe Firefly Cloud Processing.
Whenever you use Generative Fill, Photoshop sends your prompt and the surrounding pixels to Adobe’s cloud servers. Currently, Firefly processes all generation requests exclusively in the sRGB color space.
If your working document utilizes a wider gamut—such as Adobe RGB, ProPhoto RGB, CMYK, or an uncalibrated custom monitor profile—the cloud still returns the generated pixels with sRGB values. Photoshop’s local color management engine struggles to map these returned sRGB pixels back into your wide-gamut document flawlessly without user intervention. The result is a glaring color mismatch at the seams of the generated area.
Here are the three proven methods to resolve this issue and restore color accuracy.
Method 1: The Quick Fix (Color Profile Conversion)
If your final output is destined for the web or digital screens, the fastest way to eliminate color shifts is to match your local document to Adobe Firefly’s cloud processing space before you generate.
Step-by-Step Profile Conversion
- Open your document in Photoshop.
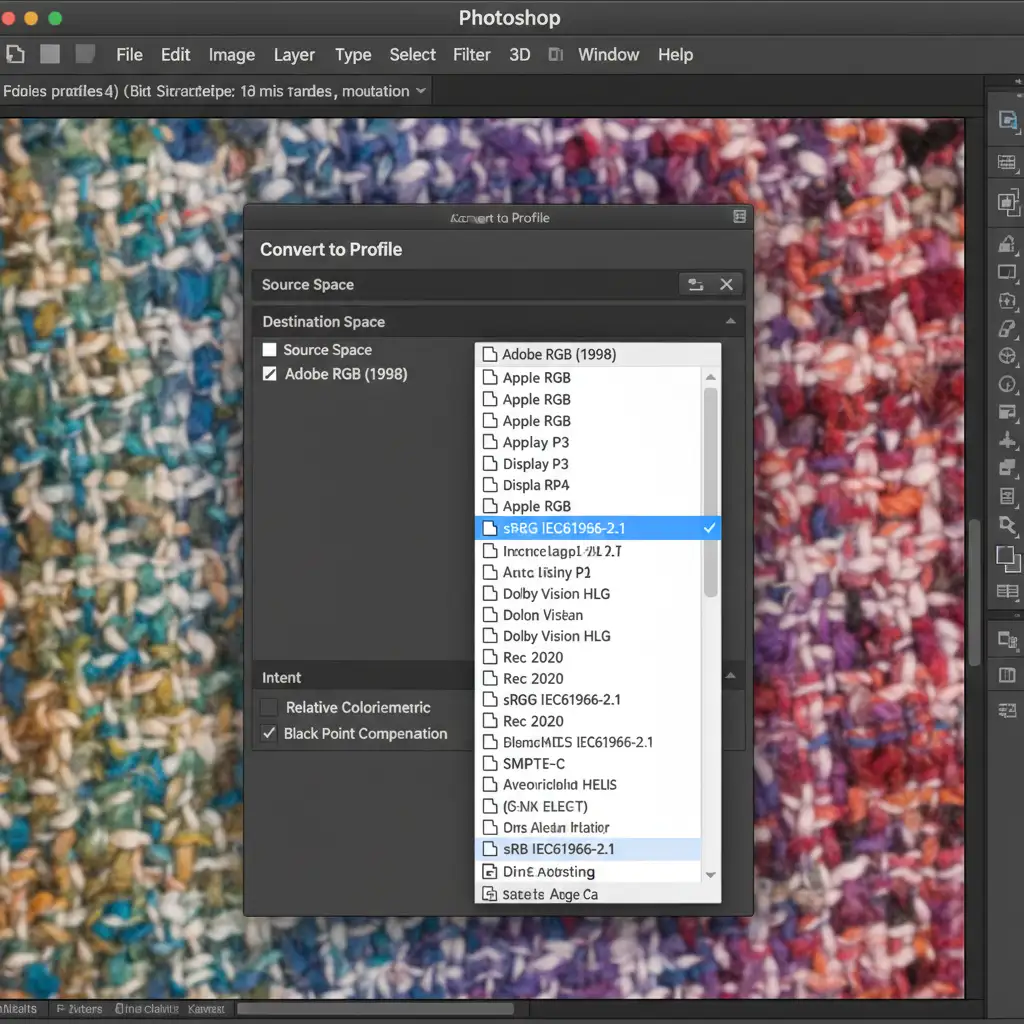
- Navigate to the top menu and select Edit > Convert to Profile.
- In the dialog box, look under Destination Space.
- Select sRGB IEC61966-2.1 from the dropdown menu.
- Click OK.
By forcing your document into sRGB, the pixels sent to the cloud and the pixels returned by Firefly will have a 1-to-1 color space match, completely eliminating the color shift.
Method 2: The Pro Workaround (Clipped Adjustment Layers)
Professional retouchers and print designers often cannot sacrifice their wide color gamut. If you must maintain your workflow in ProPhoto RGB or Adobe RGB, you cannot use Method 1. Instead, you must correct the generated pixels post-process using non-destructive editing techniques.
Applying a Clipping Mask for Color Correction
- Run your Generative Fill as you normally would, accepting the color-shifted result.
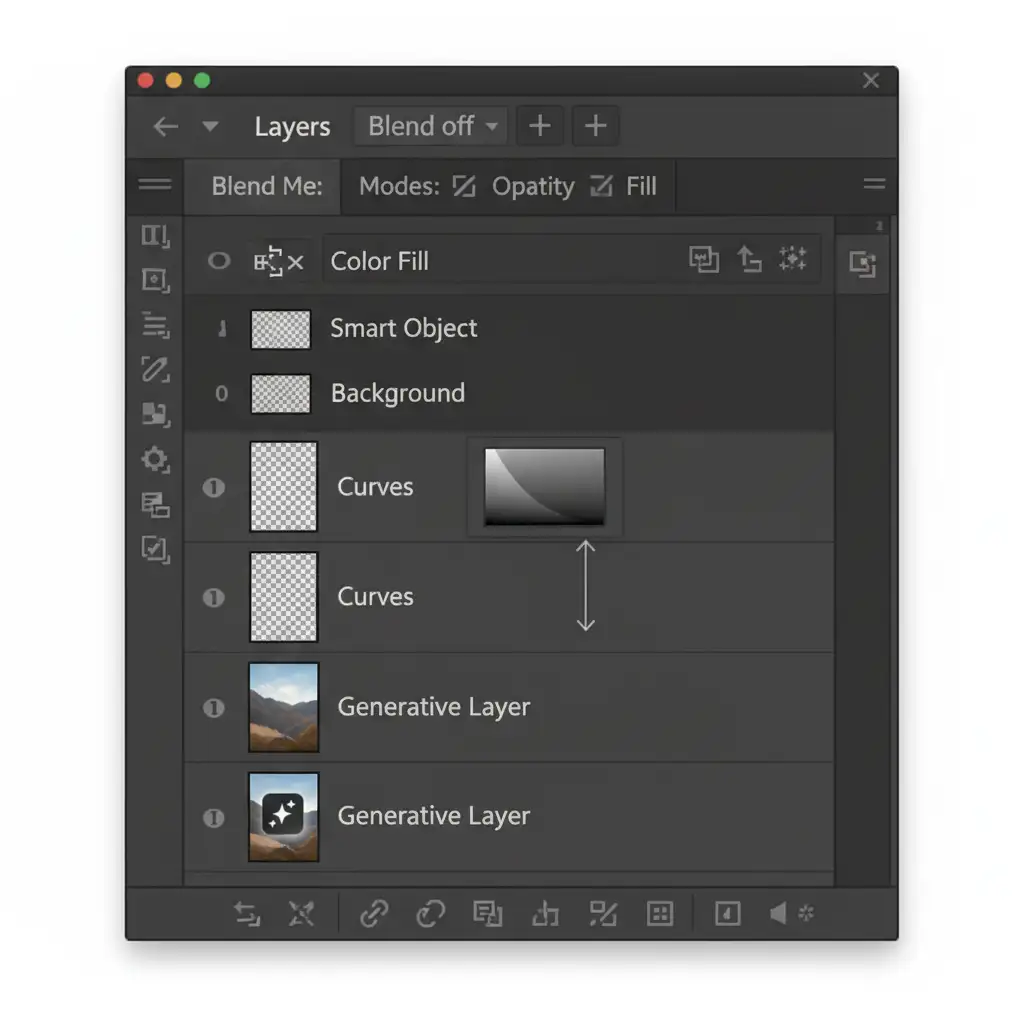
- In the Layers panel, select your new Generative Layer.
- Click the half-moon icon at the bottom of the Layers panel to create a new Adjustment Layer. Choose Curves or Color Balance.
- Hold Alt (Windows) or Option (Mac) and hover your cursor over the line between your new Adjustment Layer and the Generative Layer.
- When the cursor turns into a square with a downward arrow, click to create a Clipping Mask.
- Adjust your color channels (Red, Green, Blue) in the Curves panel until the generated patch seamlessly matches the original image.
Because the adjustment layer is clipped, your color corrections will only affect the AI-generated pixels, leaving your original high-resolution image untouched.
Method 3: The Technical Deep-Dive (System Settings)
If you are still experiencing dullness or tint issues even when working in sRGB, your local Photoshop cache or color policies may be misconfigured. Resetting these parameters ensures Photoshop accurately renders 16-bit color composites.
Optimizing Color Management Policies
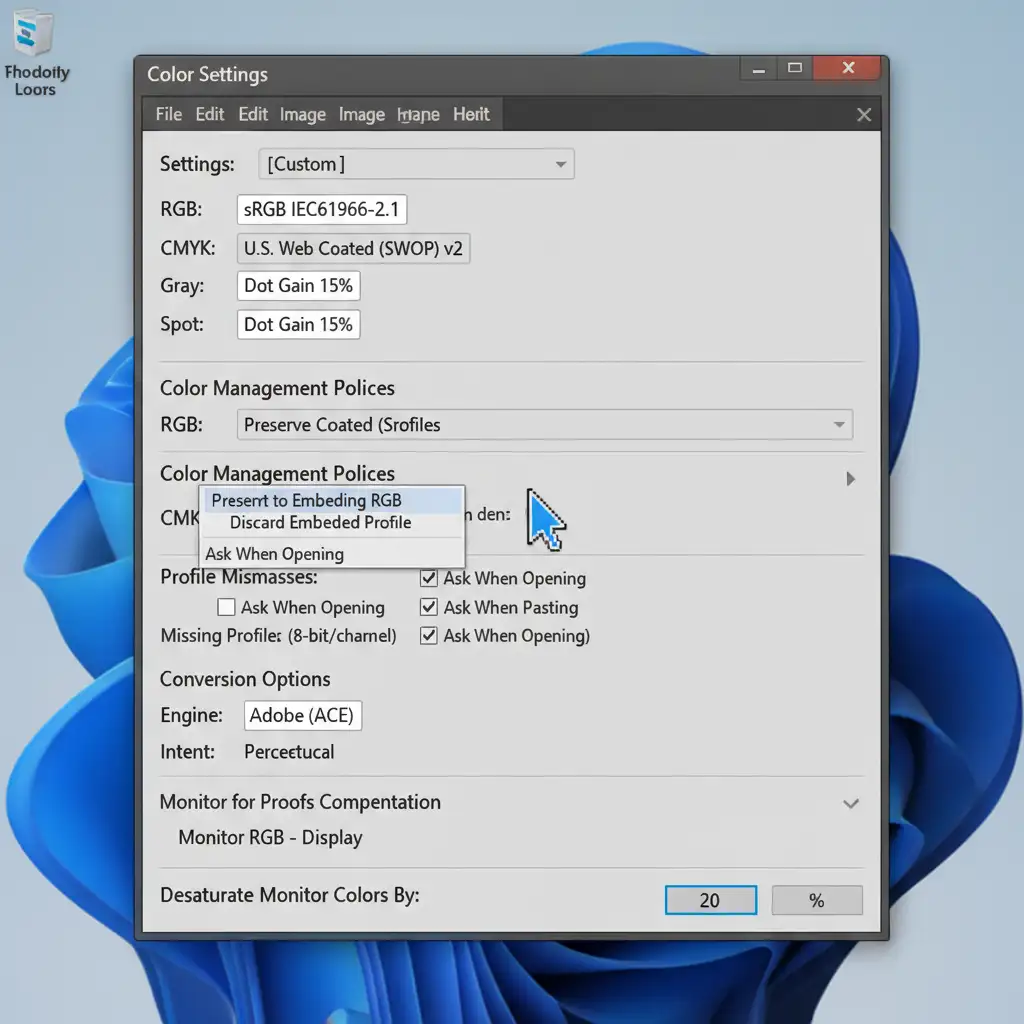
- Navigate to Edit > Color Settings.
- Under the Color Management Policies section, ensure RGB, CMYK, and Gray are all set to Preserve Embedded Profiles.
- In the same menu, click “More Options” and ensure Desaturate Monitor Colors by is unchecked.
- Click OK.
Clearing Cache and Enabling GPU Acceleration
Corrupted cache data can also cause visual rendering errors that look like color shifts.
- Go to Edit > Purge > All to clear old image data.
- Next, navigate to Edit > Preferences > Performance (or Photoshop > Settings > Performance on Mac).
- Ensure Use Graphics Processor is checked. GPU acceleration is required for Photoshop to accurately calculate and display complex AI-generated pixel blending on the canvas.
Stop Fighting AI Artifacts—Outsource the Heavy Lifting
Understanding how to fix Photoshop Generative Fill color shift issues is essential for modern post-production, but manually applying clipped adjustment layers to every AI generation is a massive drain on your time. When you are managing high-volume e-commerce shoots or high-end commercial campaigns, you need pixel-perfect color accuracy without the tedious troubleshooting.
That is where we come in.
At Image Work India and Cloud Retouch, our expert retouchers handle complex, wide-gamut post-production for global brands. We don’t rely on unpredictable AI to get the colors right; we deliver flawless, hand-finished image masking, color correction, and high-end retouching tailored to your exact specifications.
Stop wasting hours fixing AI color mismatches. Let our dedicated team handle your post-production pipeline so you can focus on scaling your business. Contact Image Work India and Cloud Retouch today to discuss your next project.


