
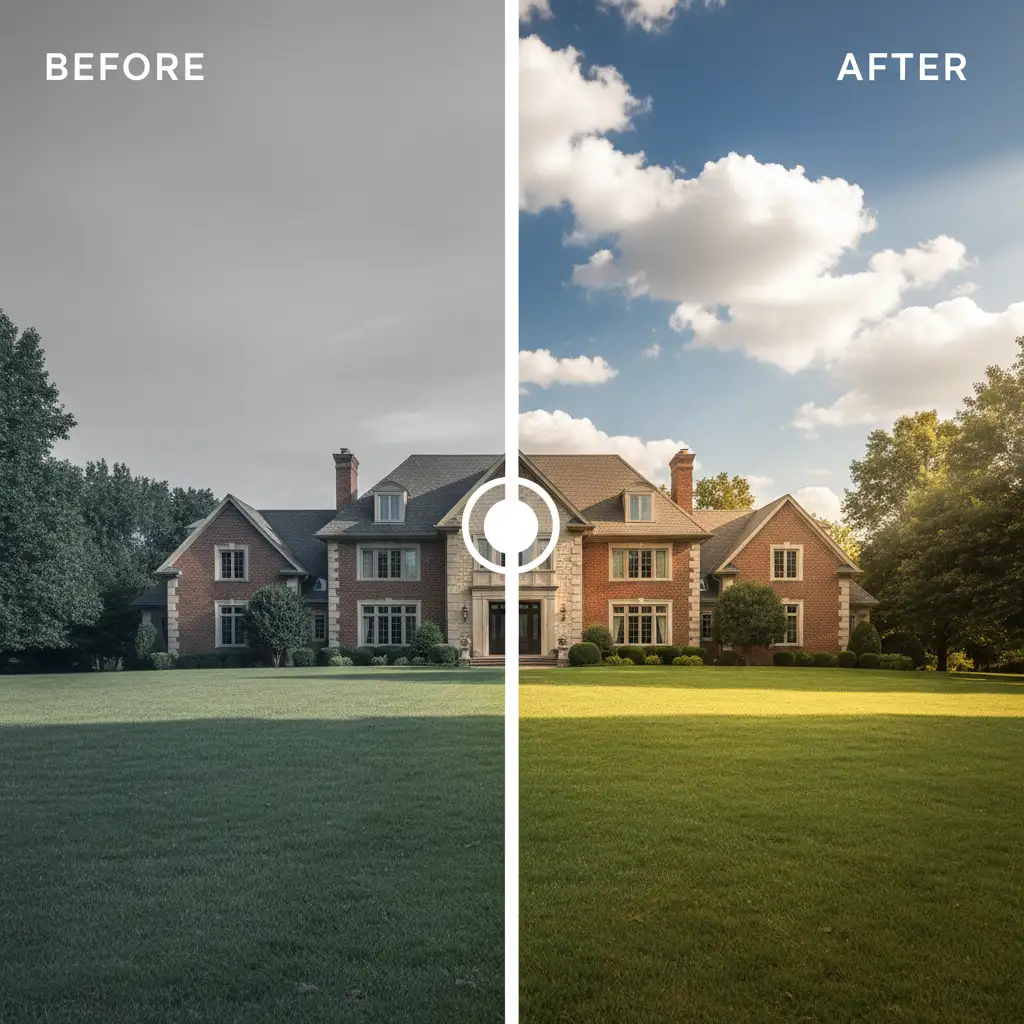
You just wrapped up a crucial real estate shoot, but the weather didn’t cooperate. The property is plagued by flat, overcast lighting and a heavy blue-gray color cast that makes the exterior look cold and uninviting. Your first instinct might be to use an AI sky replacement tool in Photoshop. Don’t do it. Modern automated sky replacements often create jarring, unnatural results because the environmental reflections and directional lighting on the property completely clash with the fake sunny sky. Instead of faking it, you need to master natural color correction for overcast real estate photos. Here is how to rescue low dynamic range shots and turn gloomy listings into high-end properties.
Why AI Sky Replacement Ruins Overcast Real Estate Photos
In overcast conditions, real estate photos suffer from low dynamic range. The diffused, cool light (typically sitting between 6500K and 7500K) flattens architectural textures and introduces an aggressive color cast.
When you use AI Sky Replacement features in Photoshop v24.x or v25.x, the software drops in a vibrant, directional sky. However, the property’s windows, roofline, and landscaping are still reflecting flat, omnidirectional gray light. The result is an optical illusion that immediately signals “fake” to potential buyers. The true technical challenge isn’t replacing the sky—it’s manually balancing localized exposure and neutralizing cool tones in the shadows without blowing out limited highlights or creating a crunchy, artificial HDR look.
Here are three methods to achieve flawless natural color correction.
Method 1: The Quick Fix (Camera Raw Adjustments)
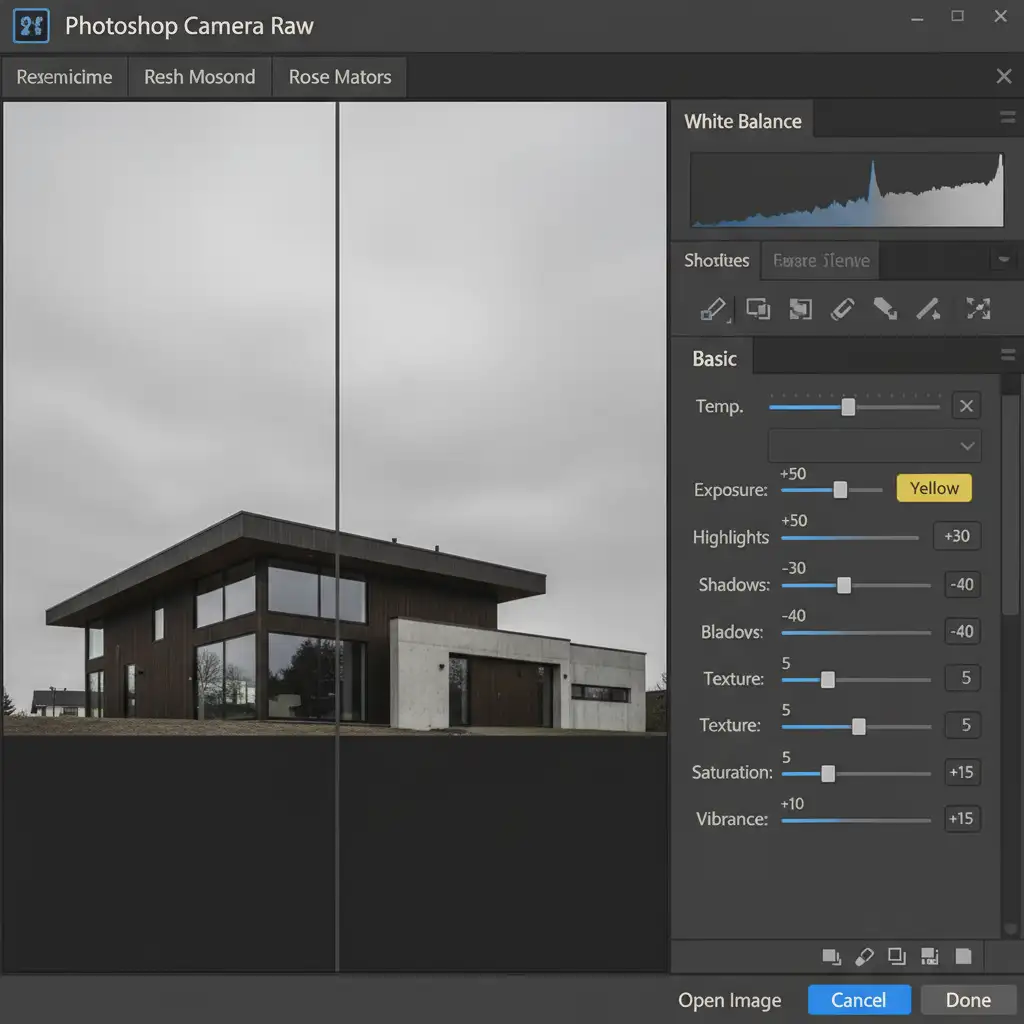
If you need a fast turnaround, Adobe Camera Raw (ACR) is your best starting point. The goal here is to kill the blue cast and restore a natural balance using your histogram as a guide.
Step-by-Step White Balance and Exposure
- Open your RAW or JPEG file in the Adobe Camera Raw Filter.
- Navigate to the Basic panel. Push the White Balance Temperature slider toward Yellow to neutralize the heavy blue cast.
- Increase the overall Exposure slightly to brighten the property.
- Drop the Highlights to recover the natural textures and details in the overcast clouds.
- Lift the Shadows to reveal details in the porch, eaves, and landscaping.
- Add +15 to the Vibrance slider. This boosts the natural colors of the grass and brickwork without oversaturating the entire image.
Method 2: The Pro Workaround (Selective Color & Curve Mapping)
For more precision, we move into Photoshop’s adjustment layers. This method uses selective color correction and curve mapping to warm up the property while protecting the shadows.
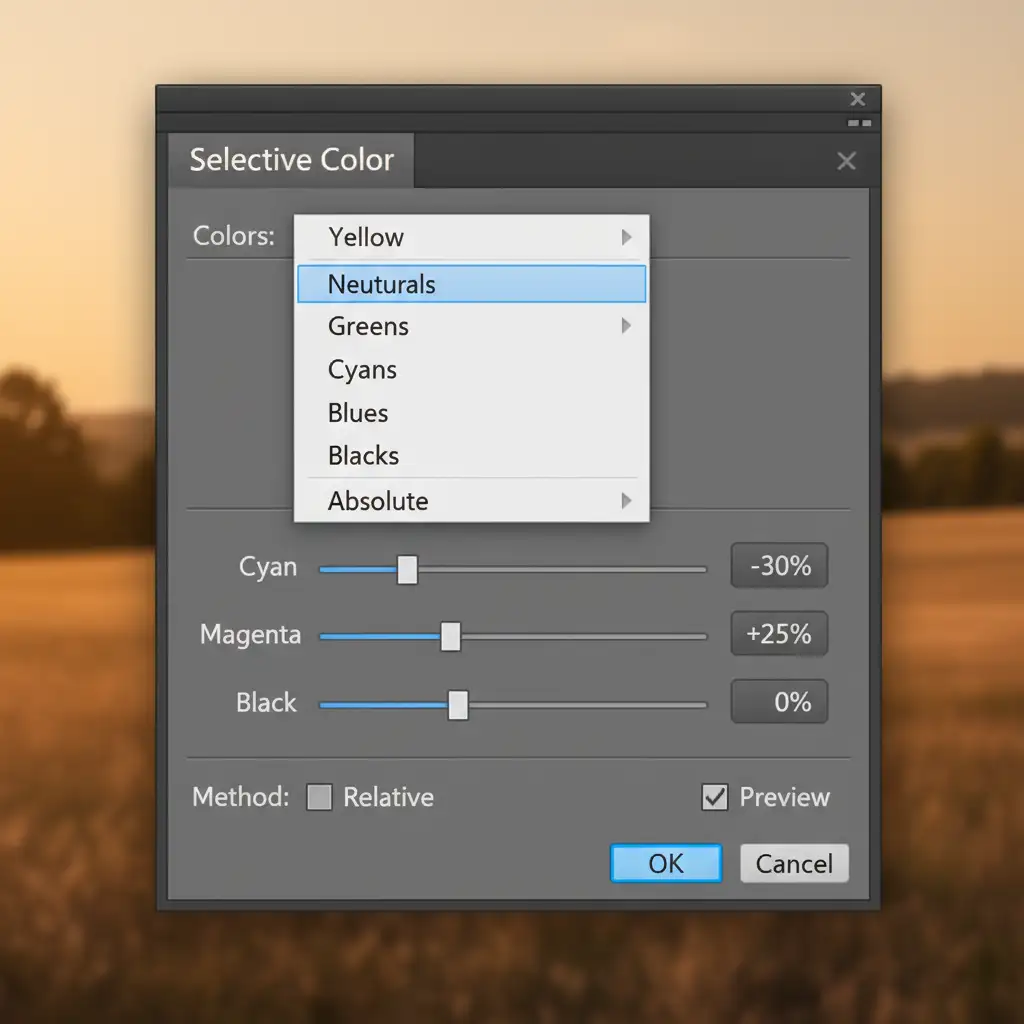
Targeting Neutrals with Selective Color
Add a Selective Color adjustment layer. By targeting the Whites and Neutrals channels, you can directly attack the gray, flat tones caused by overcast lighting. Reduce the Cyan slider and increase the Yellow slider in the Neutrals channel. This instantly warms up the midtones of the house without affecting the sky.
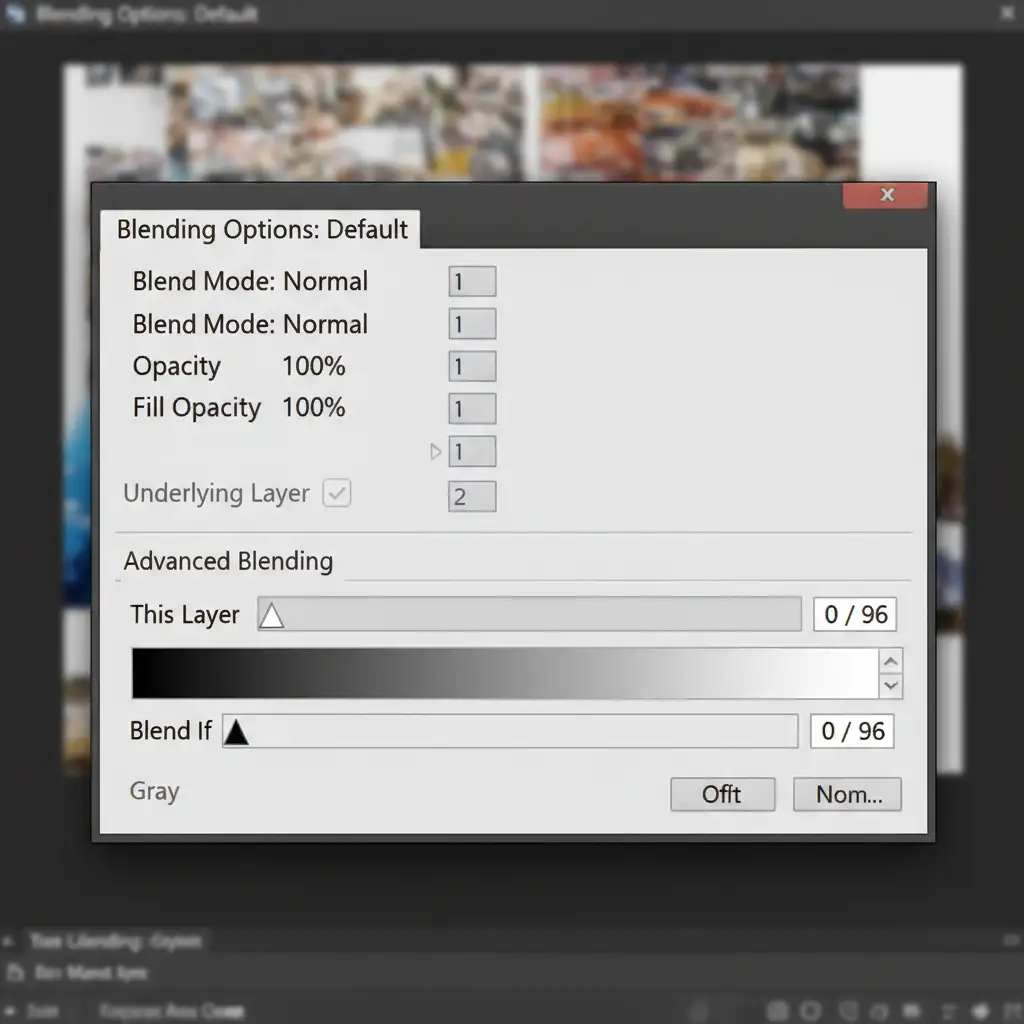
Brightening with Curve Mapping and Blend If
Next, add a Curves adjustment layer to pull up the mid-tones for brightness. However, lifting the curves can wash out your contrast. To prevent this, double-click the Curves layer to open the Layer Style dialog box and use the Blend If sliders.
Hold Alt (or Option on Mac) and split the underlying layer’s black slider, dragging the right half toward the midtones. This protects your darkest shadows from washing out, maintaining a rich, grounded look.
Method 3: The Technical Deep-Dive (Luminosity Masks & LAB Color Space)
When dealing with luxury real estate, you need flawless color separation. This advanced method isolates the sky and enhances colors using the LAB color space.
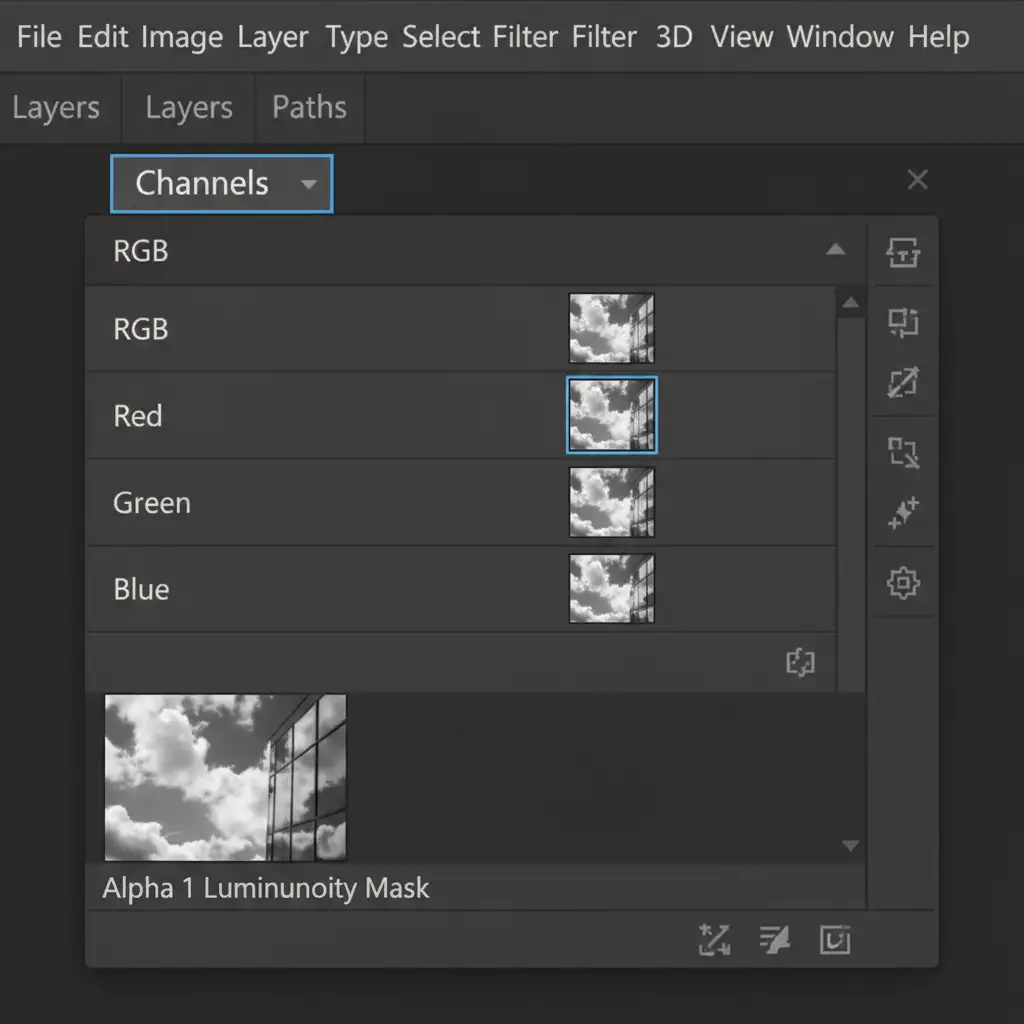
Creating a Luminosity Mask
First, create a Luminosity Mask to target only the overcast sky and the bright reflections in the windows.
- Go to the Channels panel.
- Ctrl+Click (or Cmd+Click) the RGB channel to select the brightest pixels in the image.
- Save this selection as a new Alpha channel.
- Apply a localized warming Photo Filter adjustment layer, using this mask to ensure the warmth only affects the bright, cool reflections.
Enhancing Color in LAB Color Space
To fix the flat textures without ruining your dynamic range, convert a merged copy of your layers to the LAB Color Space (Image > Mode > Lab Color).
Apply a Curves adjustment specifically on the b channel (which controls the blue-to-yellow color axis). Steepen the curve slightly by bringing the top and bottom points inward. This introduces natural, rich color separation in the landscaping and architecture without affecting the image’s overall contrast or luminosity. Once done, convert the image back to RGB.
Stop Letting Bad Weather Ruin Your Listings
Mastering natural color correction for overcast real estate photos takes time, precision, and an expert understanding of tonal mapping. When you are shooting multiple properties a week, spending hours tweaking the LAB color space or painting luminosity masks simply isn’t scalable.
Don’t let bad weather—or bad AI sky replacements—ruin your real estate listings. Outsource your high-volume image editing to Image Work India and Cloud Retouch. Our expert retouchers specialize in natural, high-end color correction that perfectly balances dynamic range, neutralizes color casts, and creates an inviting atmosphere that sells properties faster.
Focus on shooting your next property, and let us handle the overcast skies. Contact Cloud Retouch today to elevate your real estate portfolio.


