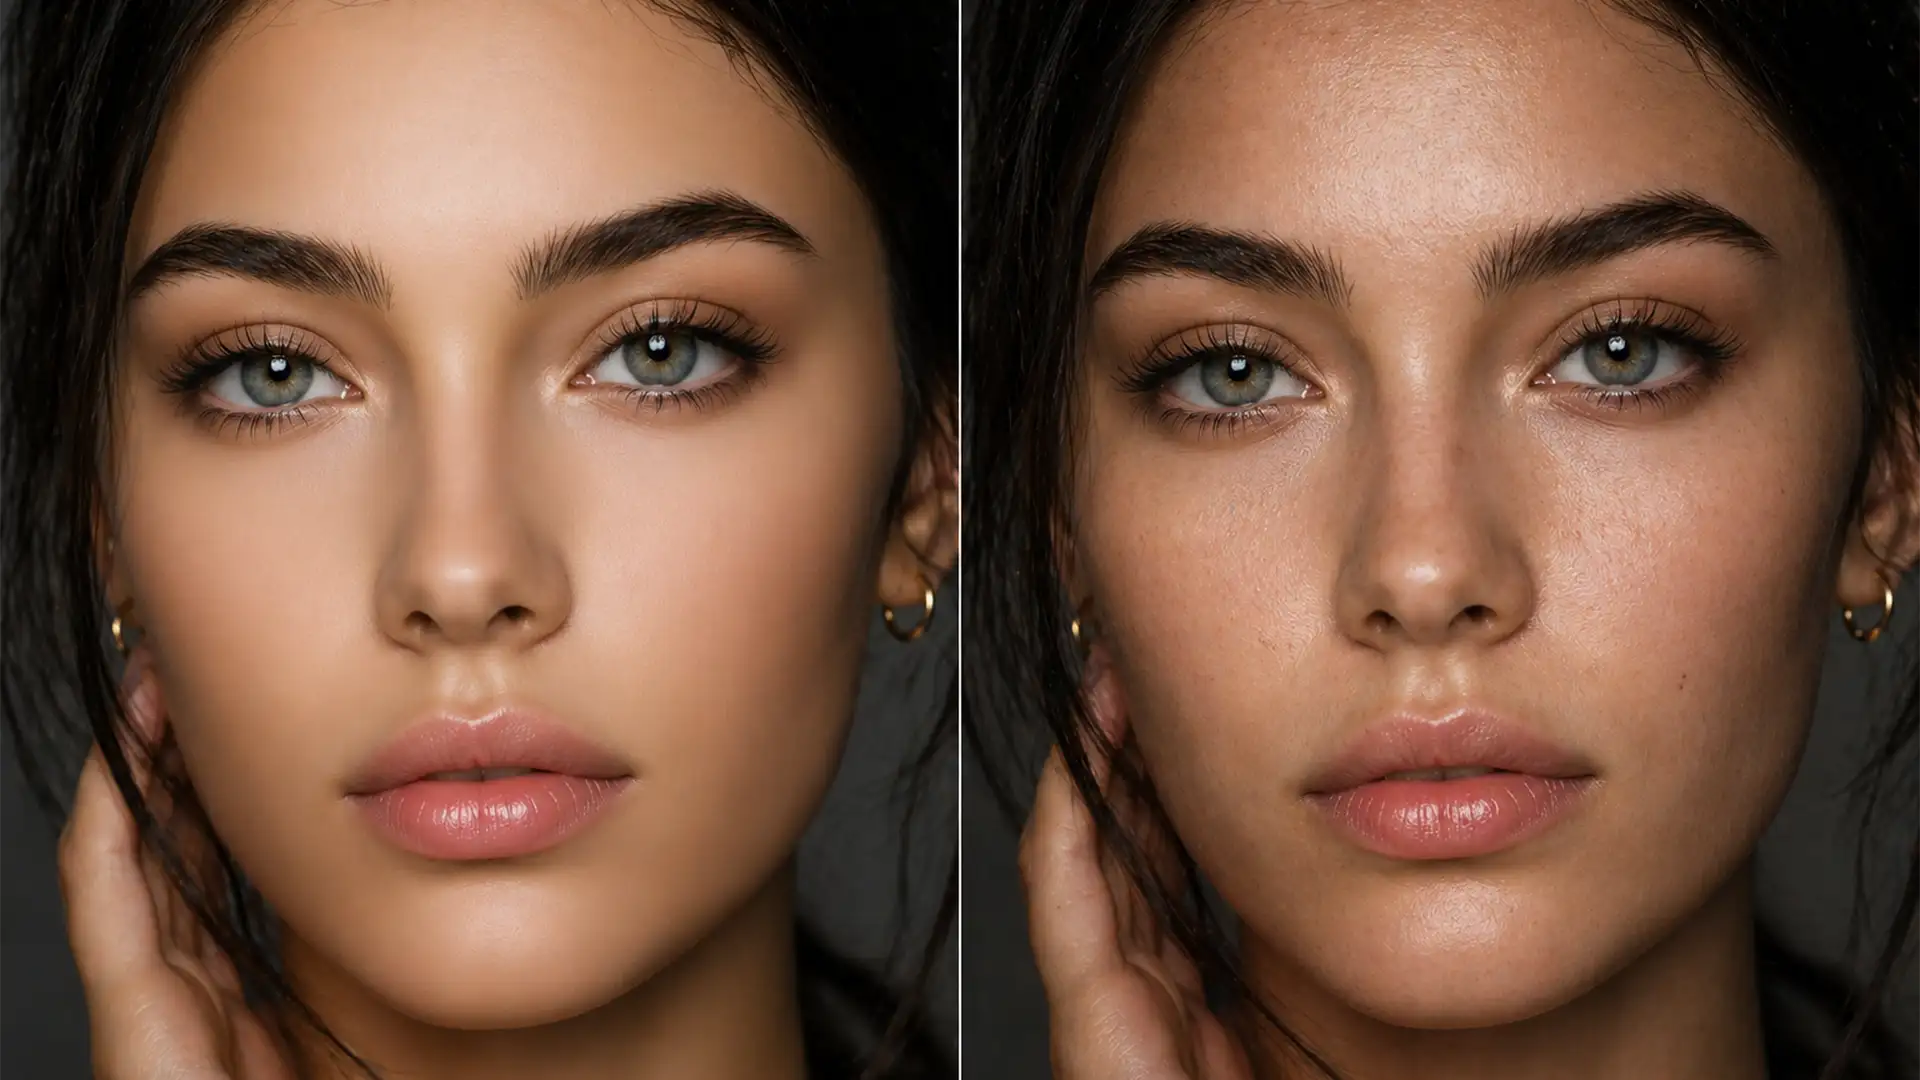
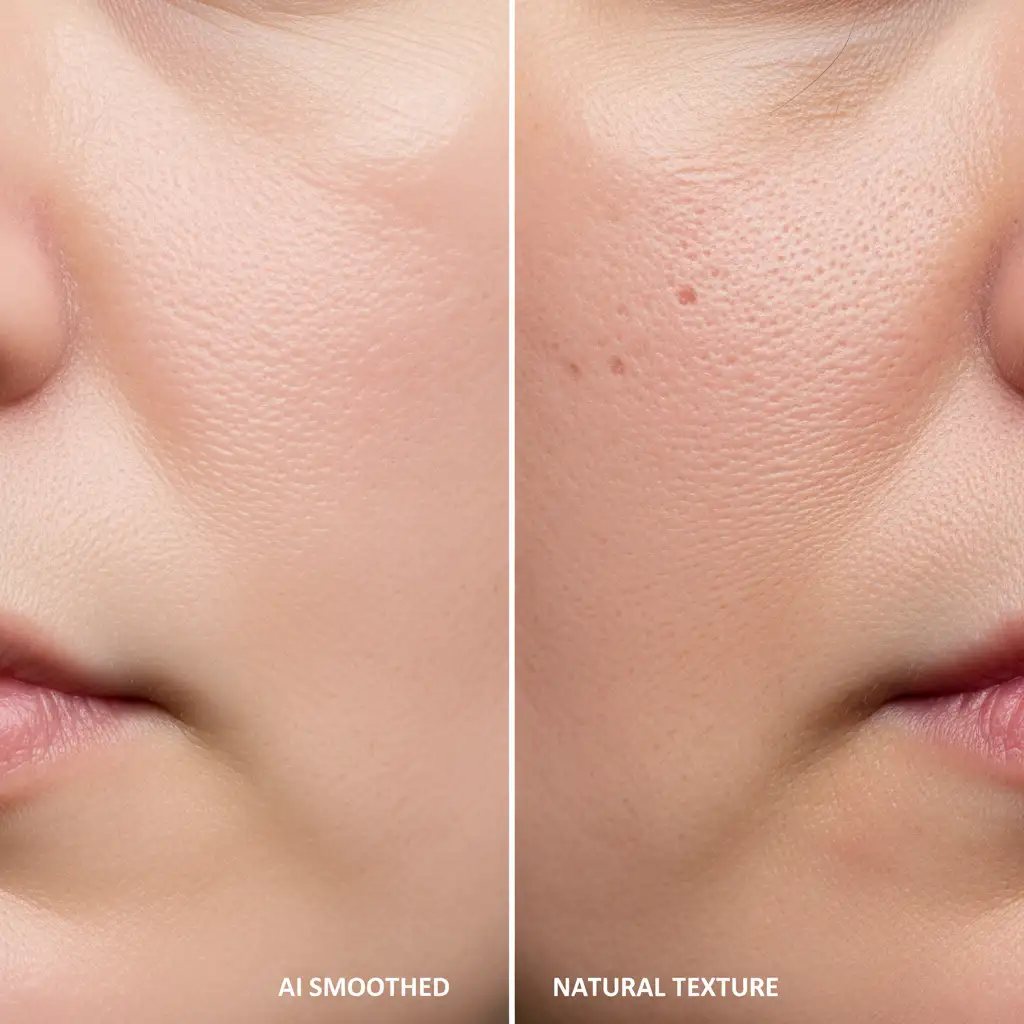
Have you ever run a portrait through Adobe Neural Filters, Topaz Photo AI, or Retouch4me, only to end up with a subject who looks like a plastic mannequin? You are not alone. While modern AI smoothing algorithms are incredibly efficient at removing blemishes, they routinely fail to distinguish between flaws and natural skin grain.
These tools indiscriminately flatten the high-frequency detail layer, destroying vital micro-textures and skin pores. The result is a severe loss of micro-contrast and an unsettling “uncanny valley” appearance. If your client’s headshots look more like CGI than human beings, you need to rebuild that lost structural skin mapping without re-introducing the original blemishes.
Here is your definitive, professional guide to recovering skin pores after AI smoothing in Adobe Photoshop v25.x and above.
The Problem: Why AI Smoothing Destroys Micro-Contrast
AI portrait tools operate by blurring the mid-frequency and high-frequency data of an image to eradicate spots and uneven tones. However, human skin is inherently textured. When you strip away those microscopic variations—the pores, fine hairs, and subtle ridges—the brain instantly recognizes the image as fake or heavily manipulated.
To fix this, we must utilize non-destructive editing workflows to reintroduce high-frequency data. Below are three industry-standard methods ranging from a quick grain simulation to advanced high pass texture recovery.
3 Professional Methods to Recover Skin Pores
Method 1: The Quick Fix (Simulating Skin Grain)
If you need a rapid turnaround and the AI hasn’t completely obliterated the underlying facial structure, simulating skin grain is a highly effective technique.
- Open your AI-processed image in Photoshop.
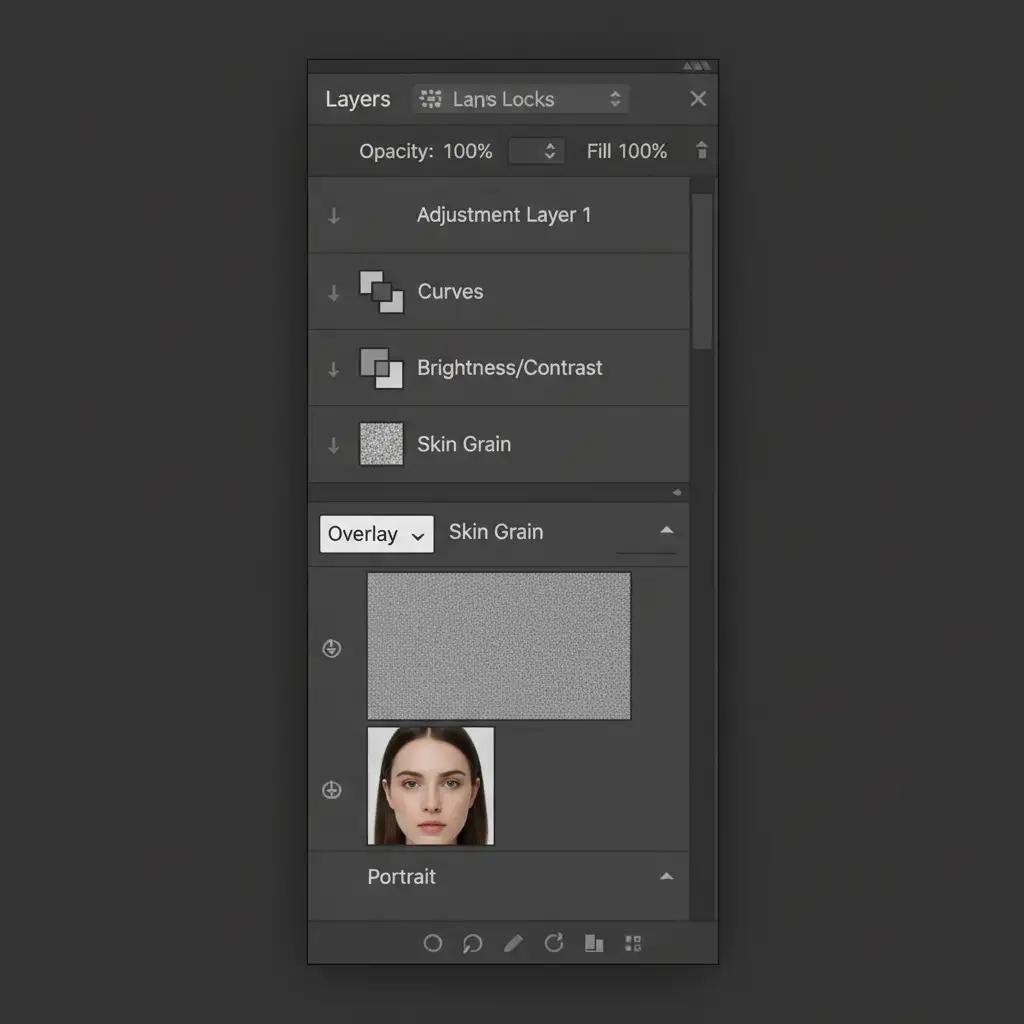
- Create a new blank layer above your portrait layer.
- Go to Edit > Fill and select 50% Gray.
- Change the layer’s blending mode to Overlay or Soft Light.
- Navigate to Filter > Noise > Add Noise. Choose Uniform and check Monochromatic noise. Keep the amount subtle (around 2-4%).
- To make the noise look like natural skin pores rather than digital static, apply a 1px Gaussian Blur (Filter > Blur > Gaussian Blur).
Method 2: The Pro Workaround (Skin Texture Grafting)
For high-end beauty and fashion retouching, simulated noise isn’t enough. You need actual human skin texture. This technique utilizes the principles of frequency separation to perform skin texture grafting.
- Find an unedited patch of skin on your original raw image (or use a high-resolution stock texture plate of clean skin).
- Extract the high-frequency texture using the standard frequency separation action (Apply Image on the high layer).
- Copy this high-frequency texture layer and paste it directly over the overly smoothed, “plastic” areas of your AI-processed layer.
- Set the grafted texture layer’s blending mode to Linear Light.
- Add an inverted (black) layer mask. Take a soft white brush at low opacity and carefully paint the realistic pores back onto the cheeks, forehead, and chin.
Method 3: The Technical Deep-Dive (High Pass Recovery with Blend-If)
This is the most precise method for recovering skin pores after AI smoothing. It pulls the exact, original pores from your raw file and seamlessly blends them into the AI-retouched version without bringing back the color blemishes.
- Duplicate your original, unedited raw image and place it at the very top of your layer stack, above the AI-smoothed layer.
- Desaturate this duplicate layer (Ctrl/Cmd + Shift + U) so color data doesn’t interfere.
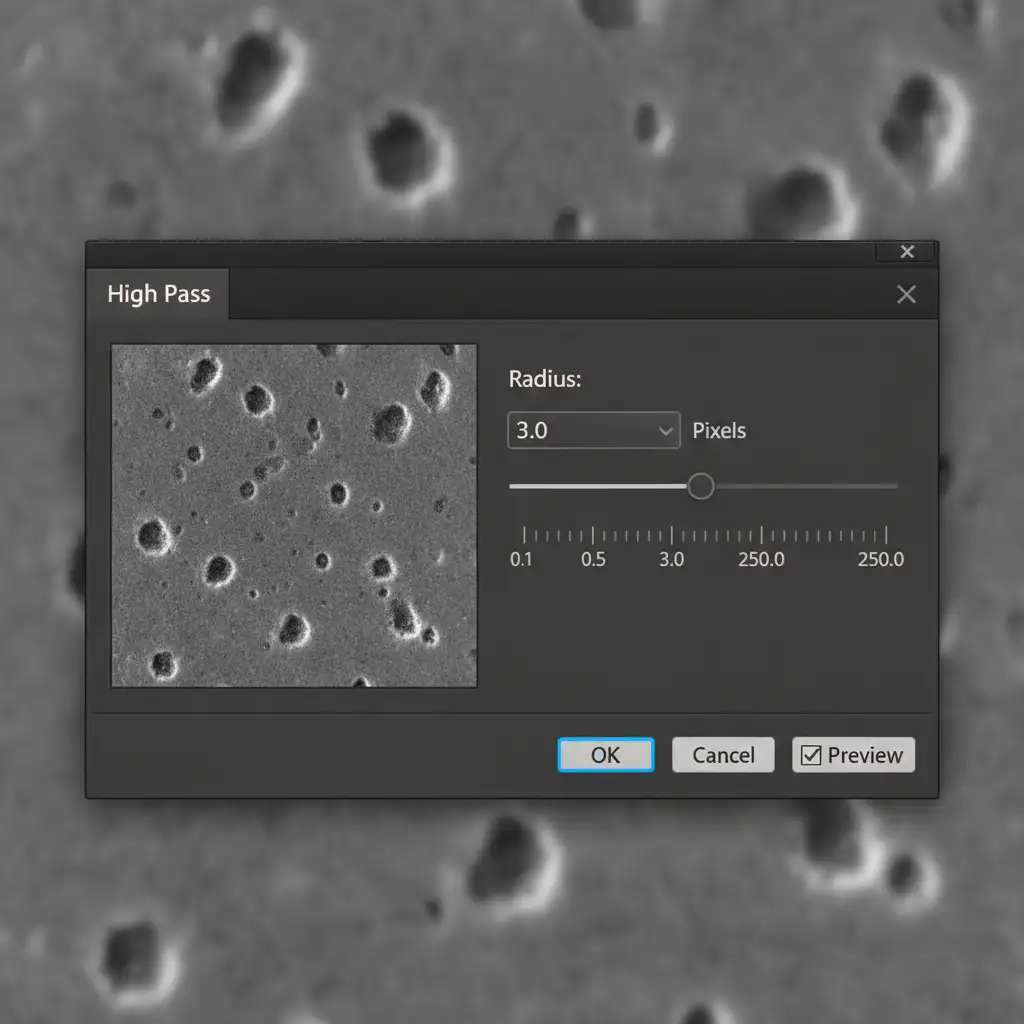
- Go to Filter > Other > High Pass filter. Set the radius to 3.0 pixels. This perfectly isolates the fine skin pores.
- Change the layer blending mode to Linear Light.
- The Magic Step: Double-click the High Pass layer to open the Layer Style dialog. We will use the Blend-If sliders (a faster alternative to complex luminosity masking) to protect the shadows and highlights.
- On the “This Layer” slider, hold Alt/Opt to split the black and white triangles. Drag the halves inward to restrict the texture recovery strictly to the midtones. This ensures dark eyelashes and bright specular highlights remain clean and untouched by the High Pass filter.
Best Practices for Non-Destructive Editing
When recovering skin texture, always prioritize non-destructive editing. Never apply your High Pass filter or noise directly to the pixel layer. By utilizing smart objects, adjustment layers, and layer masks, you retain the ability to lower the opacity of your texture layers if the pores look too harsh upon final review.
Stop Fighting AI Artifacts: Outsource to the Experts
Fixing the mistakes made by automated AI tools can take more time than retouching the portrait manually from the start. If you are constantly battling plastic skin, lost micro-contrast, and AI artifacts, it is time to streamline your workflow.
Need perfectly balanced, natural-looking headshots? Image Work India and Cloud Retouch specialize in high-end, professional retouching that retains realistic skin textures while flawlessly removing blemishes. We don’t rely on one-click AI filters that ruin your photography; we use industry-standard frequency separation and micro-dodging and burning to ensure your subjects look flawless, yet distinctly human.
Stop stressing over lost skin pores. Outsource your portrait retouching to the pros today and deliver gallery-quality results to your clients every single time.


