You just ran a batch of ecommerce photos through an AI background generator, expecting a flawless studio setup. Instead, you get a product that looks like a cheap sticker. The culprit? AI product background color bleed.
When you extract a product from its original environment, the physical light and color from that old room remain baked into the edges of your subject. Generative AI tools easily swap the background, but they fail to neutralize this original environmental color spill. The result is a glaring “halo effect” that instantly destroys the photorealism of your composite.
If you want to rescue your ecommerce catalog from the “fake AI look,” you need to bridge the gap between artificial generation and professional retouching. Here is exactly how to fix color fringing and light wrap in Photoshop.
Why AI Background Generators Cause the “Halo Effect”
In recent updates like Photoshop v25.0+ (featuring Generative Fill) and dedicated AI background generators, the software is trained to build environments around your mask. However, photography is bound by physics. In a physical photo studio, ambient light spill wraps around the subject’s contours.
When you isolate a product layer, that ambient color spill is rasterized into the edge pixels. If you photograph a shoe on a green screen and place it on a grey AI-generated concrete floor, that green edge bleed remains. The AI does not automatically rewrite the lighting on your isolated subject, creating an immediate visual disconnect.
To achieve true photorealism, you must manually strip away the old color and blend the new ambient light into the edges using advanced Photoshop matting.
3 Advanced Photoshop Techniques to Fix AI Product Background Color Bleed
Depending on the severity of the color fringing, you can use one of these three professional workflows to restore the integrity of your product edges.
Method 1: The Quick Fix Using Photoshop Matting
If you are dealing with a minor halo effect on a hard-edged product (like a box or a smartphone), Photoshop’s legacy matting tools offer a rapid solution. This method literally strips away the outermost contaminated pixels.
- Select your isolated product layer in the Layers panel.
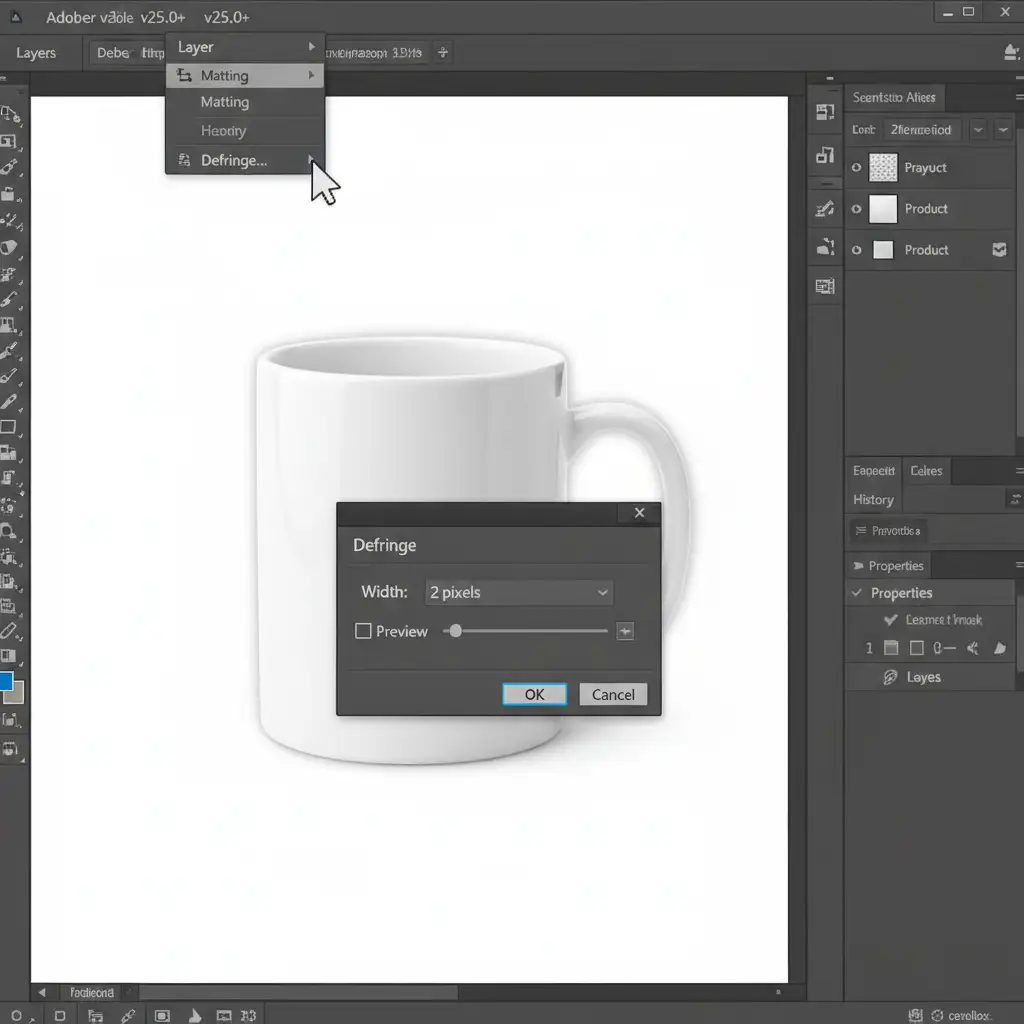
- Navigate to the top menu: Layer > Matting > Defringe.
- A dialog box will appear. Enter a value between 1-3 pixels (start with 1px for high-resolution web images).
- Click OK. Photoshop will instantly strip away the outer edge color.
Method 2: The Pro Workaround with Select and Mask
For more complex edges—such as fabrics, faux fur, or soft plastics—a simple defringe might leave the edges looking jagged. The Select and Mask workspace allows for precise edge-shifting and automatic color decontamination.
- Hold Ctrl (or Cmd on Mac) and click on your product layer’s mask thumbnail to load the selection.
- Open the Select and Mask workspace (Select > Select and Mask).
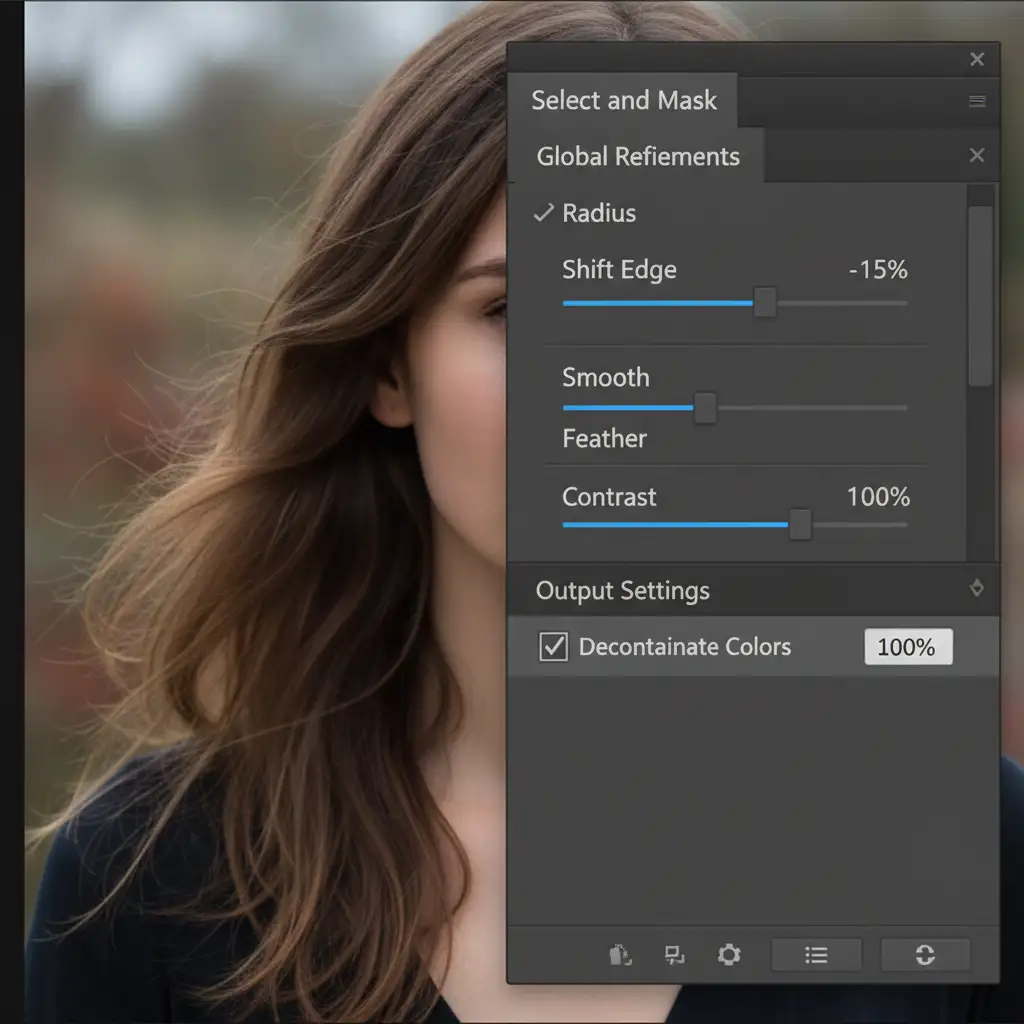
- Under the Global Refinements panel, adjust the Shift Edge slider to -15%. This pulls the mask inward, hiding the worst of the ambient light spill.
- Add a slight feather (0.5px) to soften the transition.
- If using Smart Radius, keep it low (1-2px).
- Scroll down to Output Settings and check the box for Decontaminate Colors. This tells Photoshop to dynamically replace the color of the fringed edge pixels with the color of adjacent, non-fringed pixels.
Method 3: The Technical Deep-Dive (Edge-Blend Clipping Mask)
When dealing with severe AI product background color bleed—especially on reflective surfaces like glass, metal, or jewelry—automated tools will fail. You need to manually introduce the ambient color of the new AI background onto the product using an edge-blend clipping mask.
- Create a new blank layer directly above your isolated product layer.
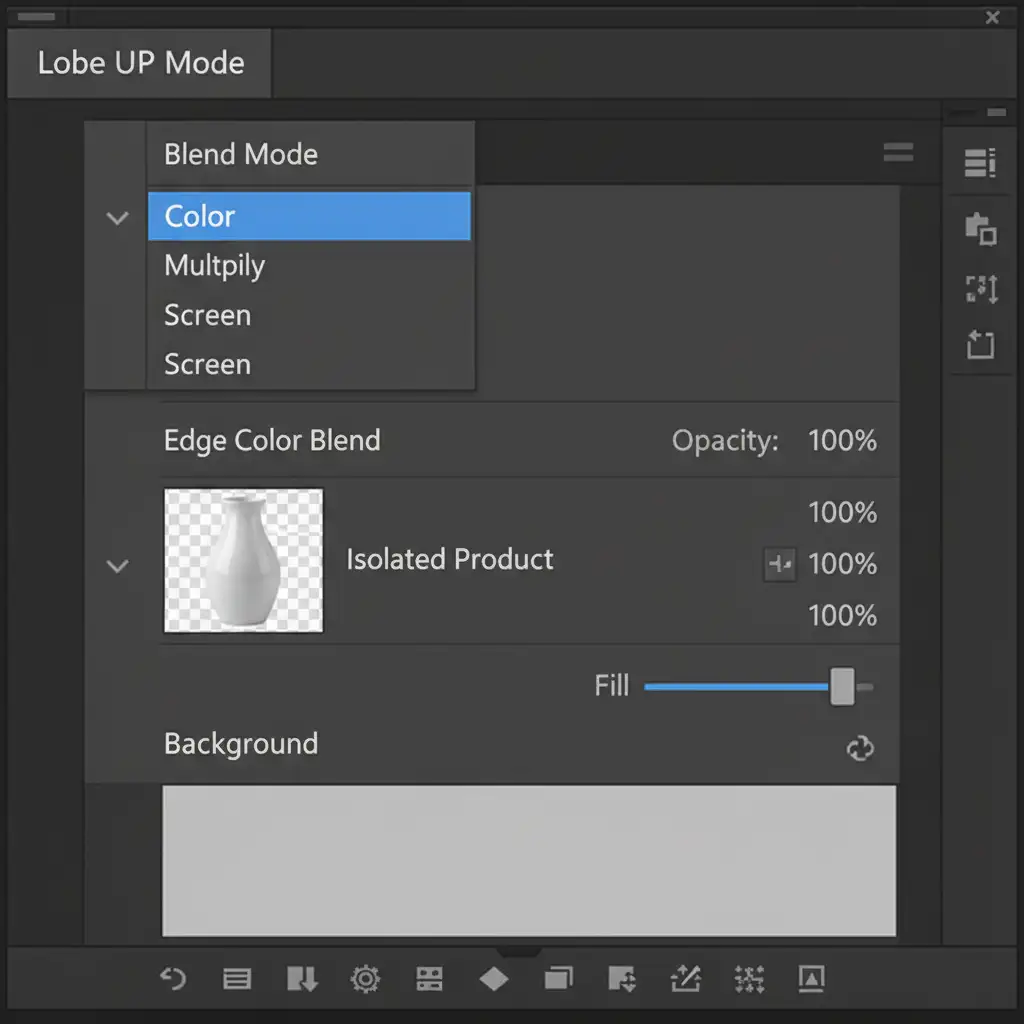
- Right-click the new layer and choose Create Clipping Mask. (A small downward arrow will appear, indicating this layer only affects the product layer below it).
- Change the blending mode of this clipped layer from Normal to Color.
- Select the Brush tool (B) with a soft, round tip and low opacity (around 20-30%).
- Hold Alt (or Option) to temporarily switch to the Eyedropper tool, and sample the ambient colors of the new AI-generated background right next to the product’s edge.
- Gently paint over the product’s edge. The Color blend mode will replace the old, ugly color bleed with the exact ambient lighting of the new environment, perfectly integrating the subject.
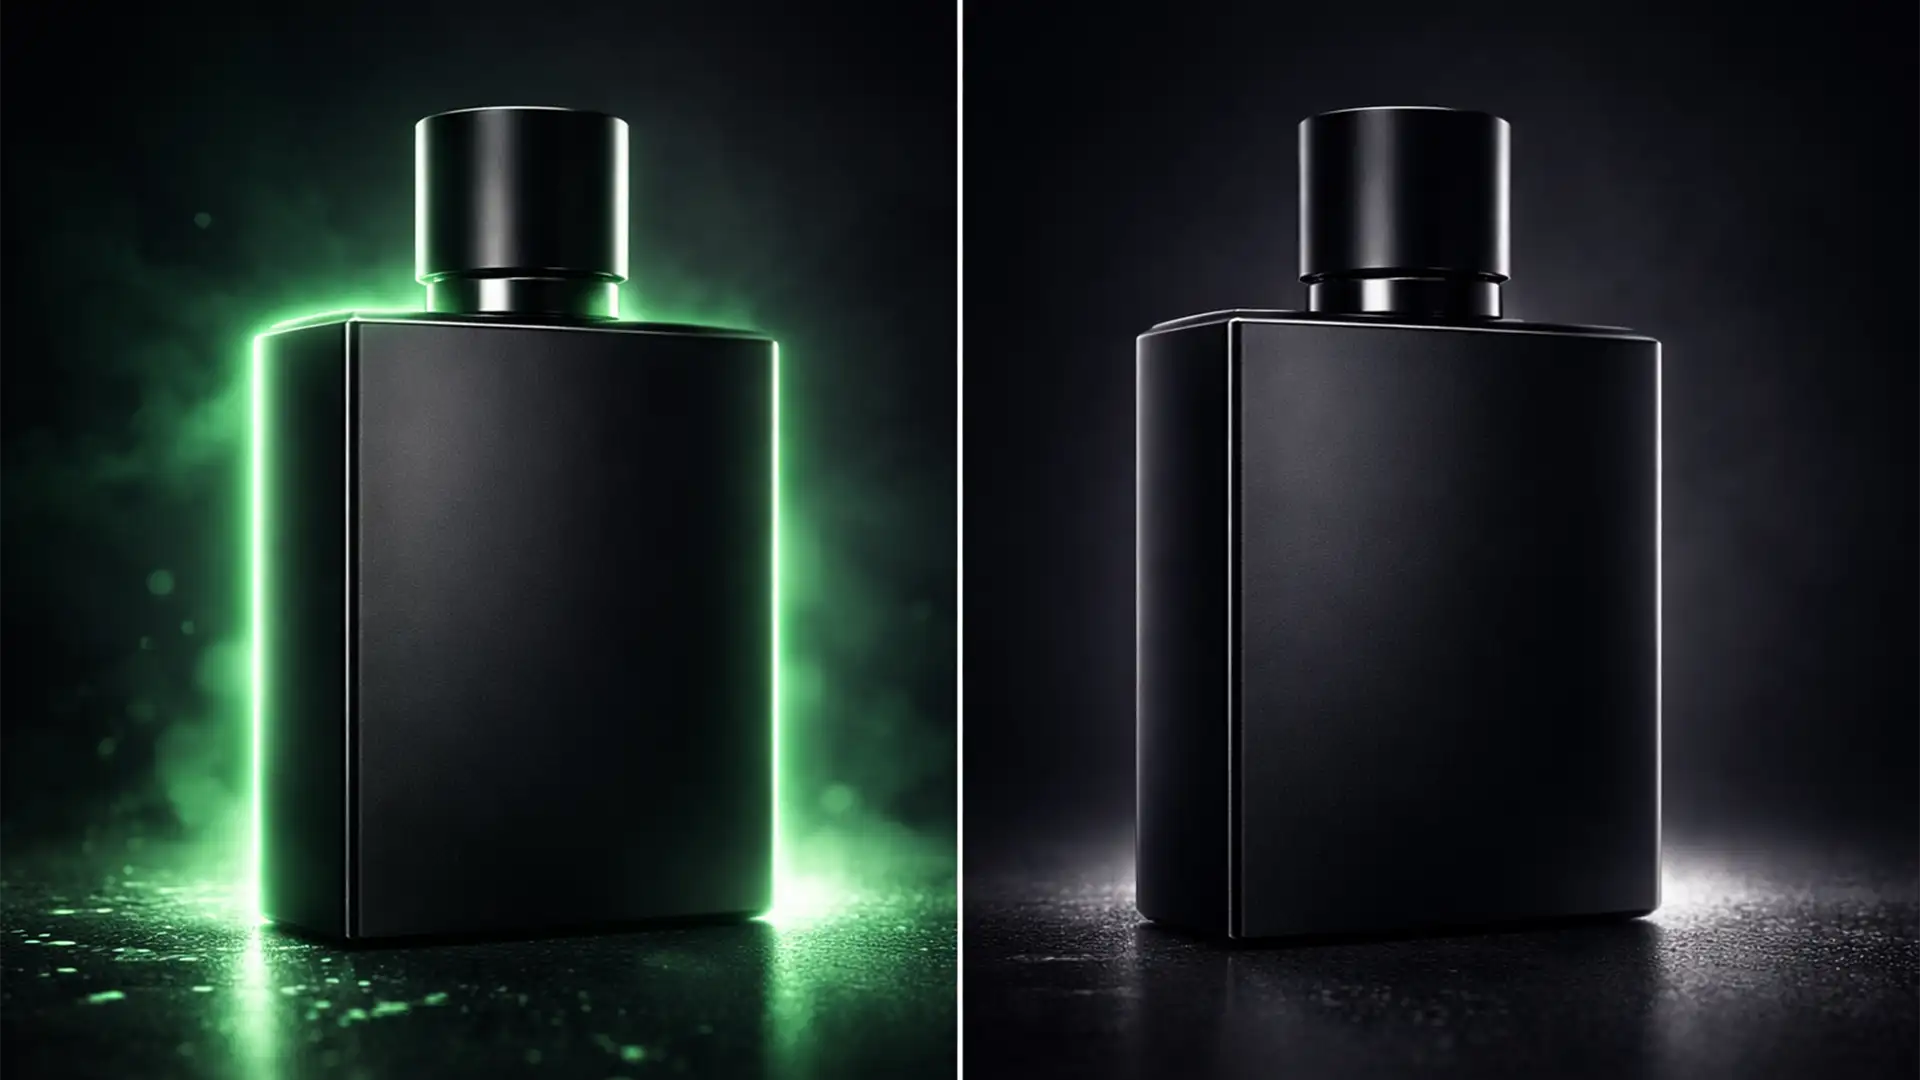
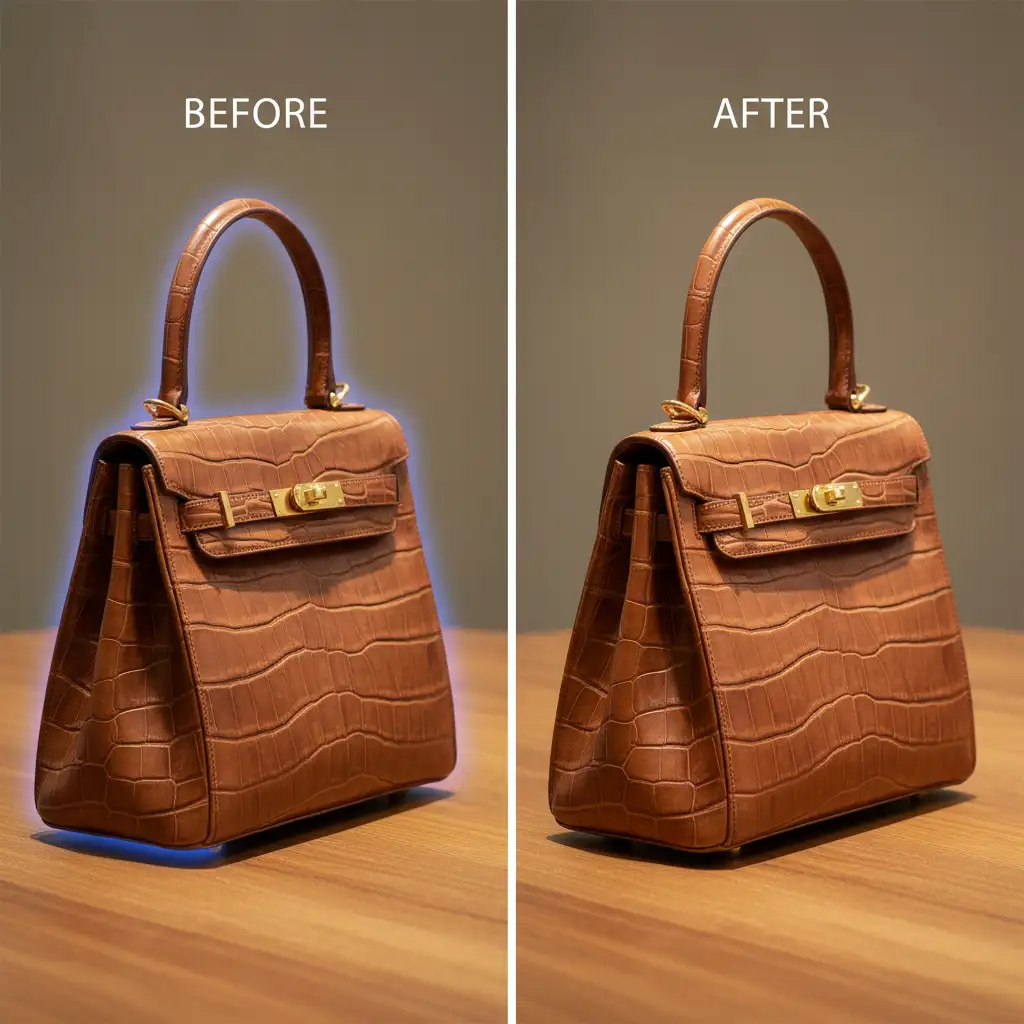
The Final Polish: Before and After
By combining these techniques, you can completely eradicate the fake AI look. Generative Fill is an incredible tool for ideation and background replacement, but it is the manual application of clipping masks, blend modes, and color decontamination that elevates an image to commercial ecommerce standards.
Scale Your Ecommerce Visuals with Image Work India and Cloud Retouch
Fixing AI product background color bleed on a single image takes a few minutes of precise Photoshop work. But what happens when you have a seasonal catalog of 5,000 SKUs? Relying purely on automated AI tools will leave your entire inventory looking cheap, while fixing them manually in-house will drain your time and resources.
Struggling with high-volume AI image artifacts? Let Cloud Retouch and Image Work India handle your ecommerce photo editing. Our expert teams combine the speed of cutting-edge technology with pixel-perfect, human-led quality control. From complex matting and color decontamination to flawless background replacements, we ensure your product images drive conversions, not distractions.
Contact us today to streamline your post-production workflow and get flawless, retail-ready imagery at scale.


