You just captured a stunning spatial photo for the Apple Vision Pro, but after a quick blemish removal in Photoshop, the 3D effect is ruined. Instead of a crisp, immersive scene, you’re looking at warped edges and bizarre AI background smearing. Sound familiar?
Standard 2D retouching tools like the Healing Brush or Clone Stamp completely ignore the hidden Z-axis data embedded inside spatial files. When you alter the surface pixels without updating the underlying geometry, the spatial computing illusion breaks. If you want to fix imperfections without destroying the parallax effect, you need a specialized spatial photo retouching workflow. Let’s break down exactly how to extract, protect, and rebuild your depth maps in Photoshop v25.x.
Why Standard Retouching Ruins Spatial Photos
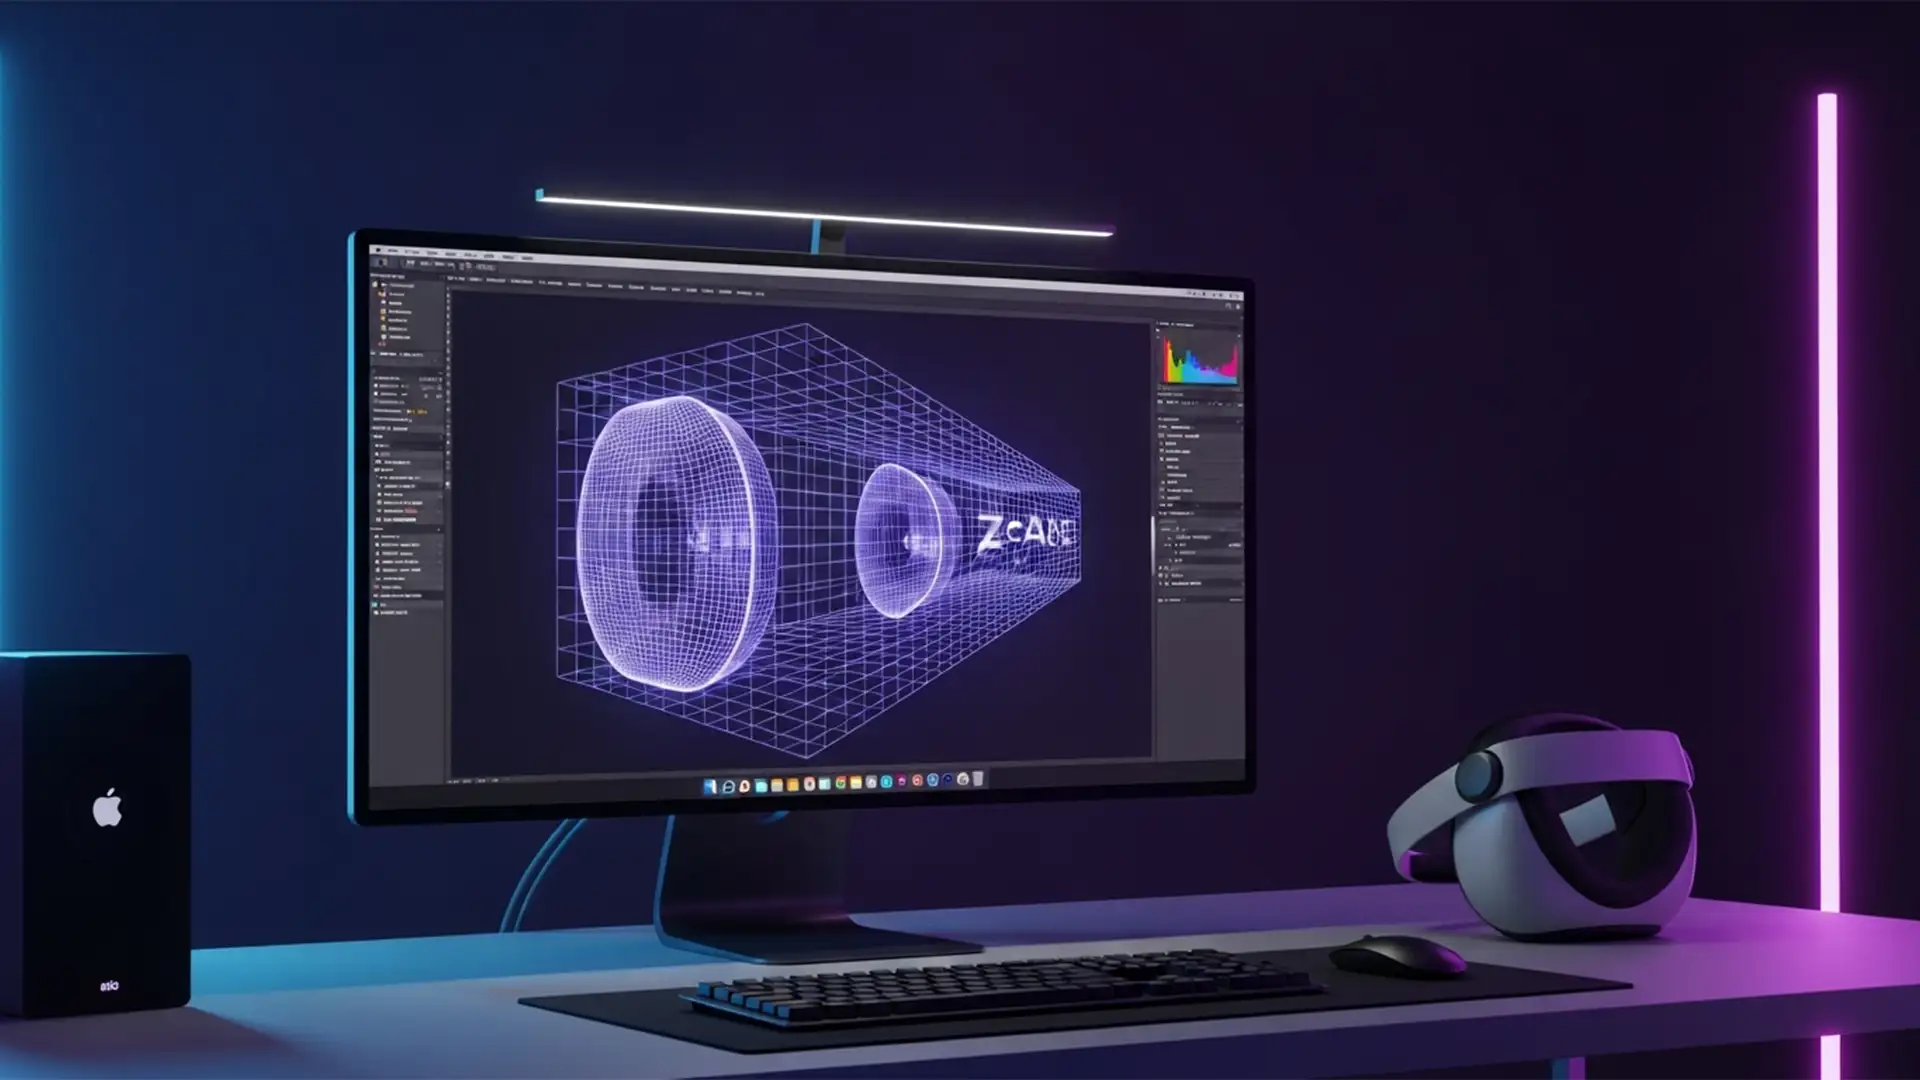
To understand the fix, you must understand the format. Spatial photos designed for stereoscopic viewing on devices like the Apple Vision Pro are encoded in the HEIC format. Unlike a standard JPEG, a spatial HEIC contains two critical components: a standard 2D image and an embedded grayscale depth map.
The depth map tells the headset how far away every pixel should appear. White pixels are close to the camera; black pixels are far away. When you use a 2D tool to clone a background texture over a foreground object, you change the visual image, but the depth map remains unchanged. The headset gets confused, resulting in a warped parallax effect where background pixels appear to float in the foreground.
To prevent this Z-axis depth corruption, your retouching workflow must treat the image and the depth map as two halves of the same whole.
The Professional Spatial Photo Retouching Workflow
Depending on the severity of the edits required, there are three main ways to handle depth data in Photoshop v25.x and newer.
Method 1: The Quick Fix – Extracting the Depth Map
If you only need to make minor adjustments, the safest approach is to isolate the foreground from the background using the image’s own depth data.
- Open your HEIC file in Photoshop.
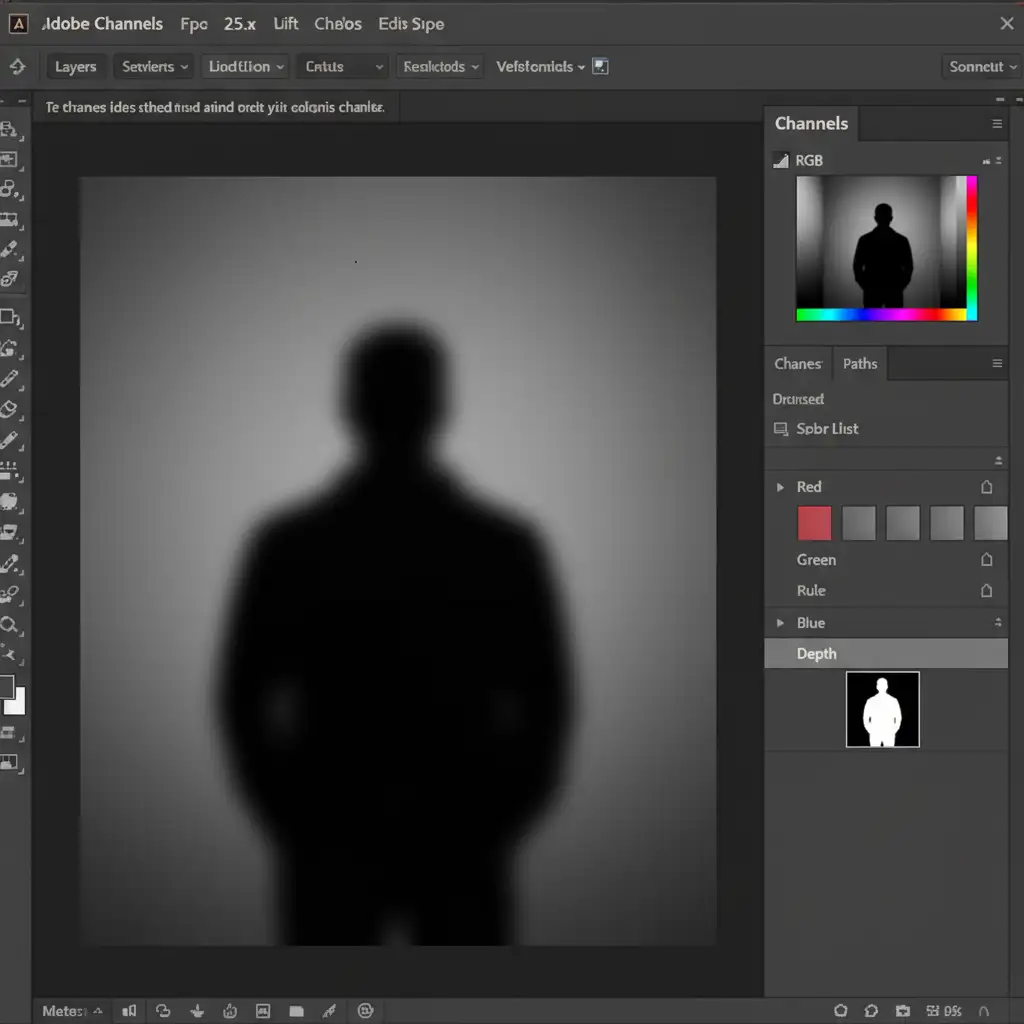
- Navigate to the Channels panel.
- Scroll to the bottom to locate the hidden grayscale Depth channel.
- Duplicate this channel to create a new Alpha Channel.
- Command-click (or Ctrl-click) the new Alpha Channel to load it as a selection.
By using the depth map as a selection mask, you can safely use your basic healing tools on the foreground without accidentally bleeding pixels into the background’s depth zone.
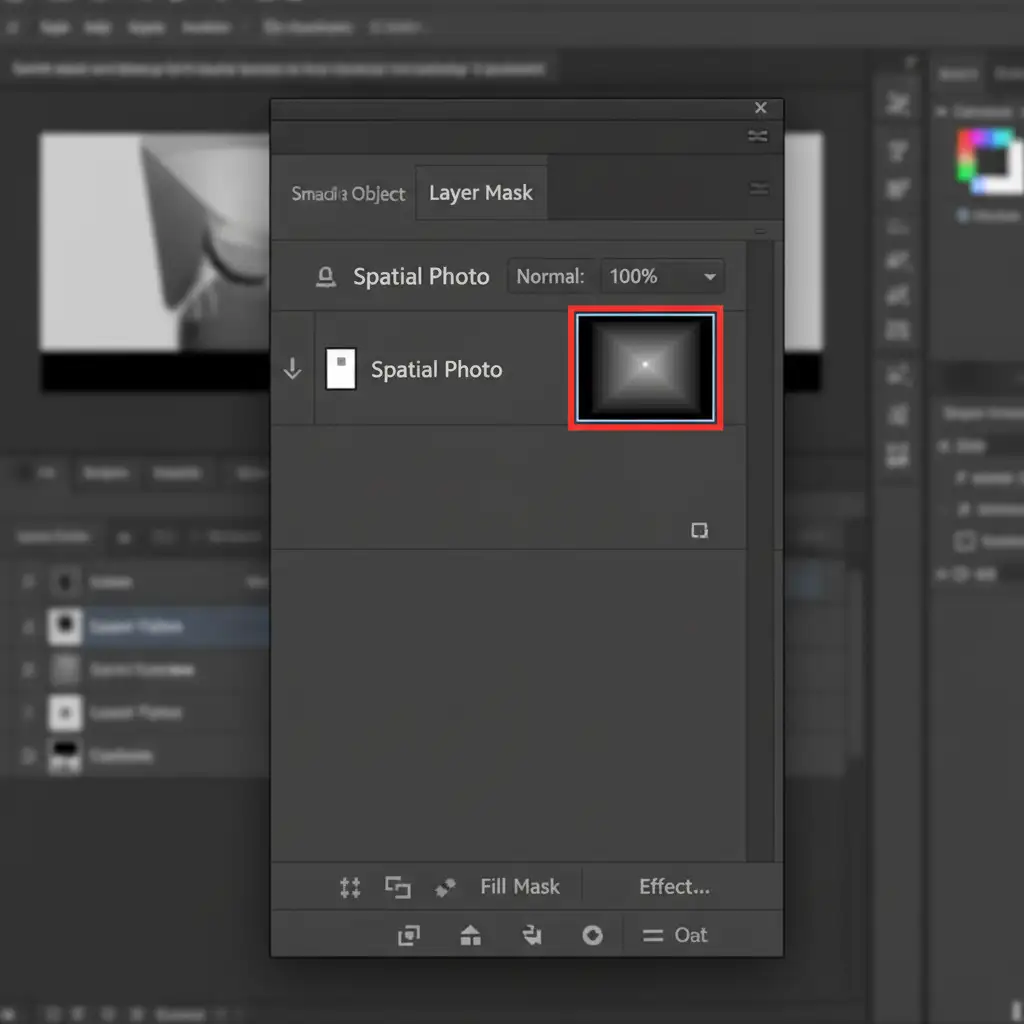
Method 2: The Pro Workaround – Smart Object Depth Masking
For heavier retouching, such as compositing or extensive cleanup, you need to actively edit the depth map alongside the image. This prevents the AI background smearing that occurs when foreground pixels bleed into background depth zones.
- Convert your primary image layer into a Smart Object.
- Apply the extracted depth map as a Layer Mask to this Smart Object.
- Select the Layer Mask and use the Dodge and Burn tools to manually refine the edge artifacts.
- Burn (darken) the edges of background elements to push them back, and Dodge (lighten) foreground edges to pull them forward.
This depth masking technique ensures that any pixel alterations are strictly bound to their correct spatial planes.
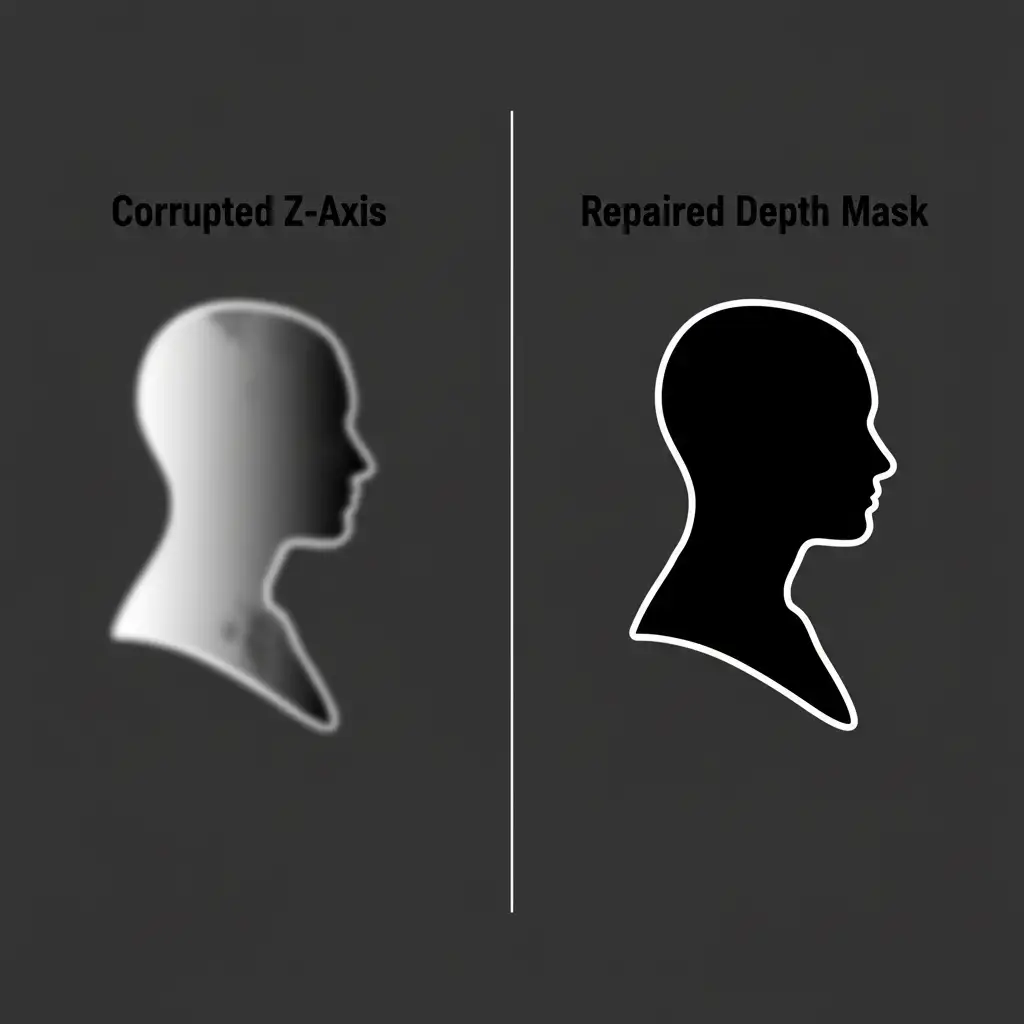
Method 3: The Technical Deep-Dive – Reconstructing the Z-Axis
Sometimes, standard retouching completely destroys the original depth map. If the depth map is heavily corrupted, you must generate a new one from scratch.
- Finish all your 2D retouching on the flat image.
- Go to Filter > Neural Filters and toggle on Depth Blur.
- Instead of applying the blur, scroll down to the output settings and check Output Depth Map Only. Photoshop’s AI will analyze your newly retouched 2D image and calculate a fresh, accurate depth mask.
- Export the retouched 2D image and your new depth map as separate files.
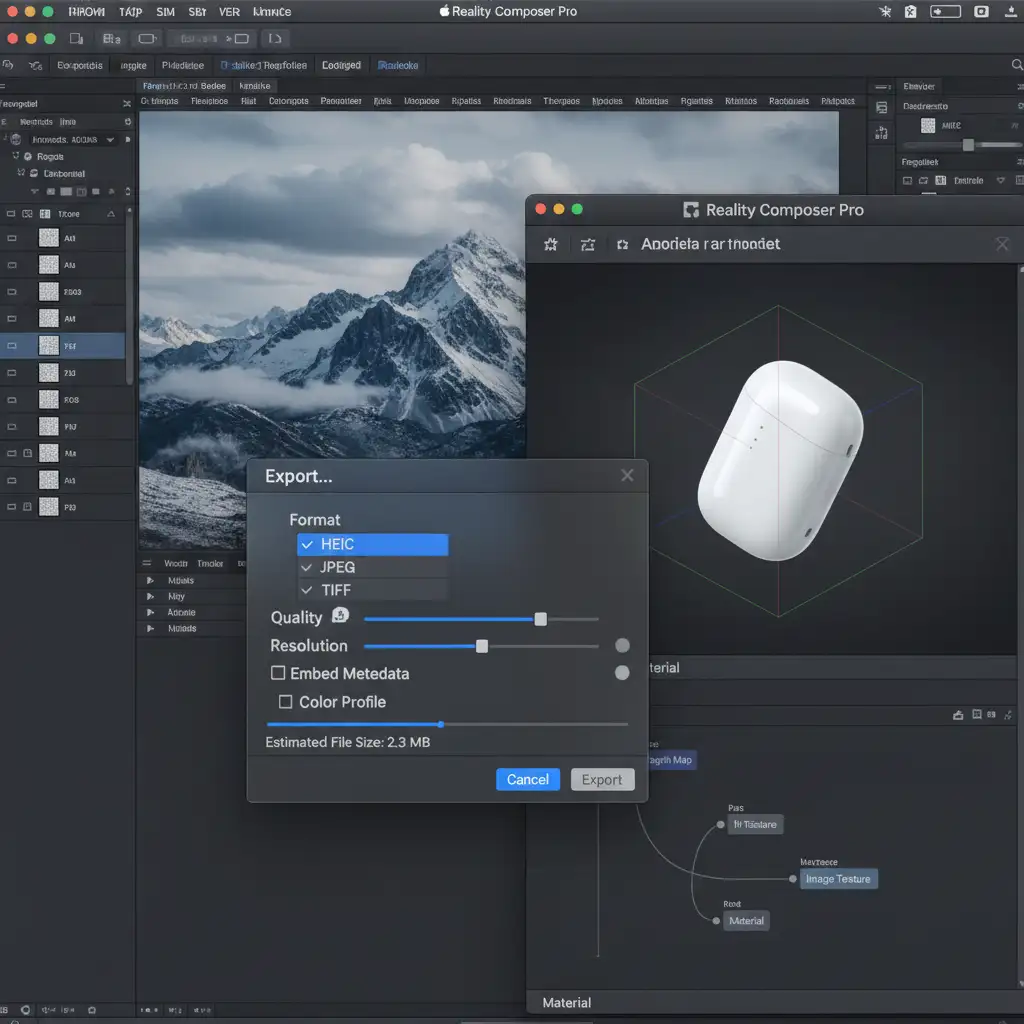
- Use a spatial photo compiler like Spatialify or Apple’s Reality Composer Pro to stitch the 2D image and the new depth map back together into a valid stereoscopic Spatial HEIC.
Scale Your Spatial Computing Content with the Pros
Transitioning your product catalog or brand imagery to spatial computing is complex, highly technical, and incredibly time-consuming. One bad depth map can cause motion sickness or ruin a high-end product presentation on the Apple Vision Pro.
You don’t have to master Z-axis reconstruction on your own. At Image Work India and Cloud Retouch, our specialized teams are fully equipped to handle high-volume, spatial photo retouching workflows. From extracting and repairing HEIC depth maps to flawless 3D optimization, we ensure your images look perfect in every dimension.
Ready to make your visuals truly stand out in spatial computing? Contact Cloud Retouch today for bulk spatial photo retouching tailored specifically for the Apple Vision Pro.


