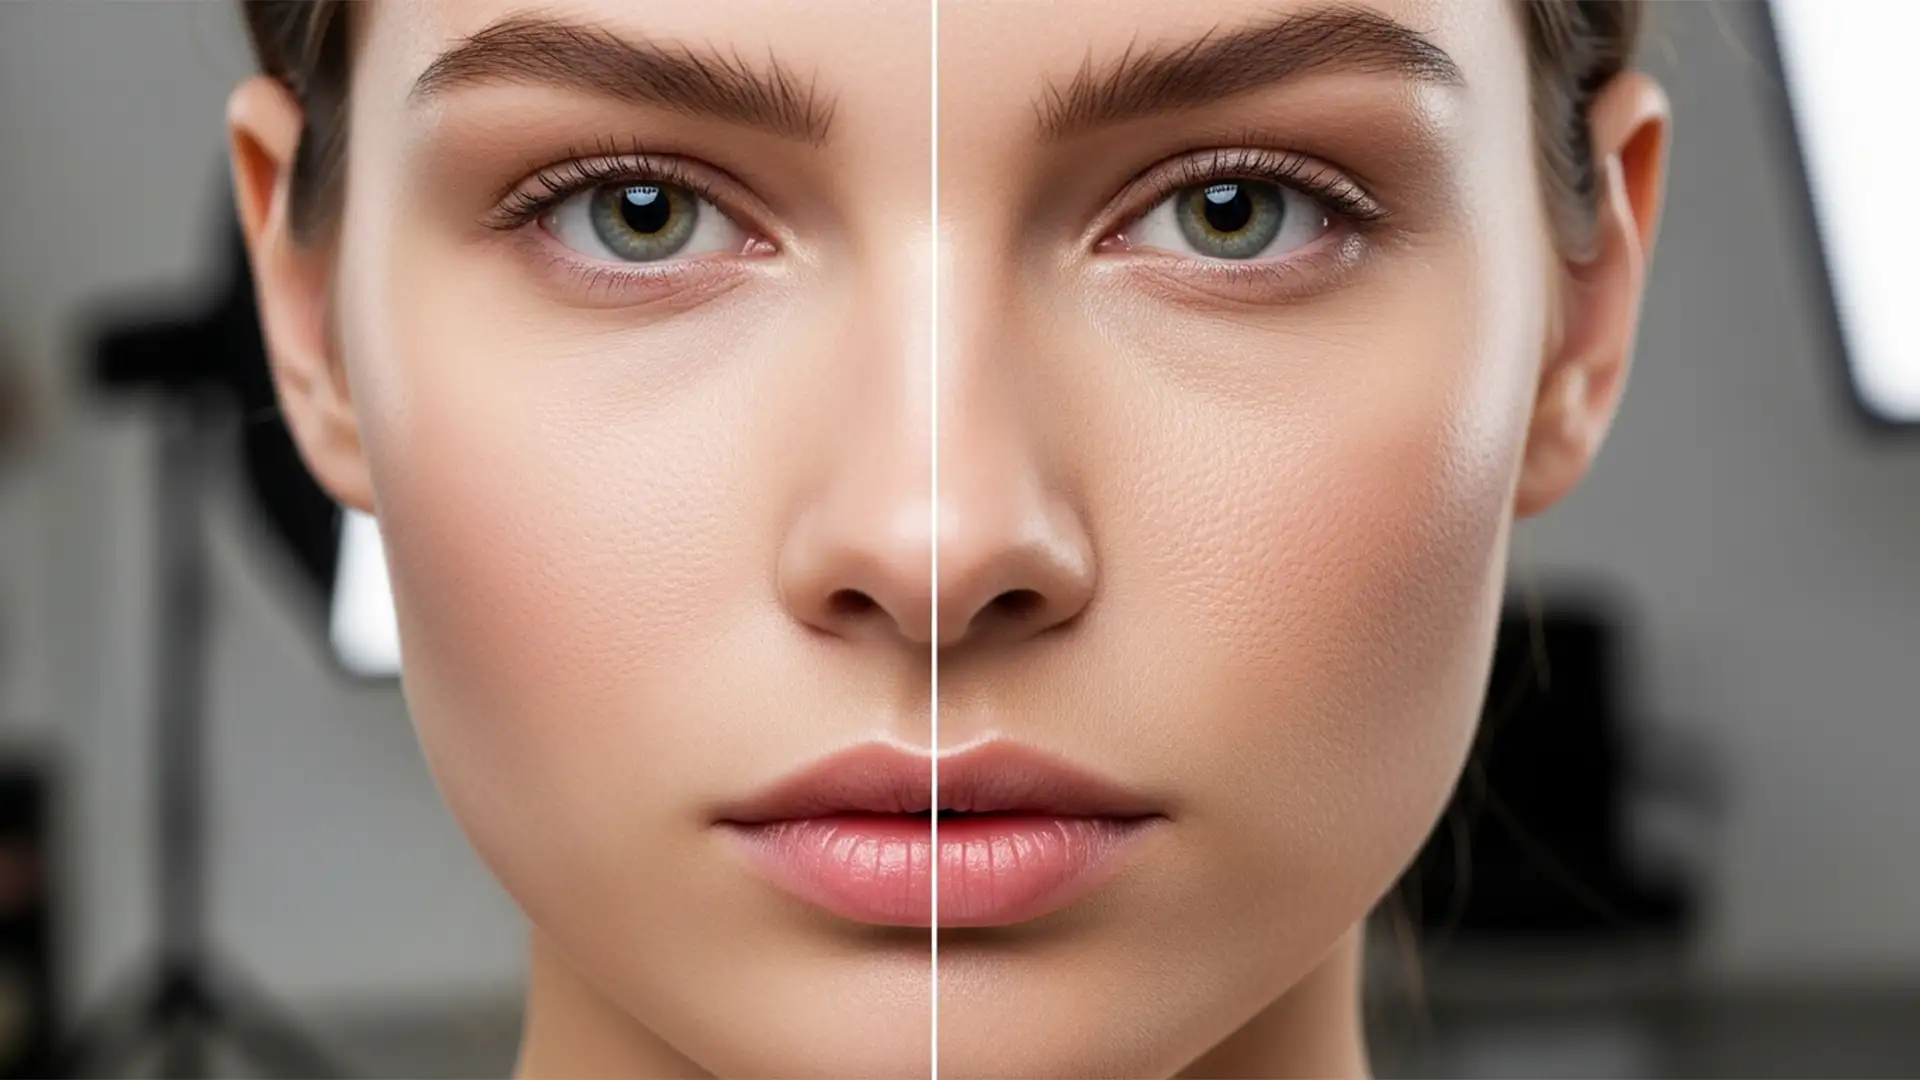
You just updated to Photoshop v27.x (2026), excited to speed up your portrait retouching with the new Adobe Sensei-powered Skin Smoothing Neural Filter. You apply it, and your subject instantly looks like a plastic mannequin.
The AI successfully maps the facial geometry, but it aggressively obliterates the high-frequency texture, destroying every single micro-pore in the process. If you are struggling with a Photoshop Neural Filter skin texture loss fix, you aren’t alone. The algorithm currently struggles to separate high-frequency detail from low-frequency color data.
Don’t abandon the tool just yet. Professional retouchers don’t rely on the filter’s default output. Here is the exact workflow to fix the “plastic skin” effect and restore 100% natural, realistic skin texture.
Why Photoshop v27.x Destroys Skin Texture
The core problem with the Adobe Photoshop 2026 Skin Smoothing Neural Filter is how it processes image data. Advanced retouching relies on separating an image into two distinct layers:
- Low-frequency layer: Contains color transitions, shadows, and overall tones.
- High-frequency layer: Contains fine details, sharp edges, and micro-pores.
When you run the Neural Filter directly on a flattened image, the AI blurs these two frequencies together. To fix this, you must adopt a non-destructive workflow utilizing smart objects, blend modes, and layer masking.
Here are three proven methods to get your texture back.
3 Ways to Fix Photoshop Neural Filter Skin Texture Loss
Method A: The Quick Opacity Blend (Beginner)
If you are editing high-volume portraits and need a rapid fix, the easiest solution is to leverage layer opacity to blend the original pores back into the AI-smoothed image.
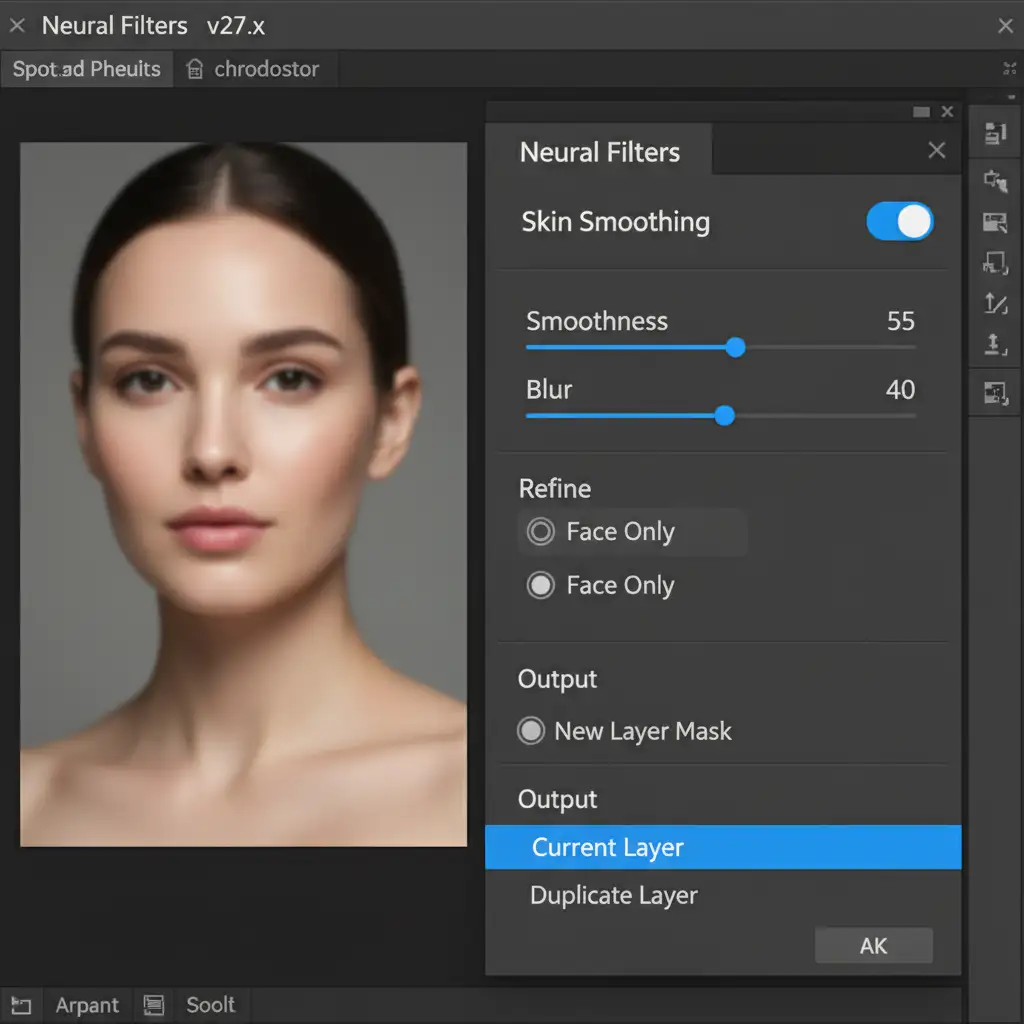
- Open your image and go to Filter > Neural Filters.
- Toggle on Skin Smoothing and adjust the Smoothness and Blur sliders to your liking.
- Crucial Step: At the bottom right of the panel, change the Output setting from “Current Layer” to New Layer. Click OK.
- In your Layers panel, select the newly generated layer and drop the Opacity to 60%.
This allows 40% of the original, unedited micro-pores from the background layer to show through, instantly eliminating the plastic look.
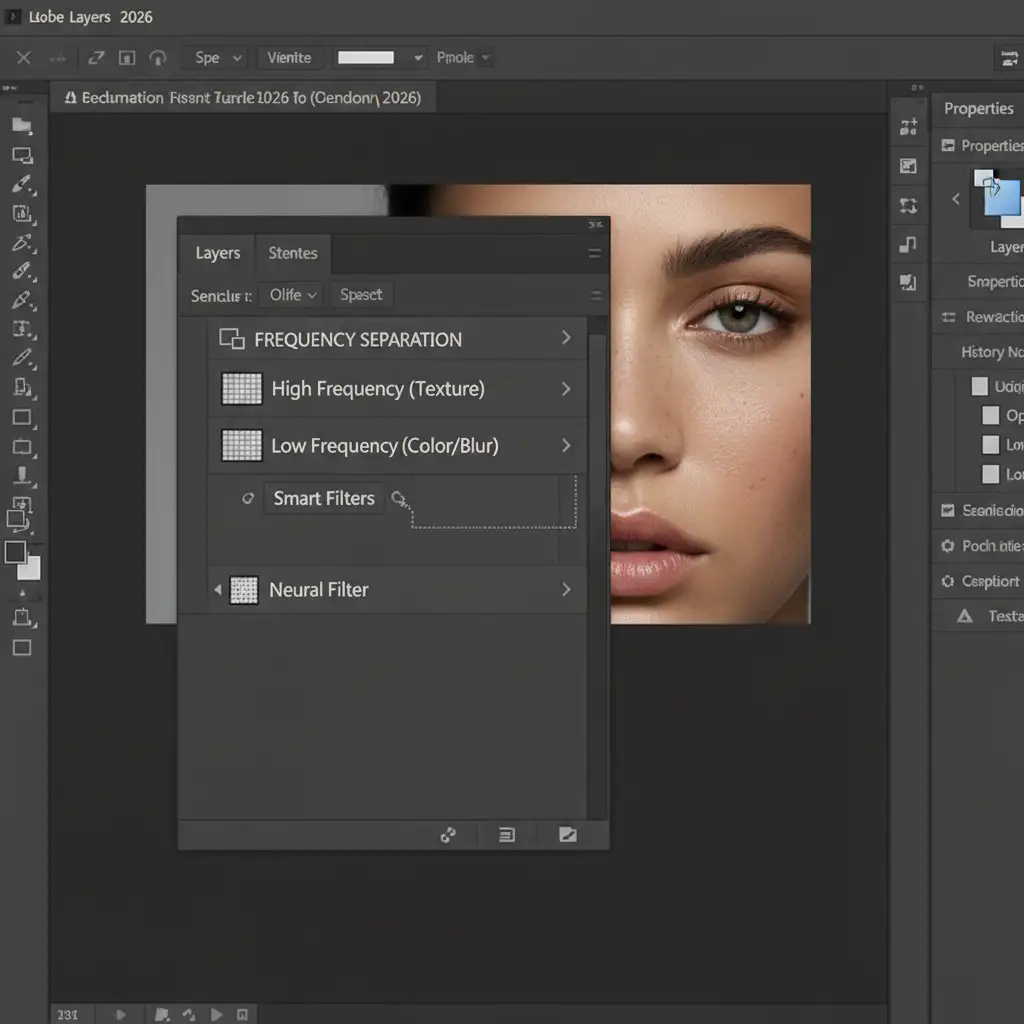
Method B: The Frequency Separation Workaround (Pro)
For high-end beauty, fashion, or editorial retouching, you need absolute control. The professional workaround is to run the Neural Filter inside a Frequency Separation action.
- Run your standard Frequency Separation action to split your image into a High-frequency layer (Texture) and a Low-frequency layer (Color/Blur).
- Select your Low-frequency layer and convert it to a Smart Object (this ensures non-destructive editing and utilizes GPU acceleration).
- Go to Filter > Neural Filters and apply the Skin Smoothing filter only to this low-frequency layer.
Because the Neural Filter is only affecting the underlying color and tone variations, your High-frequency layer remains completely untouched. The original micro-pores sit safely on top of the newly smoothed skin tones.
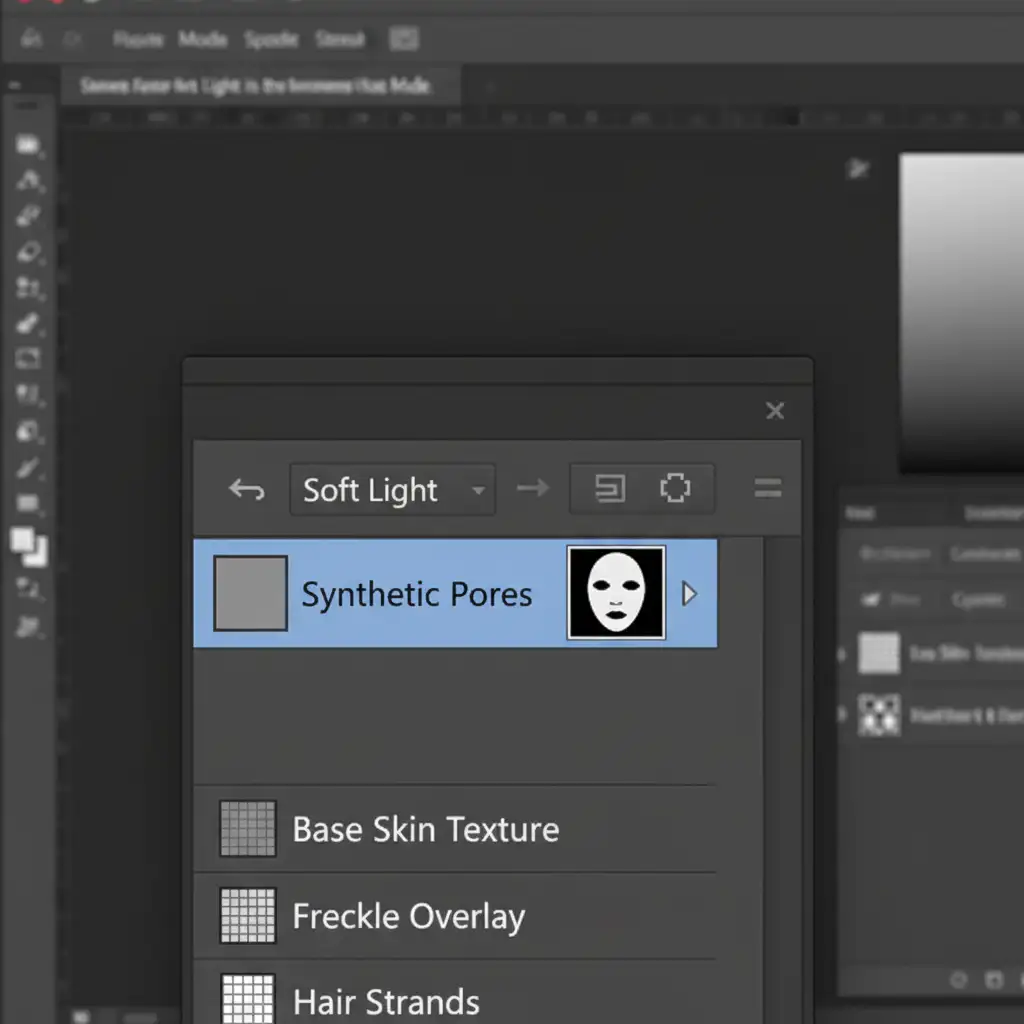
Method C: Generating Synthetic Micro-Pores (Advanced)
Sometimes the original image is too degraded, or the AI smoothing was baked into a flattened JPEG. In this scenario, the ultimate Photoshop Neural Filter skin texture loss fix is to generate synthetic skin texture.
- Create a New Layer (Ctrl/Cmd + Shift + N).
- Go to Edit > Fill and choose 50% Gray.
- Go to Filter > Noise > Add Noise.
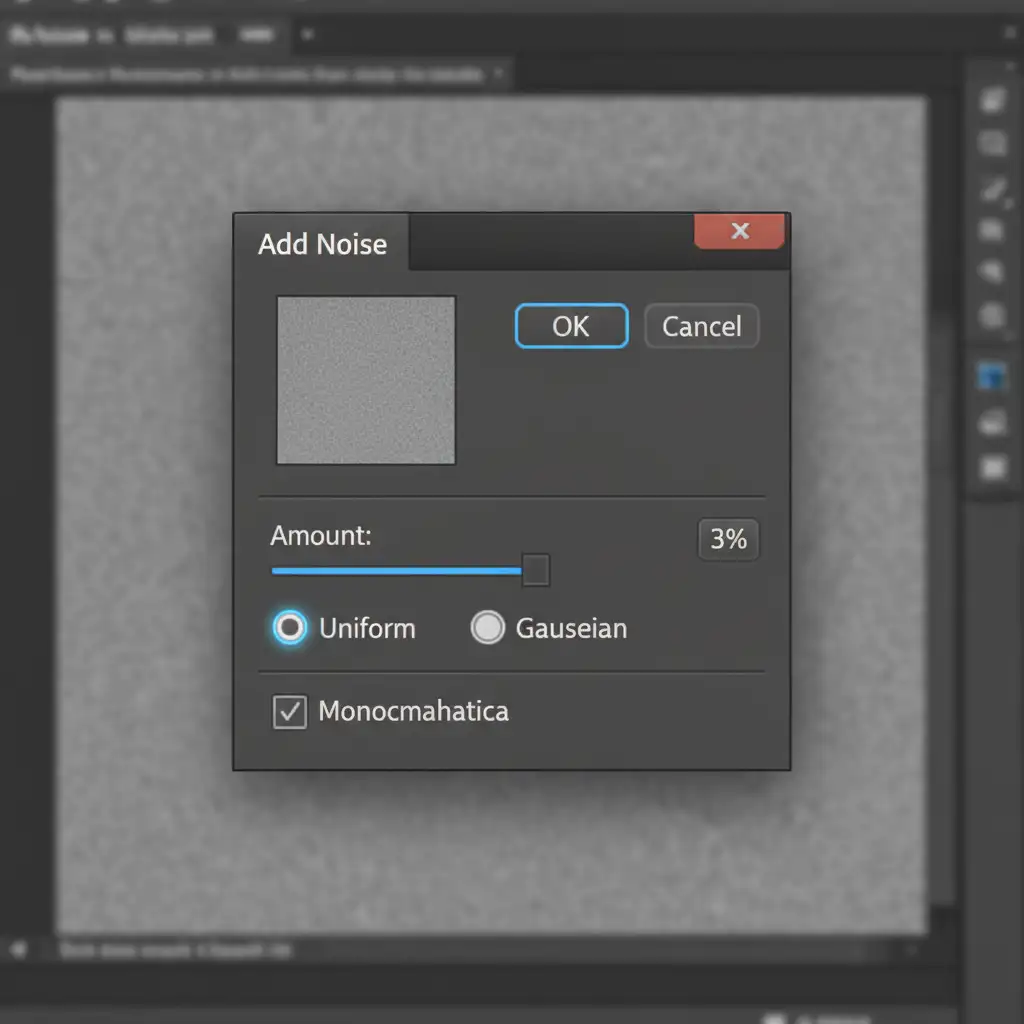
- Set the Amount to 3%, choose Uniform, and check the Monochromatic box. Click OK.
- To make the noise look like organic pores rather than digital static, go to Filter > Blur > Gaussian Blur and apply a subtle 0.3px blur.
- Change the layer’s Blend mode to Soft Light. This hides the gray and only displays the texture.
- Finally, use Layer Masking to paint the synthetic pores only over the skin, avoiding the eyes, lips, and hair.
Skip the Hassle: Let the Experts Handle Your Retouching
Mastering frequency separation, generating synthetic noise, and masking out high-frequency layers takes significant time—especially when you are processing hundreds of images from a single shoot. While the Photoshop 2026 Neural Filters promise speed, the manual cleanup required to fix the skin texture loss often negates the time saved.
Struggling to balance flawless skin with natural texture? Outsource your volume portrait editing to Image Work India and Cloud Retouch.
Our team of expert retouchers specializes in high-end, non-destructive editing workflows that guarantee flawless skin while maintaining 100% natural realism and micro-pore integrity. Whether it’s editorial beauty shots, wedding galleries, or commercial headshots, we deliver pixel-perfect results so you can focus on growing your photography business.


