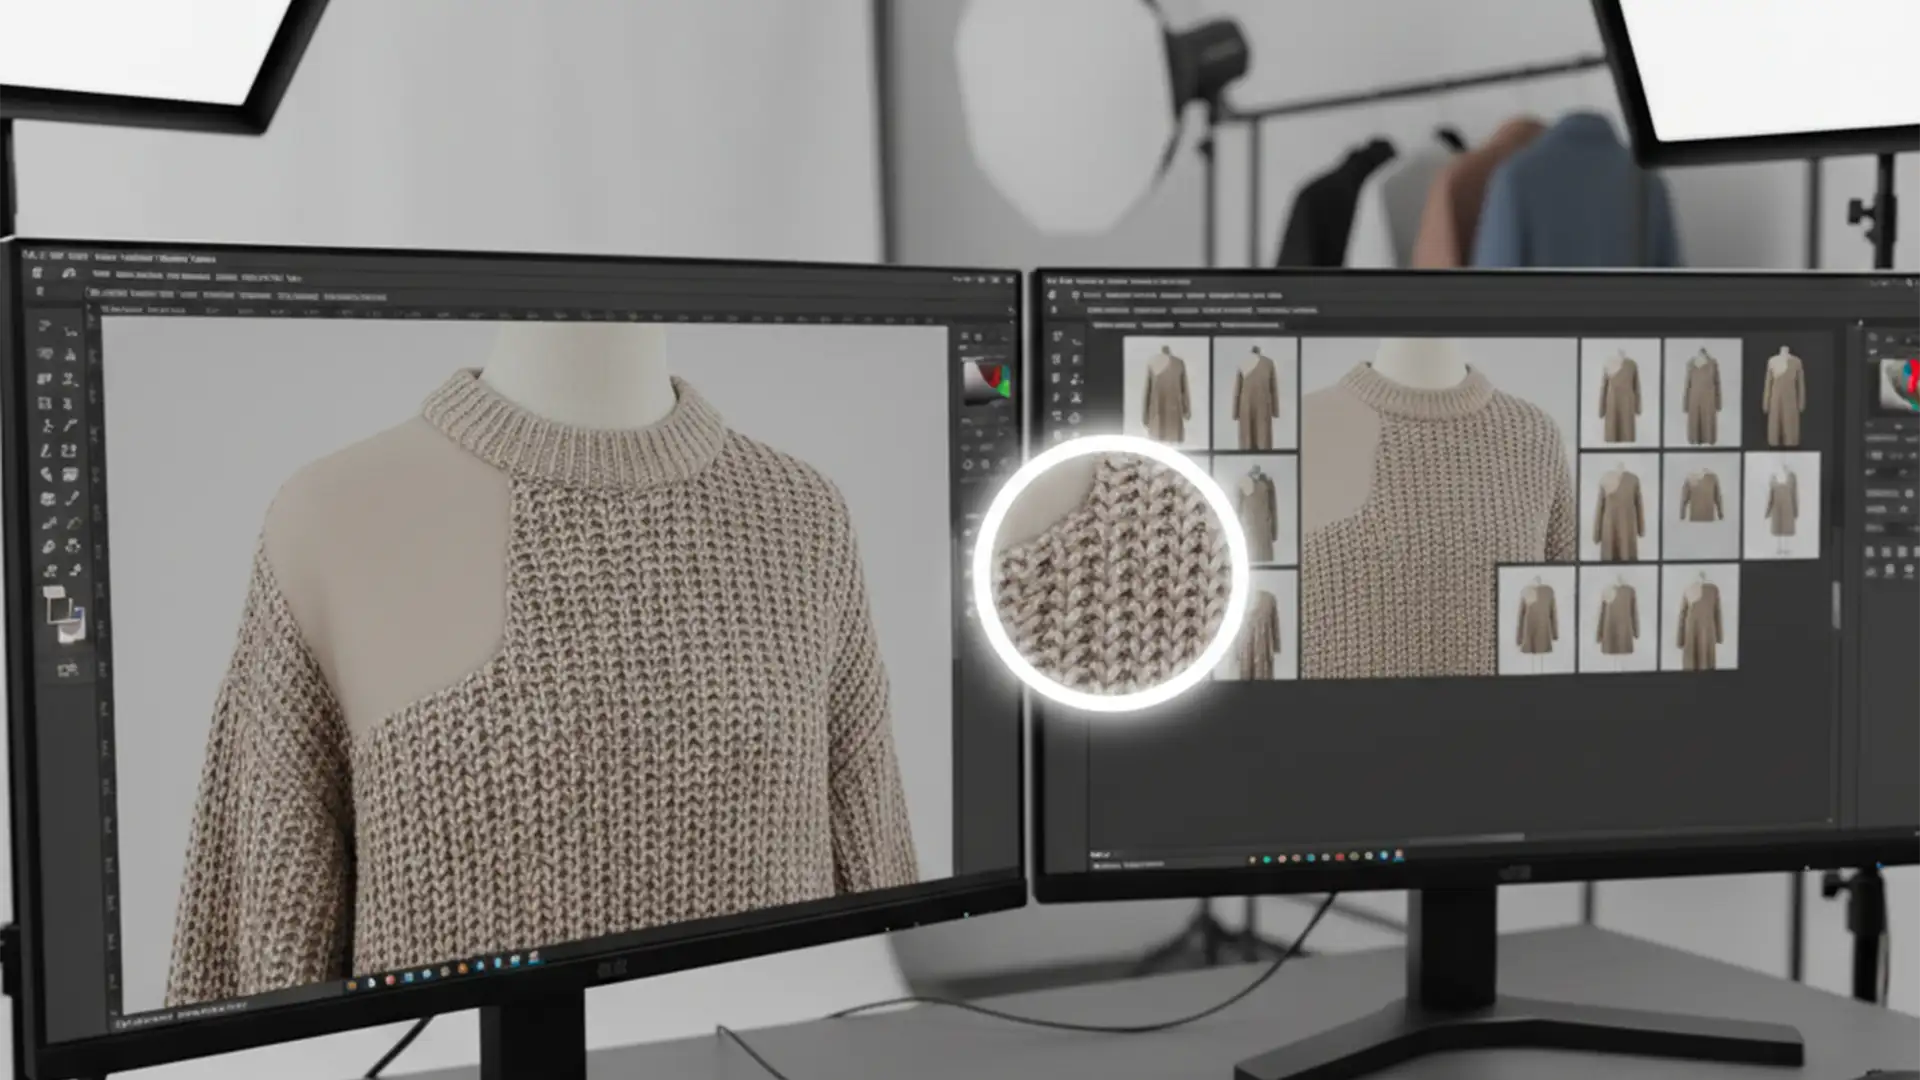
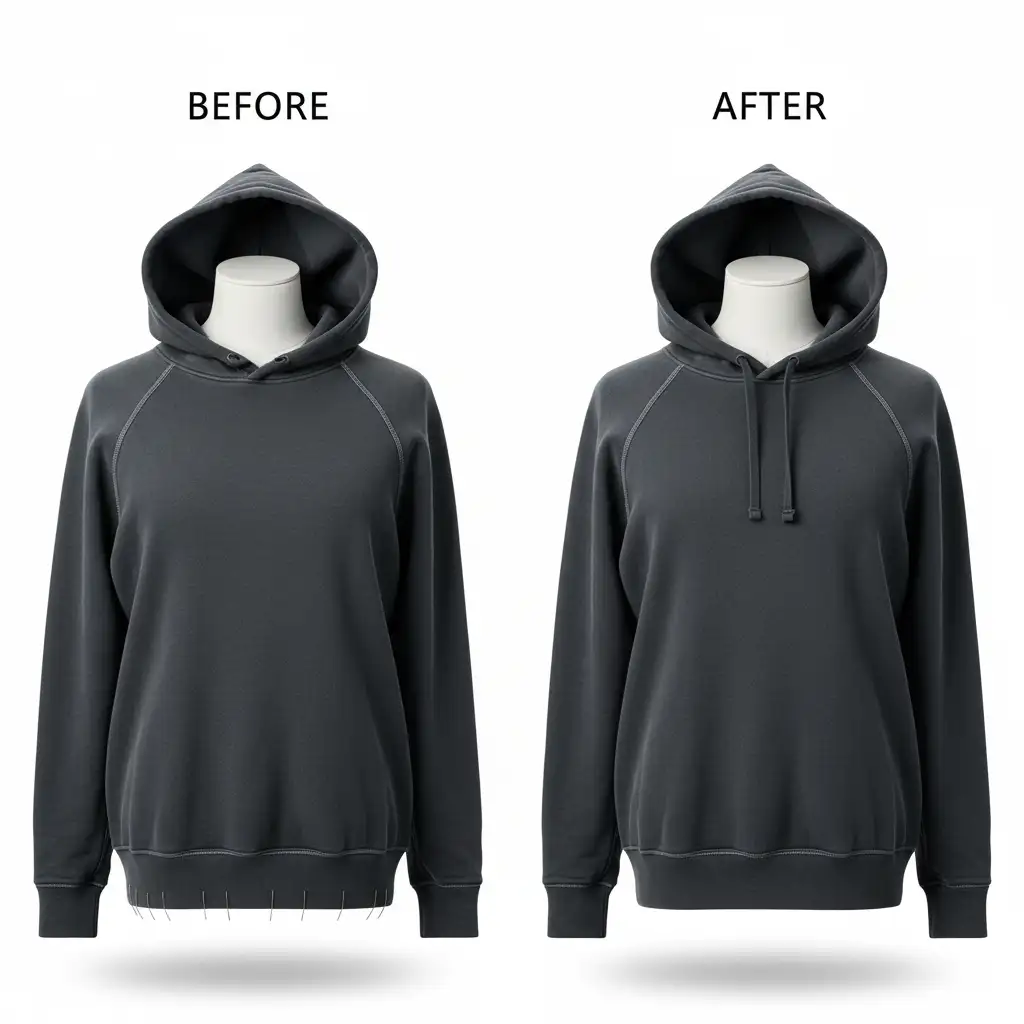
You’ve just used Photoshop’s Generative Fill to create a neck joint for a ghost mannequin shot. The shape looks perfect, but zooming in reveals a massive problem: the AI-generated area is completely smooth. It has obliterated the fabric weave, knit patterns, and microscopic textile noise, leaving a blurry, plastic-looking patch that instantly screams “fake.” For high-end e-commerce retouching, this loss of high-frequency detail guarantees client image rejections.
If you are looking for an effective AI Ghost Mannequin texture blurring fix, you are not alone. In Photoshop versions 24.5 through v25.x, the AI model simply cannot replicate complex fabric grain. Here is exactly how to restore that lost texture and save your product images.
Why Photoshop Generative Fill Blurs Fabric Textures
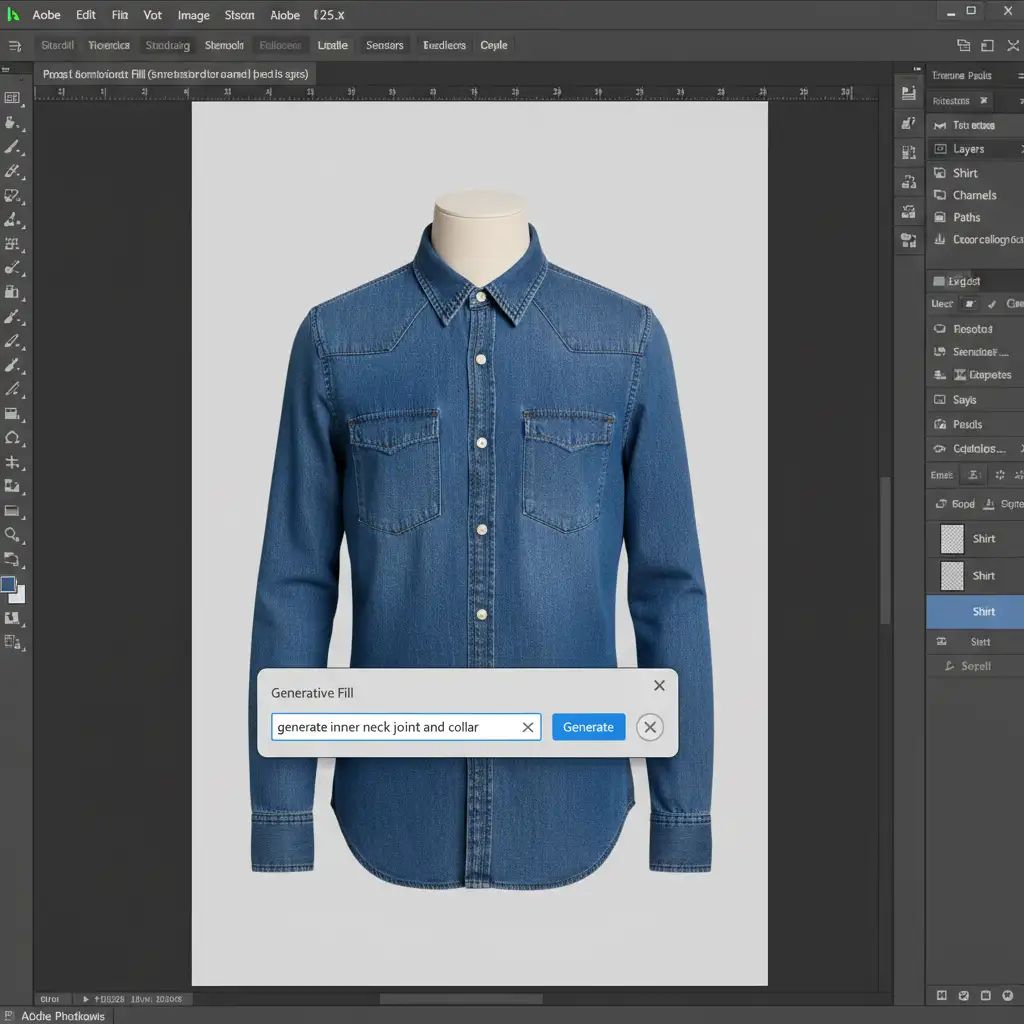
Generative Fill is a structural powerhouse for e-commerce retouching. It excels at building the missing inner back of a shirt or the collar curve of a jacket. However, the AI models powering Photoshop currently prioritize broad shapes and lighting over micro-textures.
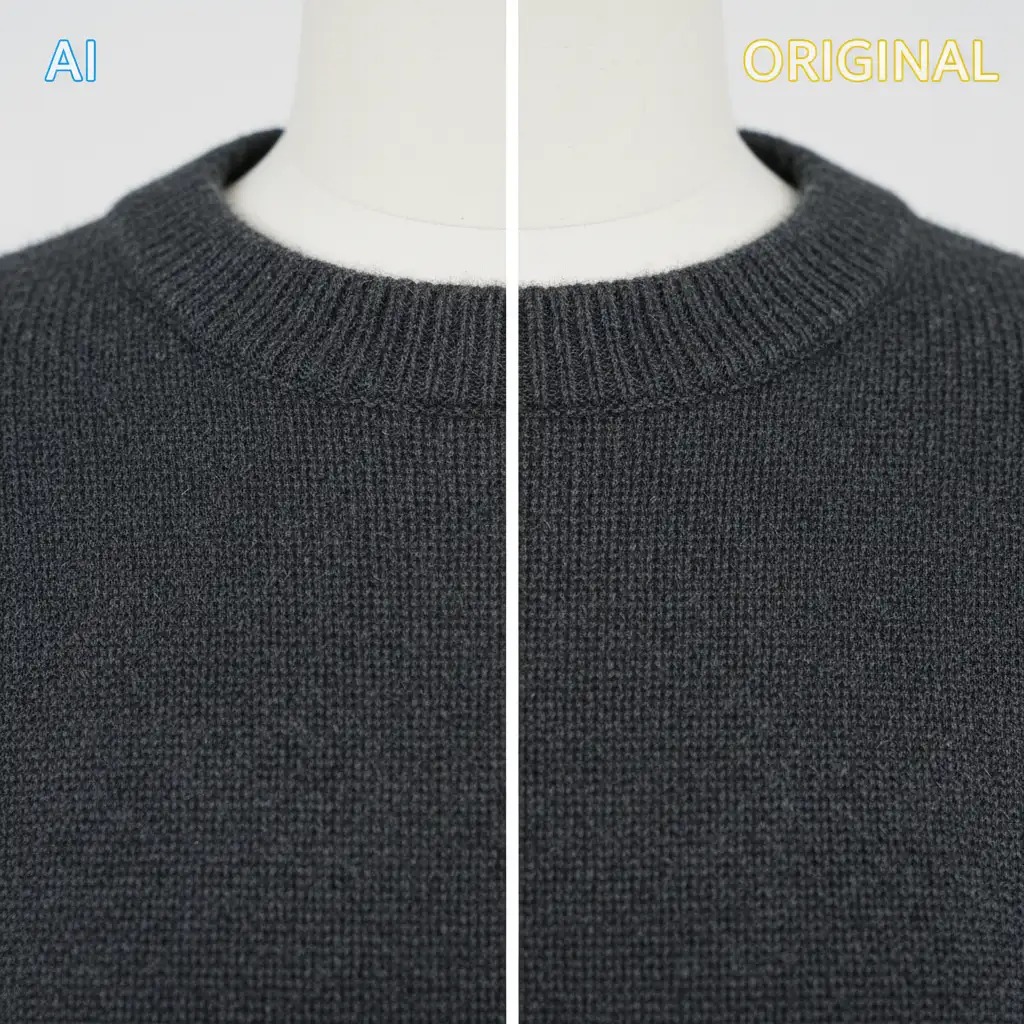
When you apply Generative Fill to a high-resolution apparel shot, the AI fails to generate the specific high-frequency detail of the garment. The result is a jarring contrast between the sharp, natural fabric of your original photograph and the unnaturally smooth, blurred output of the AI neck joint. To pass quality control, you must bridge this gap using a hybrid workflow that combines modern AI generation with traditional texture mapping.
3 Professional Methods for the AI Ghost Mannequin Texture Blurring Fix
Depending on the complexity of the garment—from a simple cotton t-shirt to a heavy cable-knit sweater—you will need varying levels of texture restoration. Here are the three industry-standard methods to fix AI texture blurring.
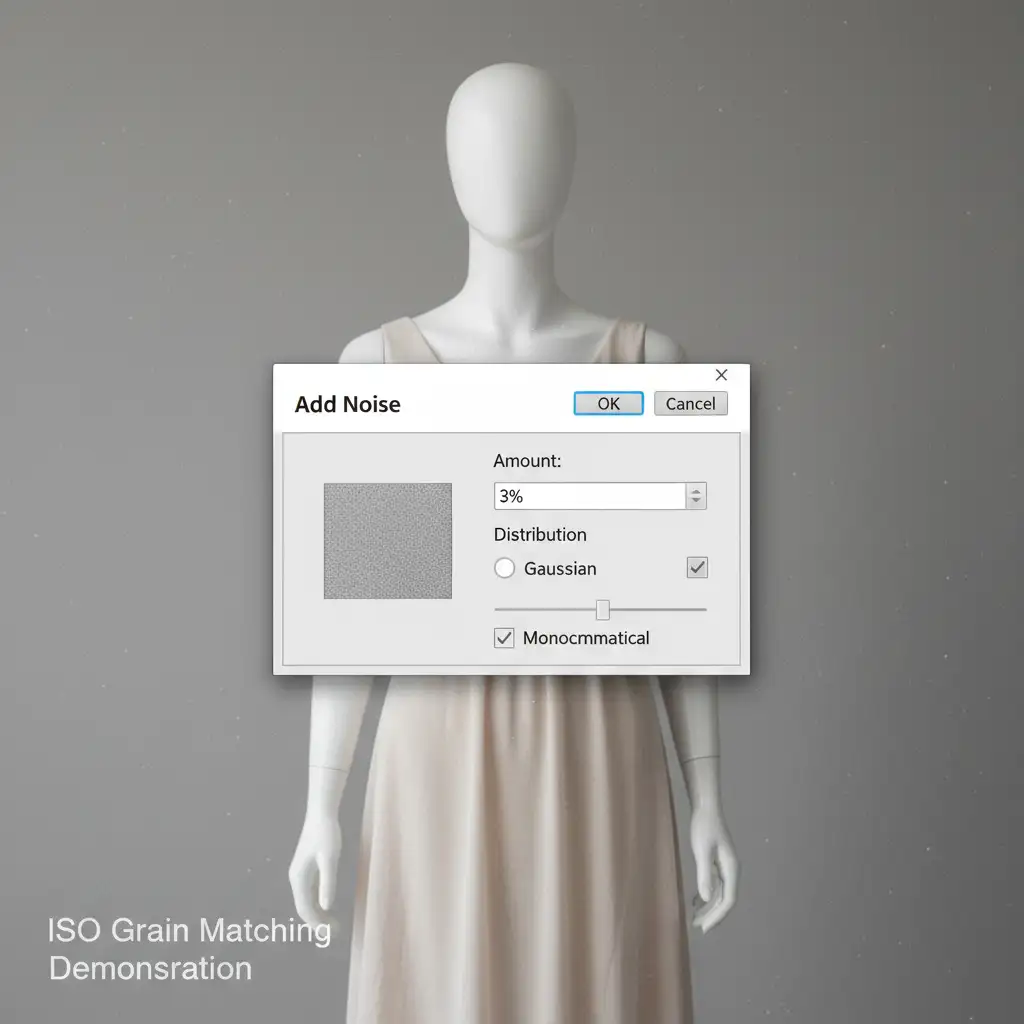
Method 1: The Quick Fix (Noise Matching)
Best for: Smooth fabrics like silk, polyester, or fine cotton where the primary missing element is camera ISO grain.
When the AI output is structurally sound but looks “too clean,” you need to reintroduce digital noise to match the original photograph’s fabric grain.
- Select your AI-generated neck joint layer.
- Create a new blank layer directly above it.
- Fill this new layer with 50% Gray (Edit > Fill > 50% Gray).
- Change the layer’s Blend Mode to Overlay.
- Navigate to Filter > Noise > Add Noise.
- Check the Monochromatic and Gaussian boxes.
- Carefully adjust the amount slider (usually between 1% and 4%) until the grain on the AI neck joint perfectly matches the natural grain of the garment.
Method 2: The Pro Workaround (Frequency Separation)
Best for: Complex knits, denim, and heavily textured apparel where physical weave patterns must be restored.
Frequency Separation allows you to separate the color and lighting of an image from its physical texture, giving you total control over the AI Ghost Mannequin texture blurring fix.
- Duplicate your original garment layer twice. Name the bottom duplicate “Color (Low)” and the top duplicate “Texture (High)”.
- Apply a Gaussian Blur to the “Color” layer until the fabric texture disappears.
- Apply the Apply Image command to the “Texture” layer (subtracting the Color layer) and set its blend mode to Linear Light.
- The Hybrid Step: Run Generative Fill strictly on the Color (Low) layer to build the shape and lighting of the neck joint.
- Select the Texture (High) layer. Using the Clone Stamp tool, sample sharp fabric texture from the chest or back of the original garment and clone it directly over the smooth AI-generated neck joint.
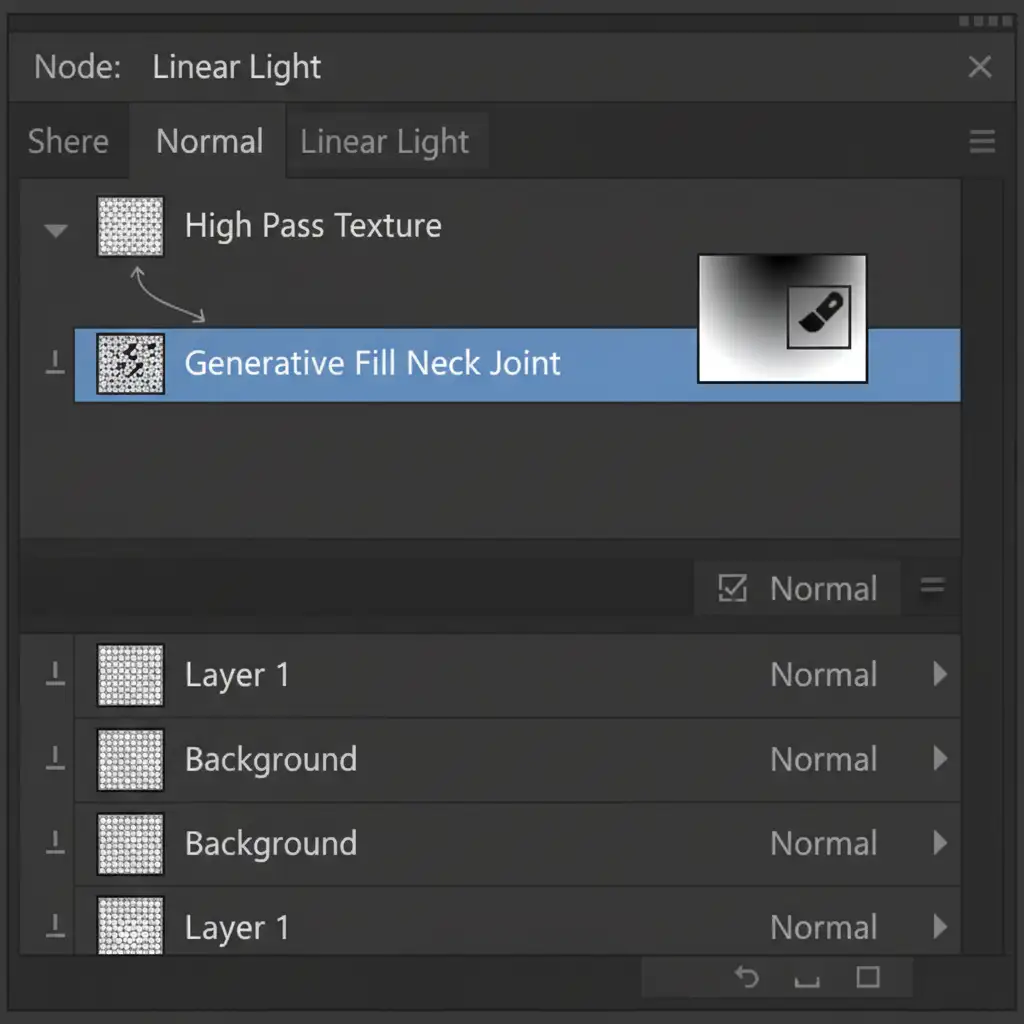
Method 3: The Technical Deep-Dive (High Pass Overlay)
Best for: Volume e-commerce retouching where speed and high-frequency detail accuracy are equally critical.
If Frequency Separation feels too slow for bulk orders, the High Pass Filter method provides a rapid, non-destructive way to map real fabric texture over AI generation.
- Use the Lasso tool to select a highly textured section of the original garment (like the chest). Copy and paste this onto a new layer above your Generative Fill layer.
- Desaturate the copied texture layer (Cmd/Ctrl + Shift + U) to remove its color data.
- Navigate to Filter > Other > High Pass. Set the radius between 2.0 and 4.0 pixels to isolate the high-frequency detail (the threads and weave).
- Change this layer’s Blend Mode to Linear Light.
- Create a Clipping Path by holding Alt/Option and clicking between the High Pass layer and the Generative Fill layer. This forces the texture to only appear inside the AI neck joint.
- Apply a soft Layer Mask to gently blend the seams where the new texture meets the original collar.
Perfecting Your E-commerce Retouching Workflow
By mastering these blend modes and texture isolation techniques, you can confidently use Generative Fill to speed up your ghost mannequin creation without sacrificing the photorealistic quality expected in high-end e-commerce retouching. The key is never relying on the AI to finish the job—use it to build the foundation, and use your technical skills to restore the reality.
Stop Fighting the AI: Let the Experts Handle Your E-commerce Retouching
Fixing AI errors on a single image is manageable. Repeating this complex AI Ghost Mannequin texture blurring fix across a seasonal catalog of 5,000 garments is a massive drain on your time and resources.
Struggling with inconsistent AI edits and blurry textures? Outsource your volume apparel editing to Image Work India and Cloud Retouch. Our expert retouchers combine advanced AI workflows with meticulous manual texture mapping to deliver pixel-perfect, realistic ghost mannequin composites. We guarantee sharp high-frequency details, flawless clipping paths, and natural fabric grain—delivered overnight.
Contact Image Work India today to streamline your e-commerce retouching pipeline and get your products online faster.


