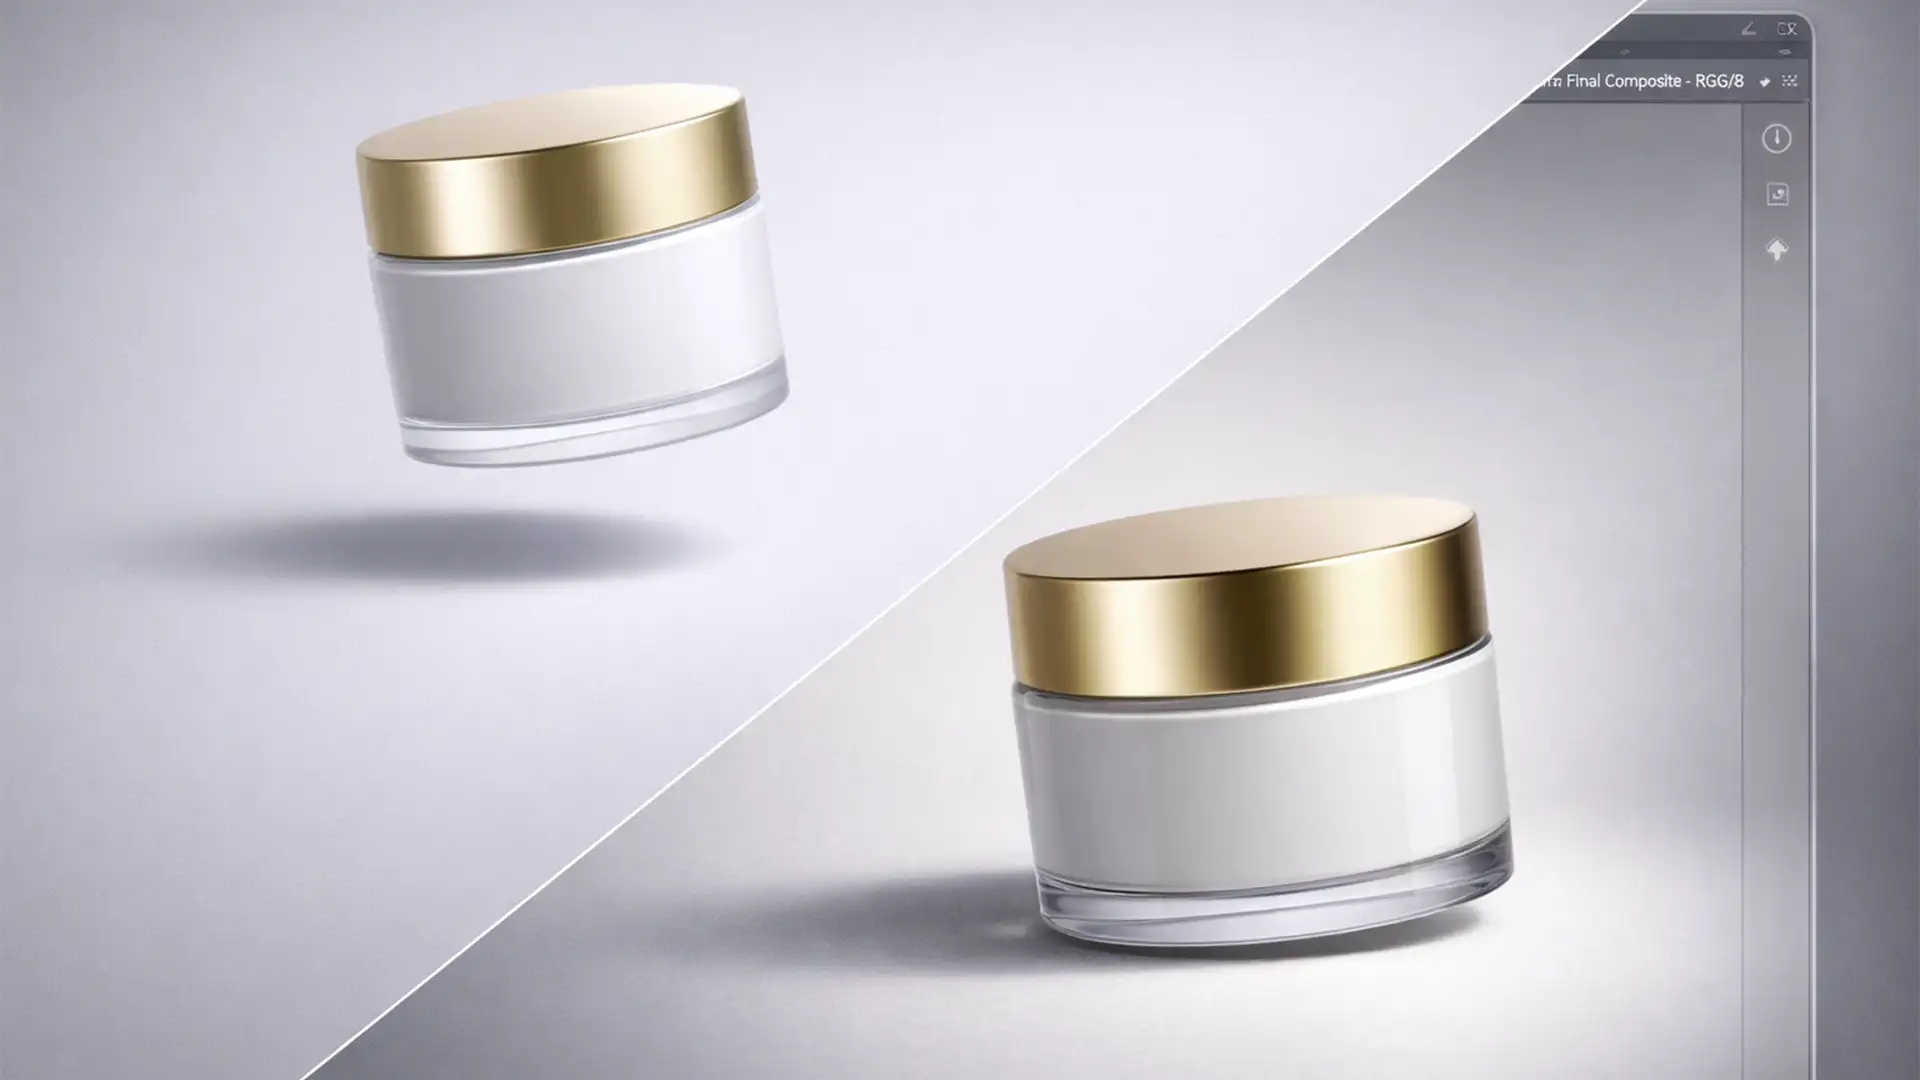
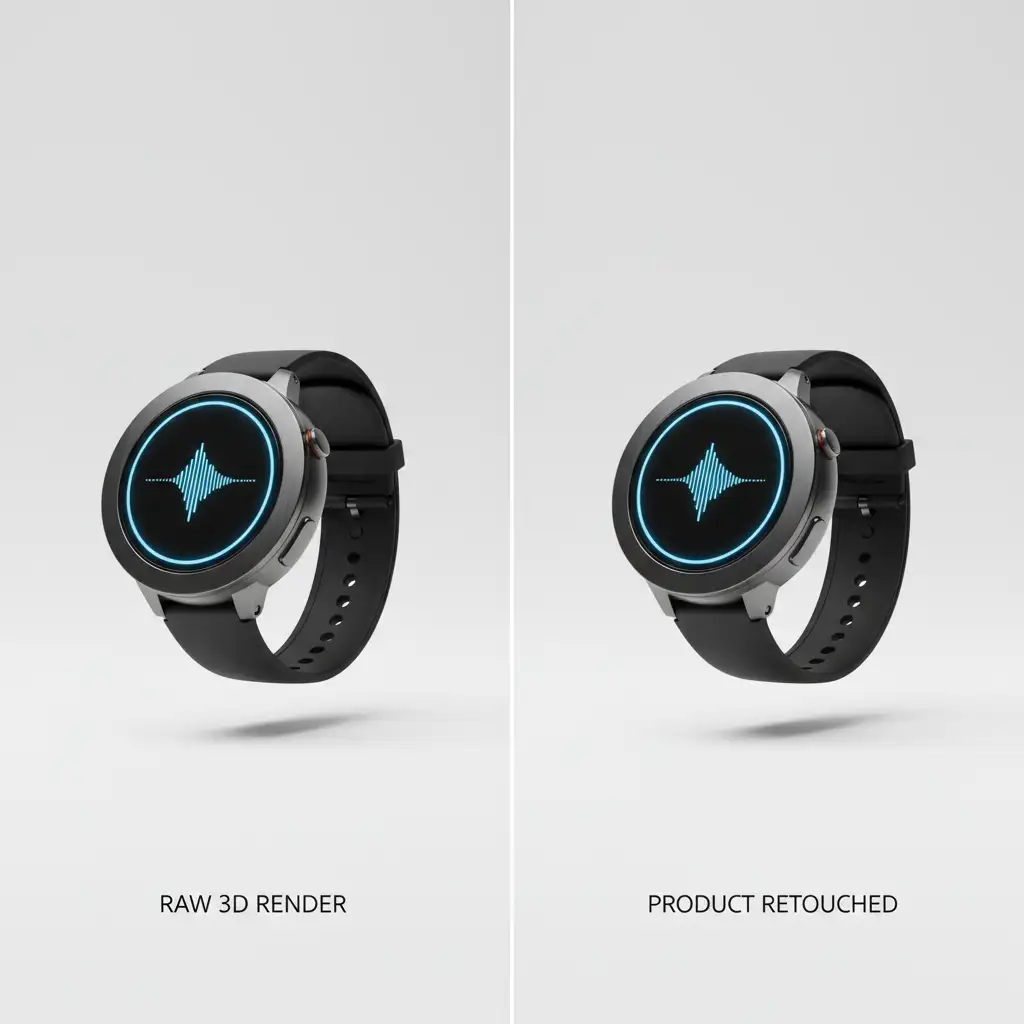
You just spent hours perfecting a 3D product render, but the final output still looks synthetic. The product appears to “float” above its background, feeling completely disconnected from the environment. Sound familiar?
The culprit isn’t your textures or your main lighting setup—it’s the absence of accurate micro-shadowing. Relying solely on standard drop shadows is a rookie mistake that leaves high-end products looking flat. To bridge the gap between a basic digital render and true photorealism, you need to master ambient occlusion shadows for 3D rendered products.
In this technical guide, we will explore how to ground your products using Photoshop (v25.x+), moving beyond basic drop shadows to create the soft, realistic contact shadows that define luxury retouching.
Understanding Ambient Occlusion vs. Drop Shadows
A standard drop shadow only simulates how an object blocks a direct light source. Ambient Occlusion (AO), on the other hand, is a shading technique that calculates how exposed each point in a scene is to ambient lighting. It creates the subtle, dark contact shadows found in crevices, tight corners, and exactly where the product touches the floor.
Without AO, you lack global illumination accuracy. With it, your product suddenly gains weight, depth, and undeniable photorealism.
Method A: The Quick Fix (Manual Contact Shadows)
If you don’t have access to the original 3D project files, you can manually paint contact shadows in Photoshop. This requires a delicate touch to avoid muddying the product’s true colors.
Step-by-Step Manual Shading:
- Create the Shadow Layer: Add a new blank layer beneath your main product layer.
- Set the Blend Mode: Change this new layer’s blend mode to Multiply. This ensures your shadows darken the background naturally without looking like gray paint.
- Configure Your Brush: Select the Brush Tool (B). You need extreme subtlety here.
- Paint the Contact Points: Using pure black, carefully paint directly under the points where the product touches the surface. Keep your strokes tight to the base.
- Refine Opacity: Drop the layer opacity to between 30% and 45% for a subtle, grounded effect.

Method B: The Pro Workaround (Compositing an AO Pass)
For high-end e-commerce and luxury campaigns, manual painting isn’t enough. The industry standard is to generate a dedicated AO Pass directly from your 3D software (such as Blender, Maya, or Cinema4D) and composite it in Photoshop.
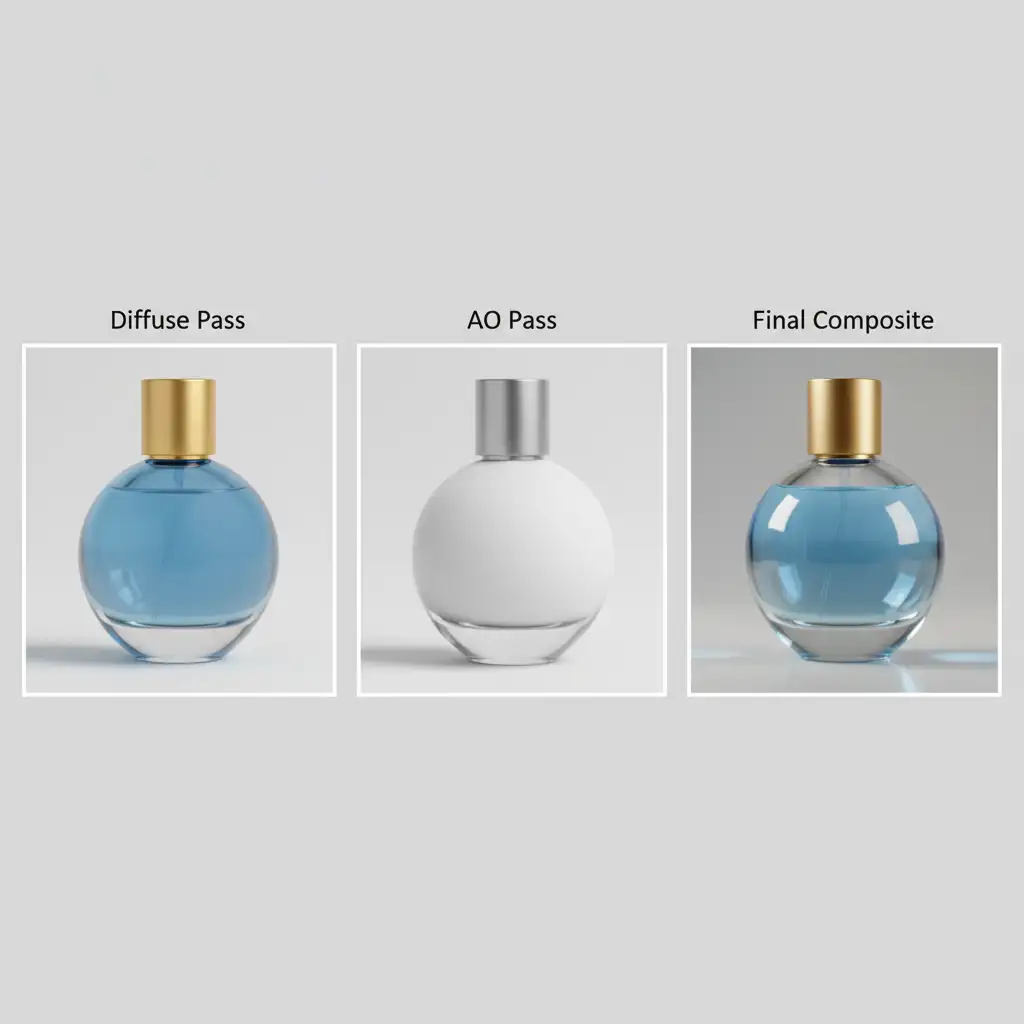
The Rendering Pipeline
A professional workflow utilizes multiple render passes. You will typically combine a Diffuse Pass (base color), an AO Pass (grayscale shadow map), and specular/reflection passes to build the final image.
Compositing the AO Pass in Photoshop
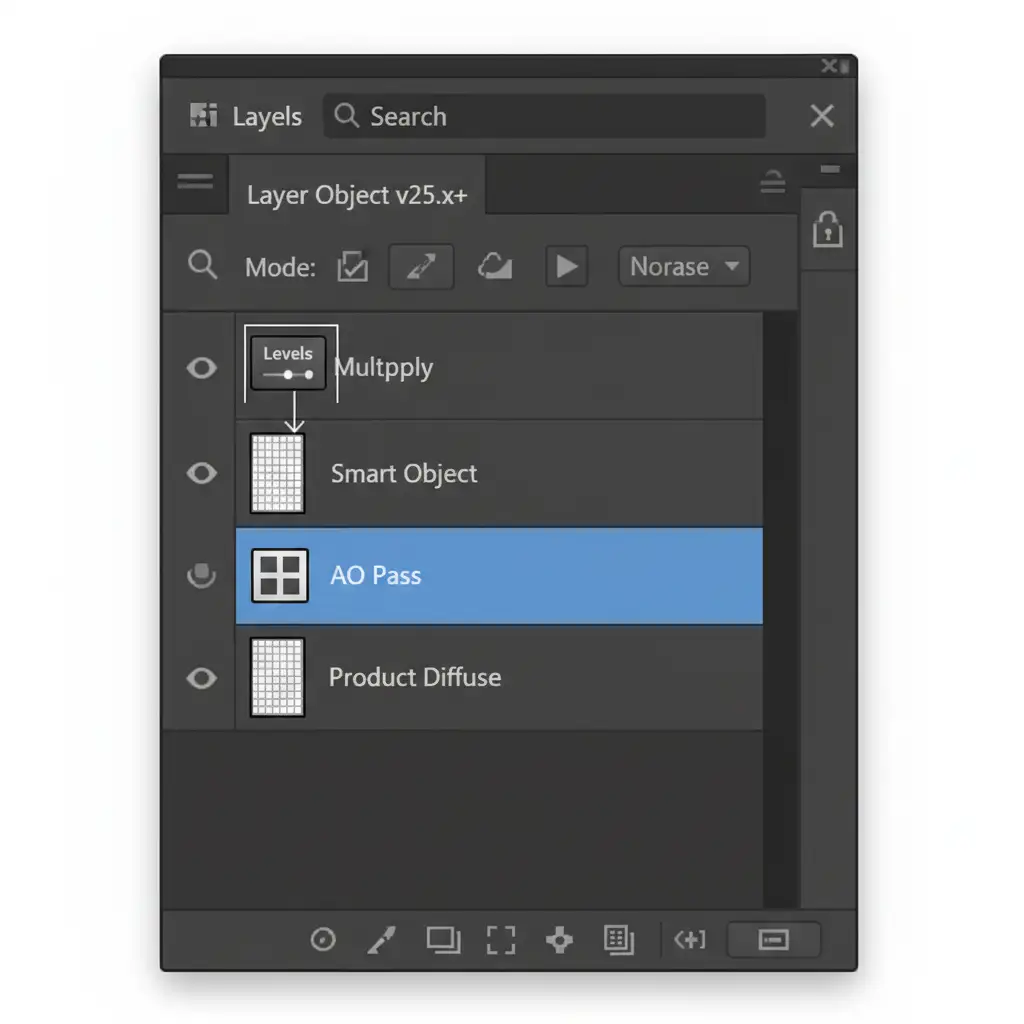
- Import as a Smart Object: Drag your grayscale AO render into your Photoshop document and place it directly above your diffuse product layer. Keeping it as a Smart Object preserves its original resolution.
- Apply Multiply Blend Mode: Change the AO layer’s blend mode to Multiply. The white areas will become transparent, while the dark crevices will perfectly overlay your product.
- Fine-Tune with Clipping Masks: AO passes are often too dark or muddy out of the box. Add a Levels adjustment layer above the AO pass. Right-click and select “Create Clipping Mask” (or Alt-click between the layers).
- Adjust Contrast: Tweak the Levels sliders to pull back the midtones and highlights, restricting the AO darkening effect strictly to the deepest contact points.
Method C: The Technical Deep-Dive (Simulating AO on Flat 2D Images)
What if you are retouching a flat 2D photograph or a merged 3D render where you cannot extract an AO pass? You can mathematically simulate ambient occlusion using Photoshop’s High Pass filter and advanced layer masking.
The “High Pass Invert” Technique:
- Duplicate and Desaturate: Duplicate your main product layer (Ctrl/Cmd + J) and completely desaturate it (Ctrl/Cmd + Shift + U).
- Apply High Pass: Go to Filter > Other > High Pass. Set the radius to around 50px. This isolates the edge contrast and structural crevices of the product.
- Invert the Layer: Press Ctrl/Cmd + I to invert the High Pass layer. The edges and crevices will now appear dark, while the flat surfaces turn light gray.
- Blend and Restrict: Set this layer’s blend mode to Multiply.
- Utilize Blend If: To prevent the gray areas from dirtying your product’s highlights, double-click the layer to open Layer Styles. Use the Blend If sliders (Underlying Layer) to seamlessly mask out the lighter tones, forcing the simulated AO shadows strictly into the darkest crevices.
Elevate Your Visuals with Image Work India
Mastering ambient occlusion shadows for 3D rendered products is the definitive line between amateur graphics and luxury, photorealistic imagery. Whether you are generating complex render passes or manually reconstructing contact shadows via Blend If and Multiply blend modes, the attention to micro-details is what sells the product to the consumer.
Don’t have the time or technical bandwidth to perfect your rendering pipeline? Elevate your e-commerce and marketing visuals today. Hire Image Work India and Cloud Retouch for expert 3D product rendering and high-end retouching. Our specialized team understands the exact science of global illumination, delivering flawless, photorealistic results that drive conversions.
[Contact us today to transform your product imagery.]


