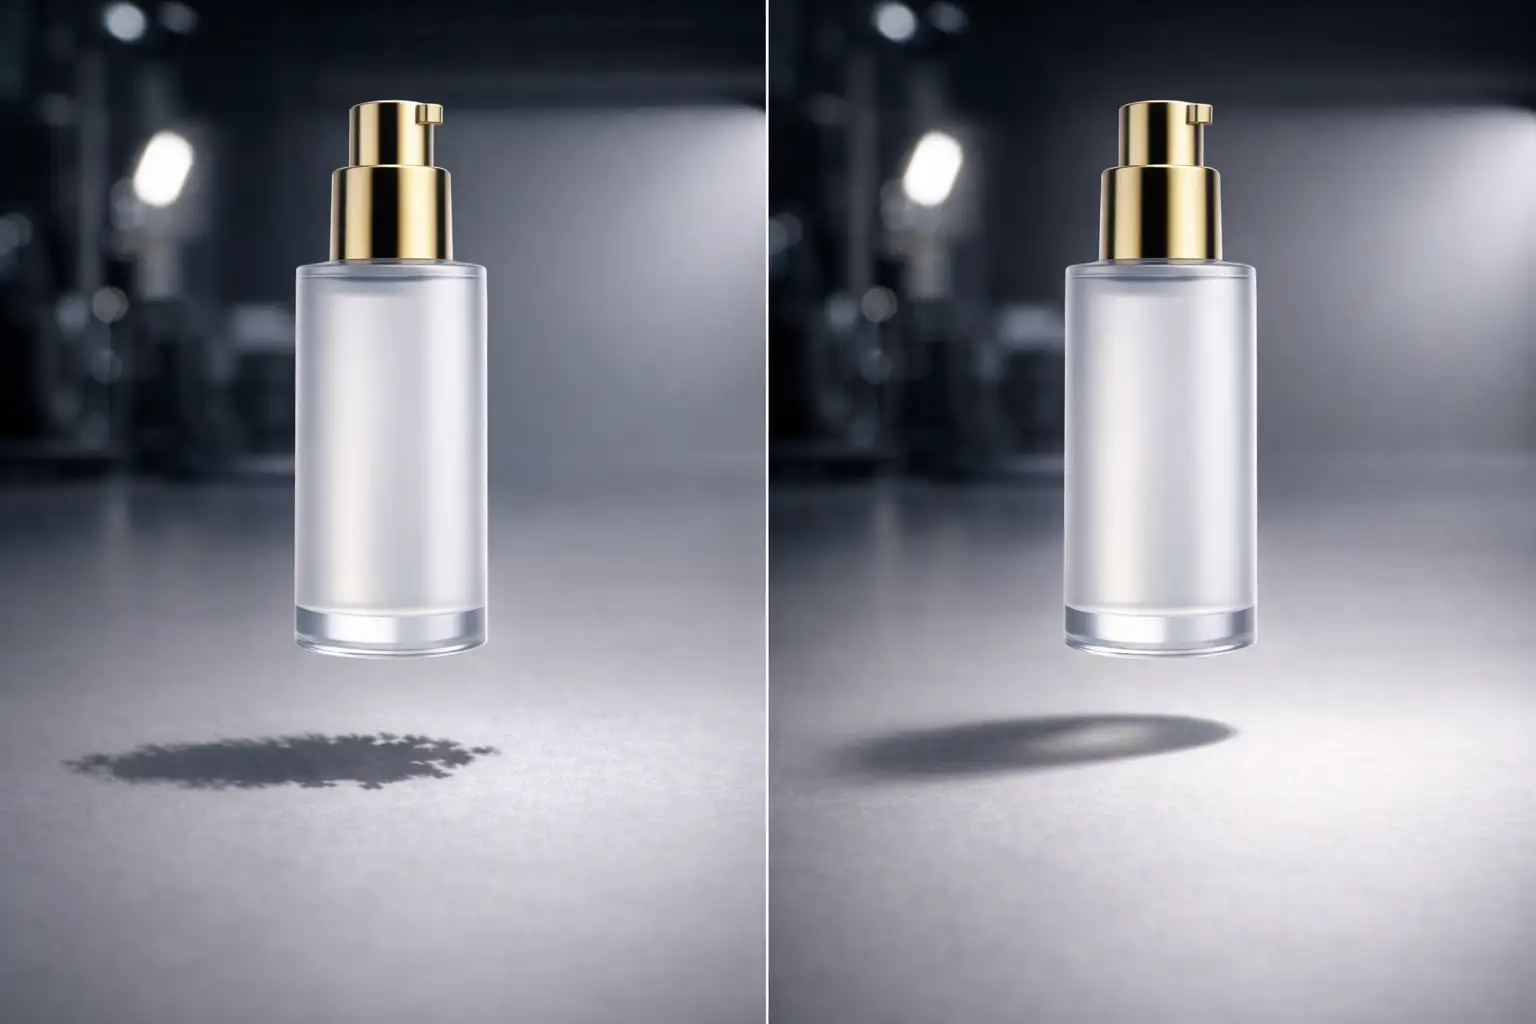
You’ve just used Photoshop’s Generative Fill to extend a background or add a prop to your product photo. The texture looks great, but something is glaringly wrong: the object looks like it’s floating.
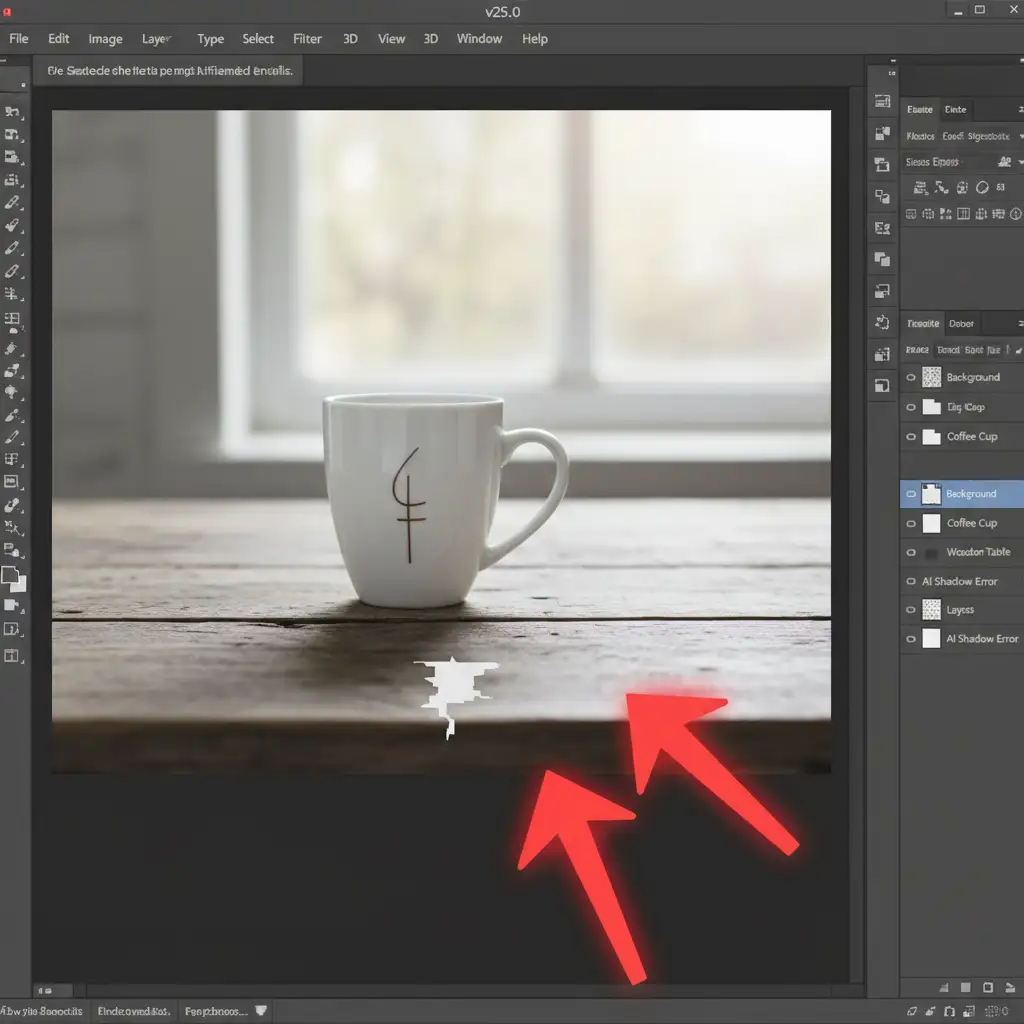
In Adobe Photoshop v25.0 and newer, the Firefly AI model often struggles with 3D spatial awareness and light directionality. The result? Messy, patchy pixelation and floating shadow artifacts that instantly ruin the realism of your composite. If you are tired of AI prioritizing texture matching over accurate photometric rendering, you are in the right place. Let’s explore exactly how to fix AI generative fill shadow artifacts and ground your images like a professional.
Why Does Generative Fill Struggle with Shadows?
When generating objects or extending plates, Adobe’s Firefly model is incredibly skilled at matching the surrounding grain and texture. However, it lacks true physics-based lighting simulation. Because it doesn’t understand the exact 3D spatial geometry of your scene, it frequently produces AI artifacts at the base of generated elements.
Instead of a grounded contact shadow, you get a blurry, directionless dark patch. To achieve commercial-grade results, you must manually override these AI errors.
3 Professional Methods for Fixing AI Generative Fill Shadow Artifacts
Depending on your timeline and the complexity of the scene, there are three distinct ways to correct these lighting inconsistencies.
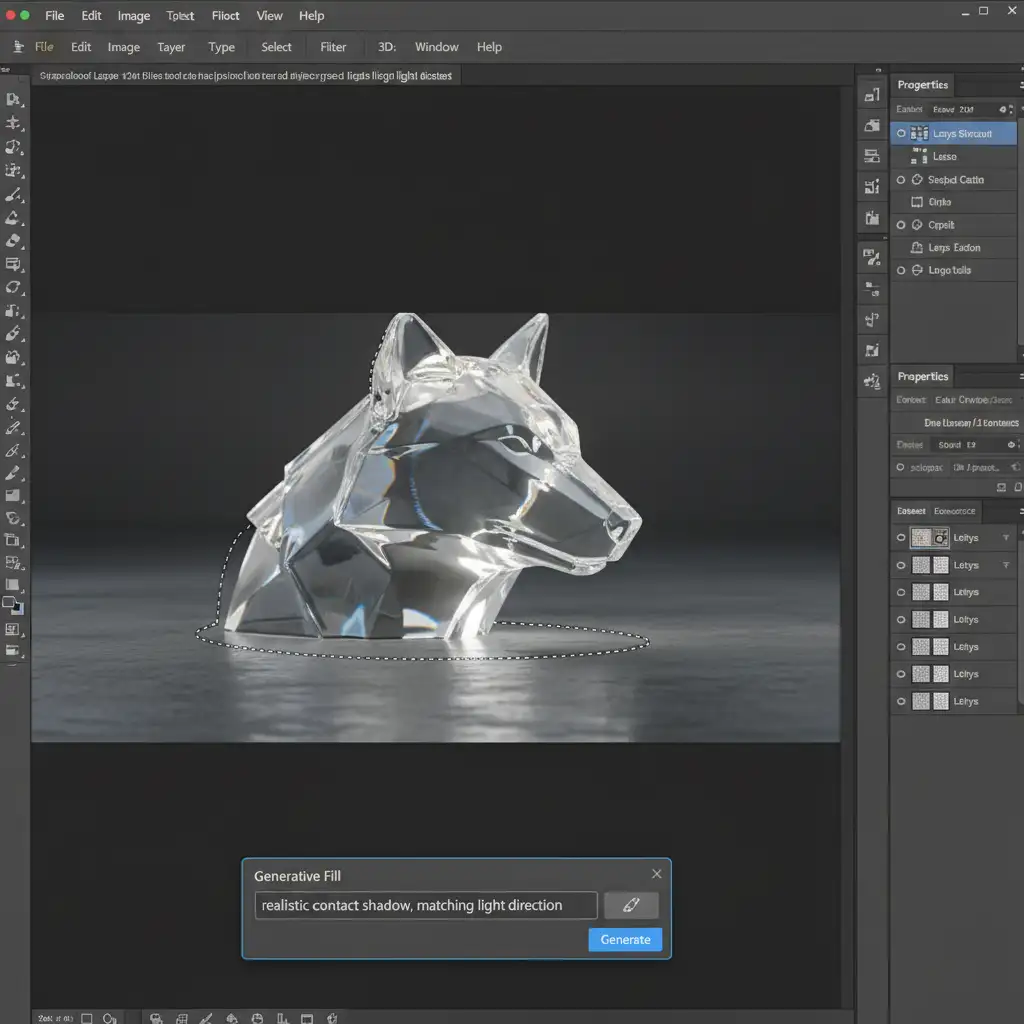
Method 1: The Quick Fix (Targeted Prompting)
If you are on a tight deadline, you can force the AI to correct its own mistake by isolating the problem area.
- Select the Lasso Tool.
- Draw a tight selection only around the immediate base of the floating object where it should meet the floor.
- Open the Generative Fill text box.
- Prompt: “realistic contact shadow, matching light direction”.
By restricting the generation area, you prevent the Firefly model from trying to redraw the entire object and force it to focus solely on the cast shadow.
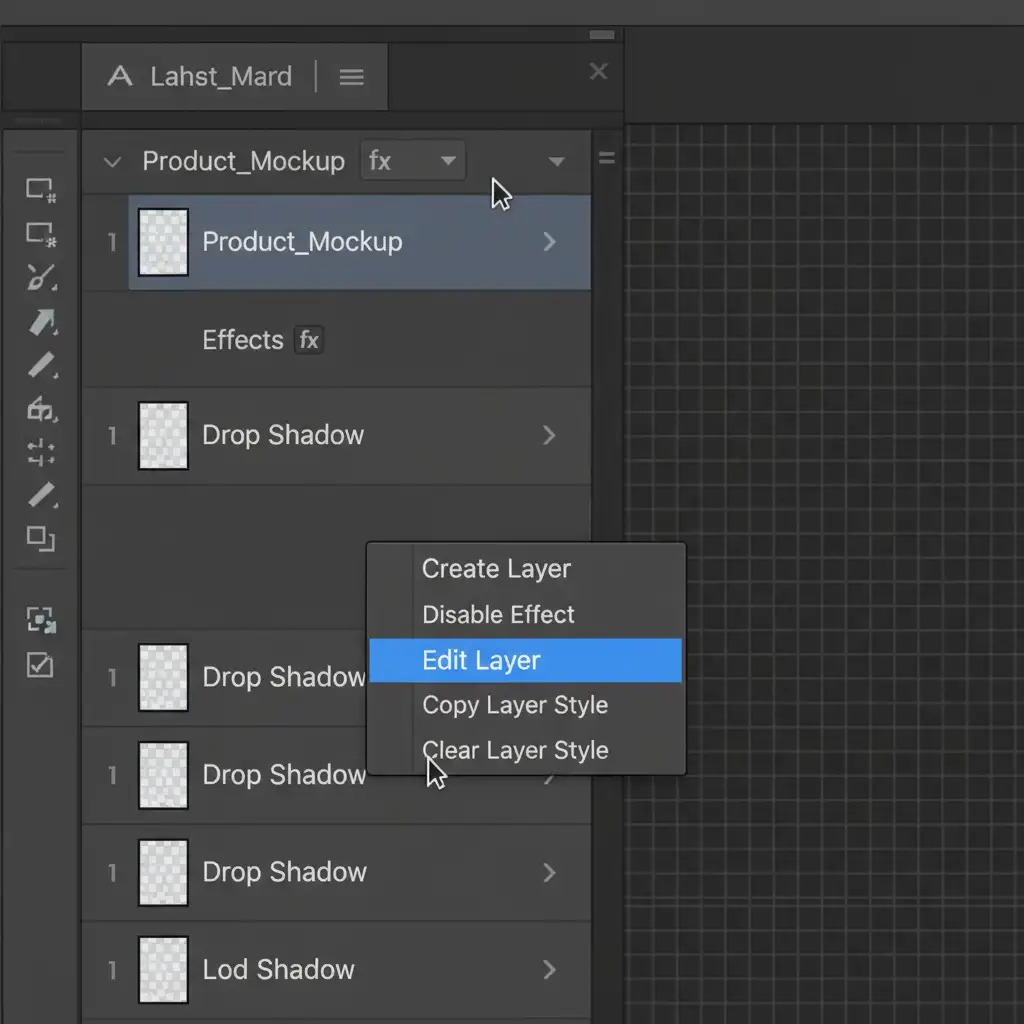
Method 2: The Pro Workaround (Extracted Drop Shadows)
When AI fails to understand the floor’s perspective, you can use traditional layer styles to build a custom, perspective-accurate shadow.
- Mask or extract your generated object onto its own layer.
- Double-click the layer to open the Layer Style dialog and apply a basic Drop Shadow.
- In the Layers panel, right-click the “Drop Shadow” effect text and select Create Layer. This detaches the shadow from the object, turning it into a standard pixel layer.
- Select the new shadow layer and use Free Transform (Ctrl/Cmd + T). Hold Ctrl/Cmd to drag the top anchor points down, matching the floor perspective and light direction.
- Apply a Gaussian Blur to soften the edges, and lower the layer opacity to blend it seamlessly into the environment.
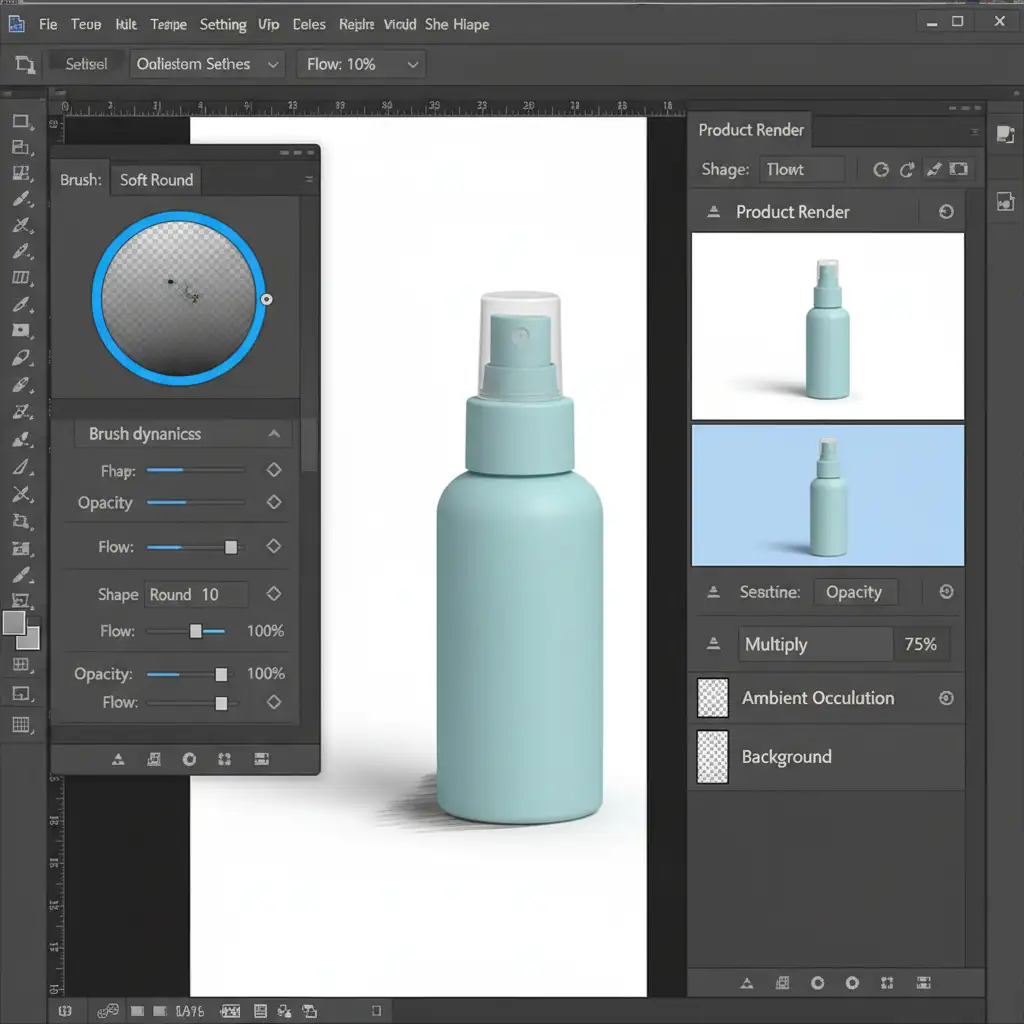
Method 3: The Technical Deep-Dive (Manual Painting)
For high-end e-commerce and commercial compositing, nothing beats manual digital painting. This method gives you absolute control over ambient occlusion and luminosity.
Step 1: Paint the Ambient Occlusion
Ambient occlusion is the darkest part of a shadow where two surfaces touch (e.g., the exact millimeter where a bottle sits on a table).
- Create a new layer below your object.
- Set the blending modes to Multiply mode.
- Select a soft round brush and lower the Flow to 10%.
- Carefully paint a very tight, dark line right at the base of the object.
Step 2: Build the Cast Shadow
- Create a second layer below the ambient occlusion layer, also set to Multiply.
- Using a much larger, softer brush (still at 10% flow), paint the softer, wider cast shadow extending away from the light source.
Step 3: Match Luminosity
Often, the generated object itself won’t match the lighting of your newly painted shadows. Add a Curves Adjustment layer above the object, right-click, and choose Create Clipping Mask. Adjust the curve to darken the base of the object so it seamlessly blends into your custom shadows.
The Final Result: Grounded and Professional
By utilizing targeted prompts, extracting layer styles, or mastering the Multiply blending mode, you can easily bypass the limitations of Adobe’s current AI models. Fixing AI generative fill shadow artifacts transforms a cheap-looking composite into a highly realistic, commercially viable image.

Don’t Let Bad Shadows Ruin Your Conversions
While these techniques are highly effective, they are also incredibly time-consuming—especially if you are processing hundreds of product photos for an e-commerce catalog. Poorly composited images with floating AI artifacts destroy customer trust and directly hurt conversion rates.
You don’t have to spend hours painting ambient occlusion by hand. Image Work India and Cloud Retouch specialize in pixel-perfect, commercial-grade photo retouching. Our team of expert retouchers understands the physics of light, ensuring every product is perfectly grounded, color-corrected, and ready to sell.
Whether you need to fix a handful of AI errors or require bulk shadow creation for an entire seasonal catalog, we deliver flawless results at scale. Contact Image Work India and Cloud Retouch today to elevate your product imagery and leave the technical retouching to the professionals.


