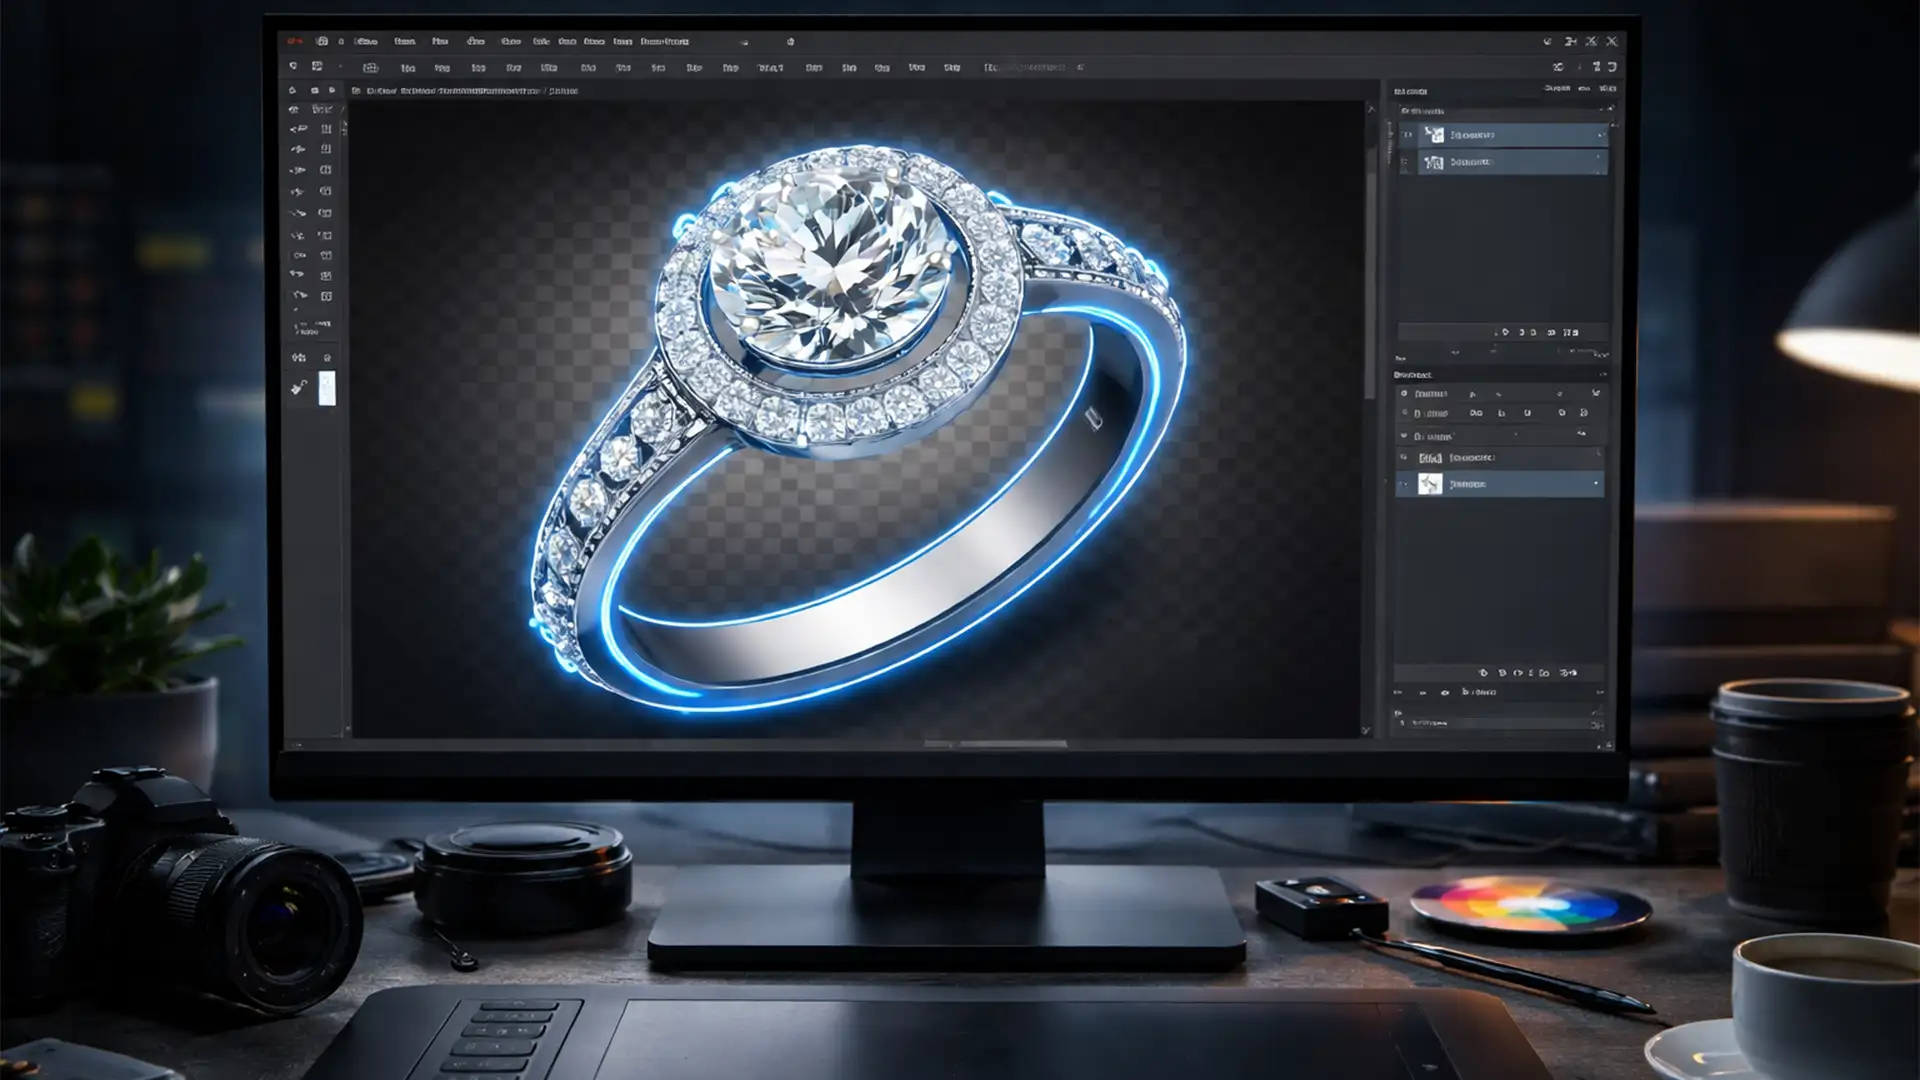
You just spent twenty minutes meticulously plotting a flawless bezier curve around a stunning diamond ring. You export the image, drop it into your InDesign layout, and your heart sinks. The background is gone from the outside, but the hollow center of the ring is still a solid, glaring block of white.
If this sounds familiar, you have encountered the clipping path jewelry inner cutouts error. It is a common, frustrating technical hitch in Adobe Photoshop (v24.x – v25.x) that ruins the illusion of a seamless product photo. Fortunately, fixing this issue does not require redrawing your entire path. Here is the exact, step-by-step workflow to master compound path logic and ensure your jewelry cutouts are perfectly transparent every time.
Understanding the Clipping Path Jewelry Inner Cutouts Error
When drawing paths around complex items with hollow centers—like rings, necklaces, or hoop earrings—the software must understand which areas are solid product and which areas are negative space.
By default, the Pen Tool’s path operations are often set to “Combine Shapes.” When you draw the outer boundary and then draw the inner hole, Photoshop merges the two paths instead of knocking out the center. This creates a solid vector mask. The core technical issue lies in incorrect subpath intersection settings. To fix it, we need to utilize proper compound path logic to tell Photoshop exactly what to hide.
How to Fix Inner Cutout Errors in Photoshop
Depending on whether you are about to start drawing or have already finished your path, there are three distinct methods to resolve this error.
Method 1: The Quick Fix (Pre-Drawing)
If you are just starting your clipping path, you can prevent the error entirely by adjusting your settings before you tackle the inner loop.
- Select the Pen Tool (P) from your toolbar.
- Look at the top Options Bar and ensure the tool is set to Path (not Shape).
- Draw your outer path as usual.
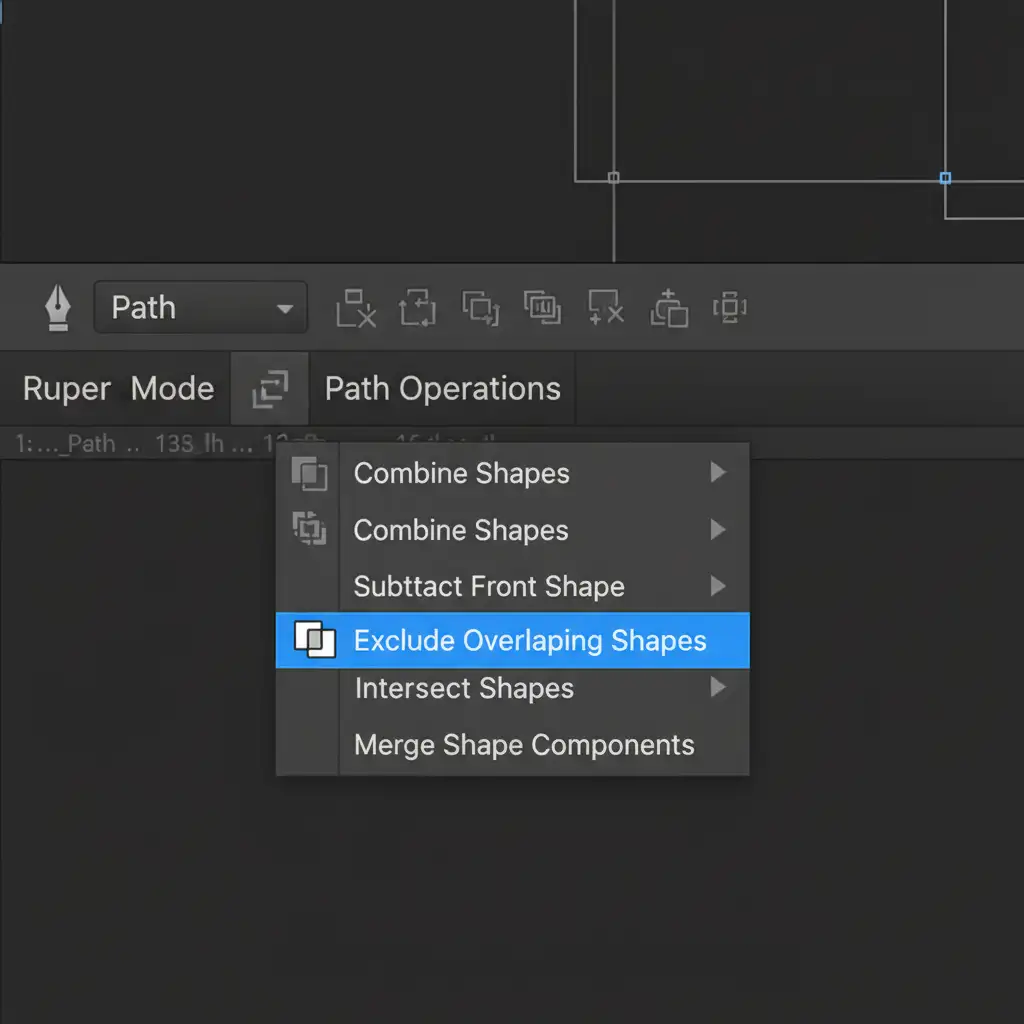
- Before drawing the inside hole, click the Path Operations dropdown in the top Options Bar.
- Select Exclude Overlapping Shapes.
- Draw your inner cutout. The software will now automatically knock out the center.
Method 2: The Pro Workaround (Post-Drawing)
If you have already drawn the entire path and just realized the inner subpath is not knocking out the background, do not delete your work. You can change the path logic retroactively.
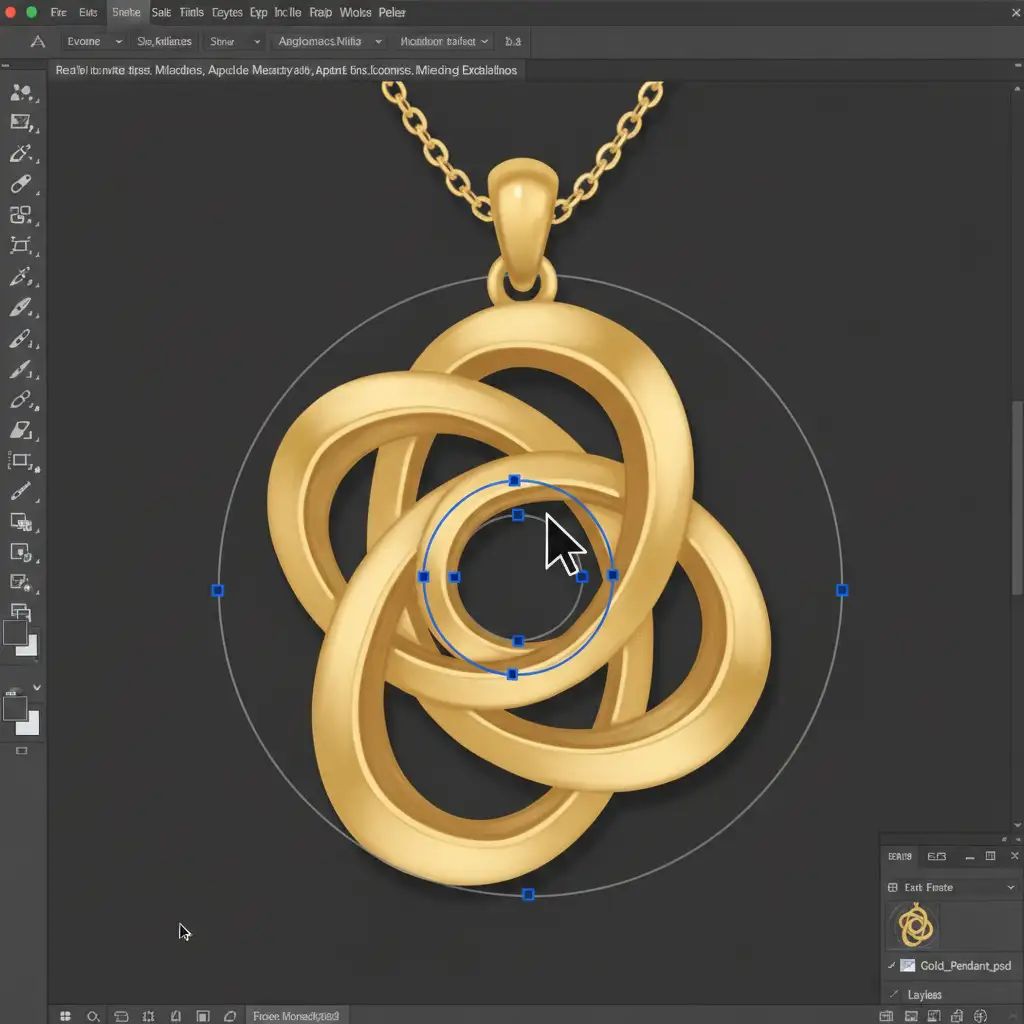
- Select the Path Selection Tool (A) from the toolbar (the black arrow).
- Click on the inner subpath to make it an active path. You will see the anchor points appear.
- Go back to the Path Operations menu in the top Options Bar.
- Select Subtract Front Shape.
- Finally, click Merge Shape Components in that same dropdown to finalize the compound path.

When done correctly, your image will transition from a solid, incorrect mask to a flawless cutout showing transparency.
Method 3: The Technical Deep-Dive (Exporting for Layout)
Creating the path is only half the battle. If you are preparing files for print layout software like InDesign or QuarkXPress, you must format the active path correctly so the layout engine recognizes the transparency.
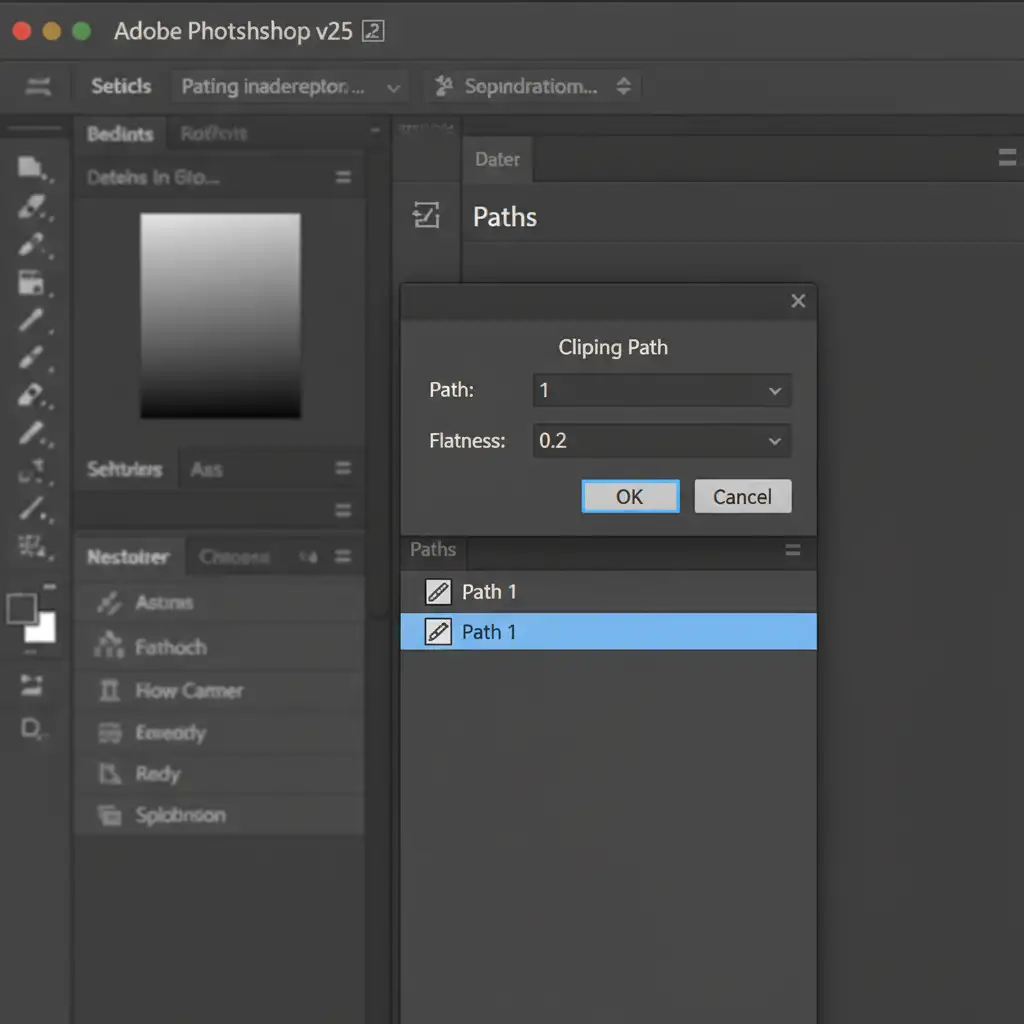
- Open your Paths Panel (Window > Paths).
- Double-click your Work Path to save it (name it “Path 1”).
- Click the flyout menu in the top right corner of the Paths Panel and select Clipping Path.
- A dialog box will appear. Select your saved path from the dropdown.
- For the Flatness setting, either leave it blank or set it to 0.2 device pixels for maximum precision on high-resolution curves.
- Click OK. The path name will now appear in bold text.
- Save your file as a layered TIFF or an EPS export to preserve the vector data.
Why Precision Matters for Complex Vector Masks
When dealing with high-end jewelry, the margin for error is zero. A poorly executed vector mask with jagged bezier curves or incorrect compound logic instantly cheapens the product. By mastering the “Exclude Overlapping Shapes” function, you ensure that every facet, prong, and hollow space is represented with absolute accuracy.
Stop Wrestling with Complex Jewelry Cutouts
Fixing the clipping path jewelry inner cutouts error is easy once you know the technical steps, but executing flawless, pixel-perfect paths on hundreds of intricate rings, necklaces, and bracelets takes an immense amount of time.
Do not let complex jewelry cutouts slow down your post-production workflow. Outsource your high-volume clipping paths, vector masking, and precision jewelry retouching to the experts at Image Work India and Cloud Retouch. Our dedicated teams ensure that every anchor point is perfectly placed and every inner cutout is flawlessly transparent. Contact us today for pixel-perfect results every time, allowing you to focus on growing your creative business.


