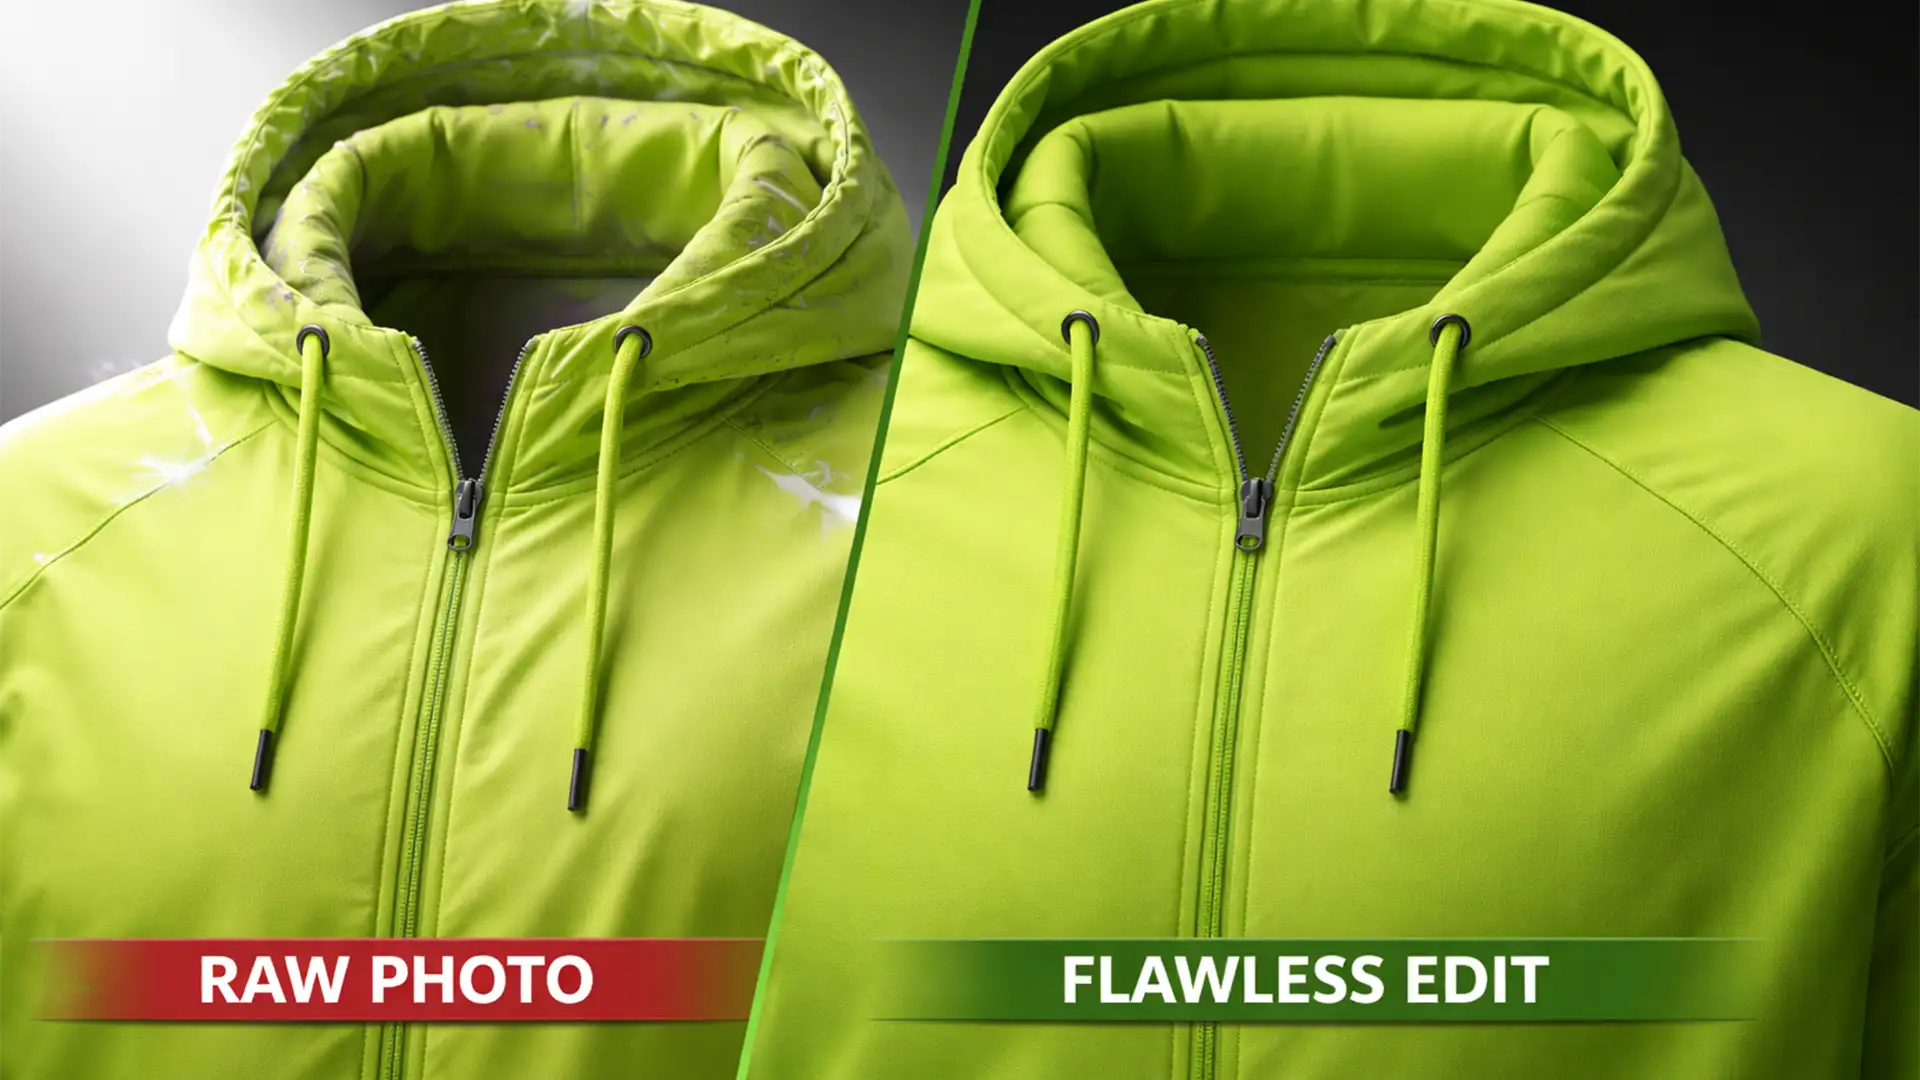
You have just finished a massive product shoot for a new activewear line. The spandex and nylon garments look great on camera, but when you attempt to composite the inner neck joints, disaster strikes. Harsh studio strobes have bounced off the moisture-wicking materials, leaving you with blown-out specular highlights, mismatched shadows, and stubborn purple fringing along the seams.
If you are struggling with ghost mannequin reflective athletic wear artifacts in Adobe Photoshop v25.x, you are not alone. Technical fabrics are notoriously difficult to edit because they reflect ambient light differently across separate exposures.
Here is the definitive guide to eliminating chromatic aberration and lighting anomalies to create flawless, retail-ready apparel compositing.
Why Technical Fabrics Ruin Apparel Compositing
Creating an invisible mannequin composite requires combining two separate photos: the exterior of the garment on the mannequin, and the inside back (the neck joint) turned inside out.
When dealing with technical fabric like spandex, nylon, or moisture-wicking polyester, studio strobes bounce aggressively off the material’s surface. This creates three distinct editing nightmares:
- Chromatic Aberration: High-contrast edges and reflective trims generate severe color fringing (usually purple or green).
- Mismatched Lighting Contours: The neck joint and the exterior garment are shot at different angles, meaning the shadows and highlights will not align naturally.
- Jagged Edge Artifacts: Selecting and masking highly reflective edges often results in a jagged, artificial halo around the collar.
To solve this, we need to move beyond basic eraser tools and implement advanced retouching workflows.
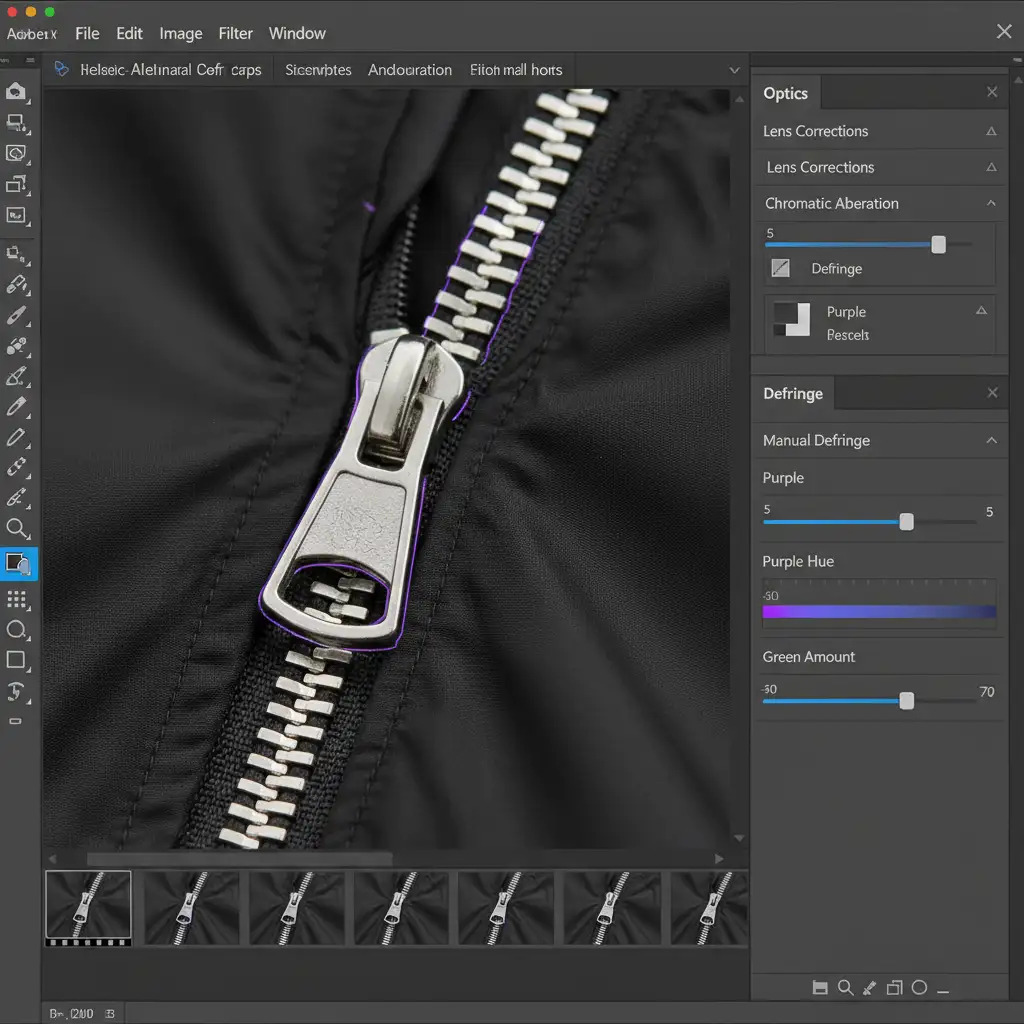
Method 1: The Quick Fix – Eliminate Chromatic Aberration
Before blending any layers, you must clean up the raw plates. Reflective trims and logos on athletic wear are magnets for purple fringing.
- Open your raw image in Adobe Photoshop v25.x.
- Navigate to Filter > Camera Raw Filter.
- Open the Optics panel (or Lens Correction in older versions).
- Click on the Defringe section.
- Use the Purple Hue slider and increase the Amount until the purple chromatic aberration vanishes from the reflective edges.
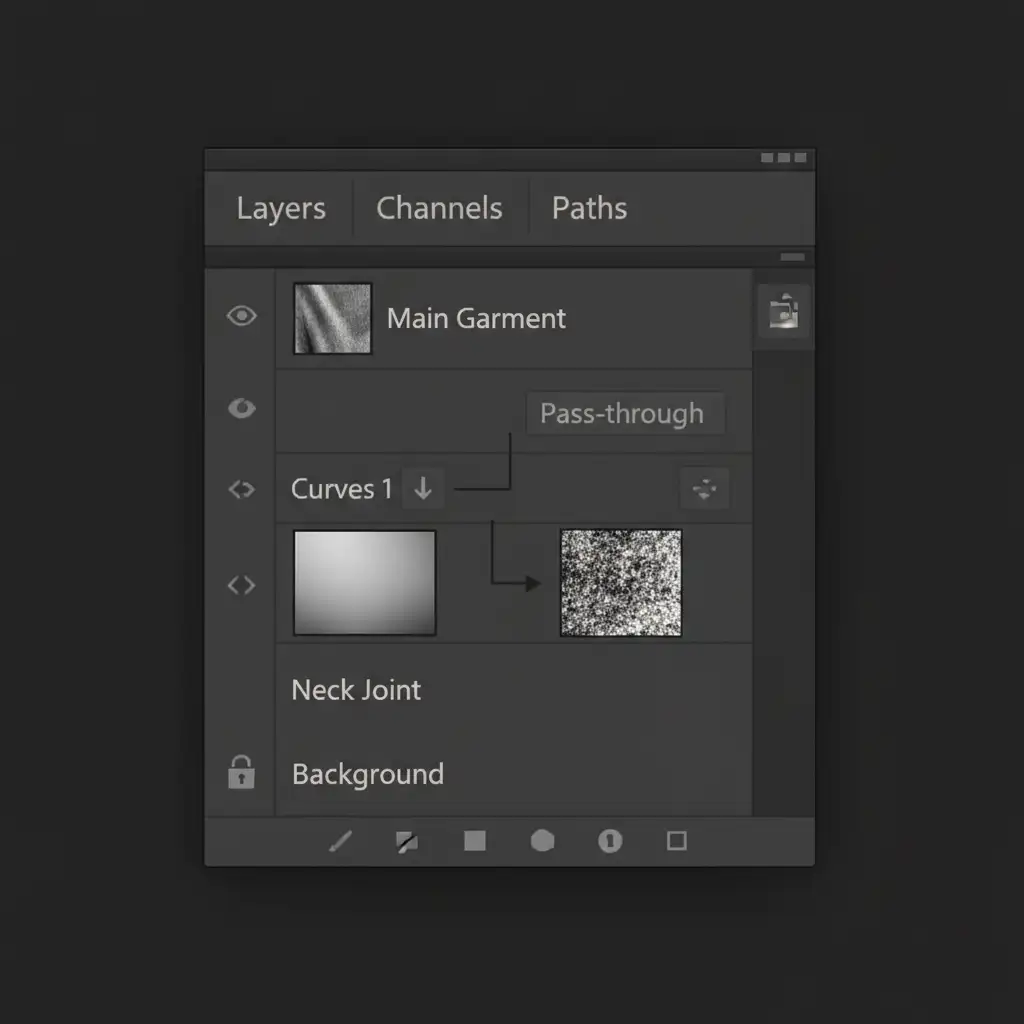
Method 2: The Pro Workaround – Seamless Neck Joint Blending
The biggest giveaway of a poorly executed ghost mannequin image is a neck joint that looks artificially flat or disconnected from the main garment’s lighting. To fix mismatched lighting contours, you need precise layer masking.
- Place your isolated neck joint layer underneath your main exterior garment layer.
- Create a Clipping Mask by adding a Curves Adjustment Layer directly above the neck joint layer. Hold Alt (or Option on Mac) and click between the layers so the Curves adjustment only affects the inside neck.
- Adjust the Curves to match the ambient lighting and shadow depth of the outer technical fabric.
- To ensure the transition looks natural, apply Luminosity Masks to target only the highlights or shadows of the inner joint, blending them seamlessly with the collar’s edge without creating jagged edge artifacts.
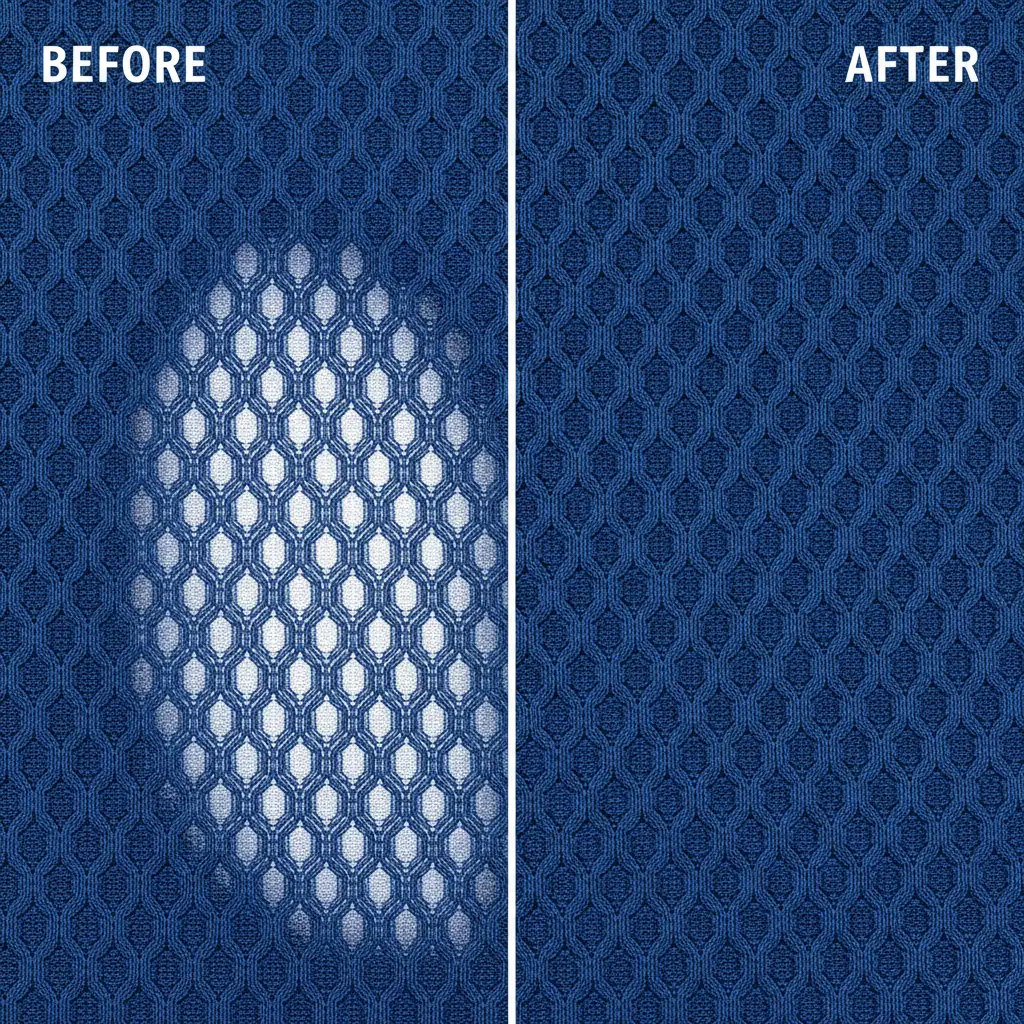
Method 3: The Technical Deep-Dive – Frequency Separation for Specular Highlights
When studio strobes hit moisture-wicking materials, they create harsh specular highlights that look like blown-out white blobs. If you use the standard Clone Stamp tool to remove them, you will destroy the intricate weave of the nylon or spandex, resulting in a blurry, unprofessional patch.
The solution is Frequency Separation, which divides your image into two distinct layers: Color (Low Frequency) and Texture (High Frequency).
- Duplicate your flattened composite twice. Name the bottom duplicate “Color” and the top “Texture”.
- Apply a Gaussian Blur to the “Color” layer until the fabric weave disappears (usually around 4-6 pixels).
- Select the “Texture” layer, go to Image > Apply Image. Set the Layer to “Color”, Blending to “Subtract”, Scale to 2, and Offset to 128. Change the “Texture” layer’s blend mode to Linear Light.
- Now, select the “Color” layer. Use a soft Mixer Brush or Clone Stamp tool to sample adjacent, properly lit fabric colors and paint over the harsh strobe reflections.
- Because you are only editing the color data, the high-frequency texture layer remains untouched, perfectly preserving the spandex fabric weave.
Scale Your Apparel Compositing with the Experts
Mastering ghost mannequin reflective athletic wear artifacts takes time, patience, and a deep understanding of advanced Photoshop techniques. When you are processing hundreds of SKUs for a seasonal activewear launch, spending twenty minutes fixing chromatic aberration and specular highlights on a single image simply isn’t scalable.
Don’t let technical fabrics slow down your post-production workflow. Outsource your complex apparel editing to Image Work India and Cloud Retouch. Our expert retouching teams specialize in high-volume, premium apparel compositing. We utilize advanced frequency separation and precision masking to ensure every ghost mannequin image is flawless, artifact-free, and ready for your e-commerce storefront.
Contact Image Work India today to streamline your retouching pipeline and elevate your product photography.


