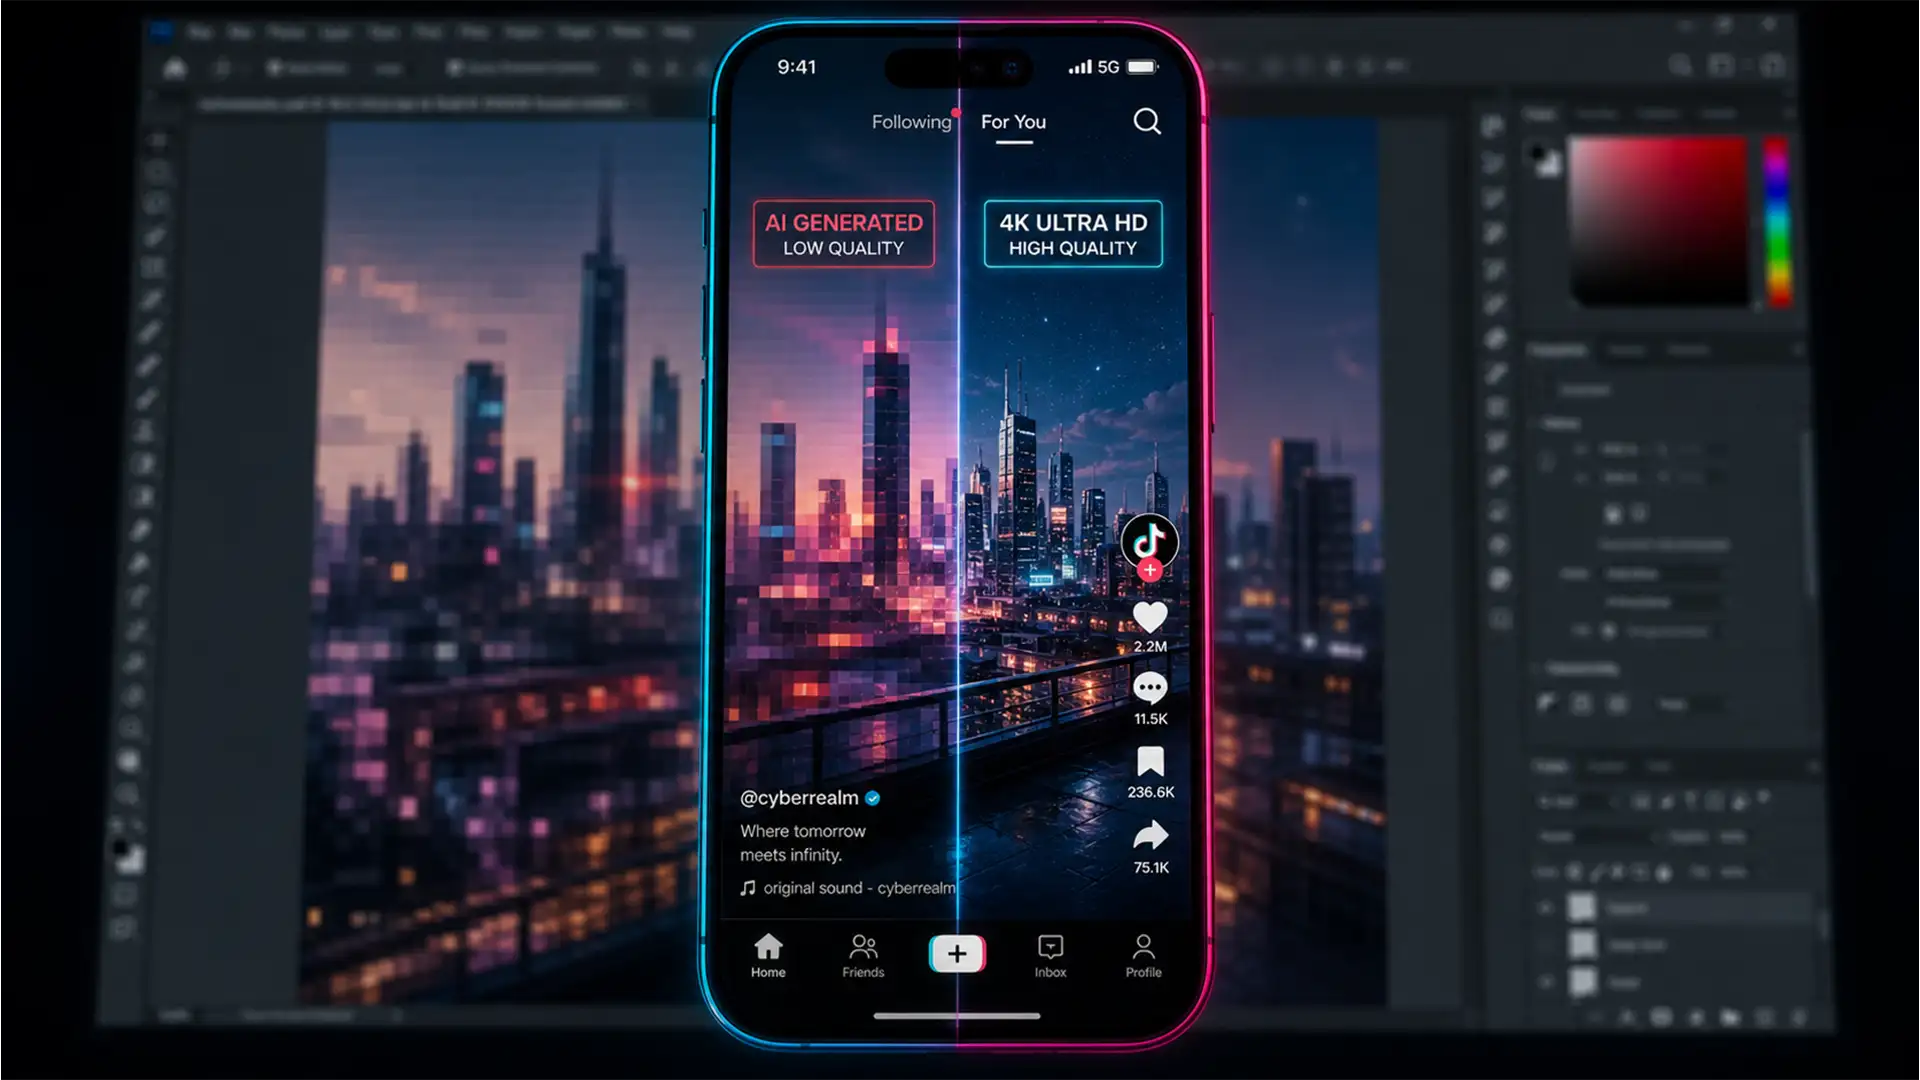
Are you tired of transforming a stunning, high-resolution landscape photo into a vertical TikTok format, only to watch Adobe’s AI turn the background into a pixelated mess? You are not alone. When you use Generative Expand to fill empty canvas space, the results often look stretched, blurry, and entirely unusable for professional social media feeds.
This is a known technical bottleneck in Adobe’s current Firefly Image 3 Model architecture. If you are searching for a definitive Photoshop Generative Expand low resolution TikTok fix, you have found it.
In this guide, we will break down exactly why this pixelation happens and provide three professional workflows to bypass the AI’s limitations, ensuring your 9:16 social media assets remain razor-sharp.
Why Does Photoshop Generative Expand Look Blurry?
Before applying a fix, it helps to understand the underlying mechanics of Photoshop’s AI.
In Photoshop v25.0 and newer, Adobe caps the native output resolution of Generative Fill and Generative Expand at 1024×1024 pixels. This limitation exists to manage cloud processing power and maintain fast generation times.
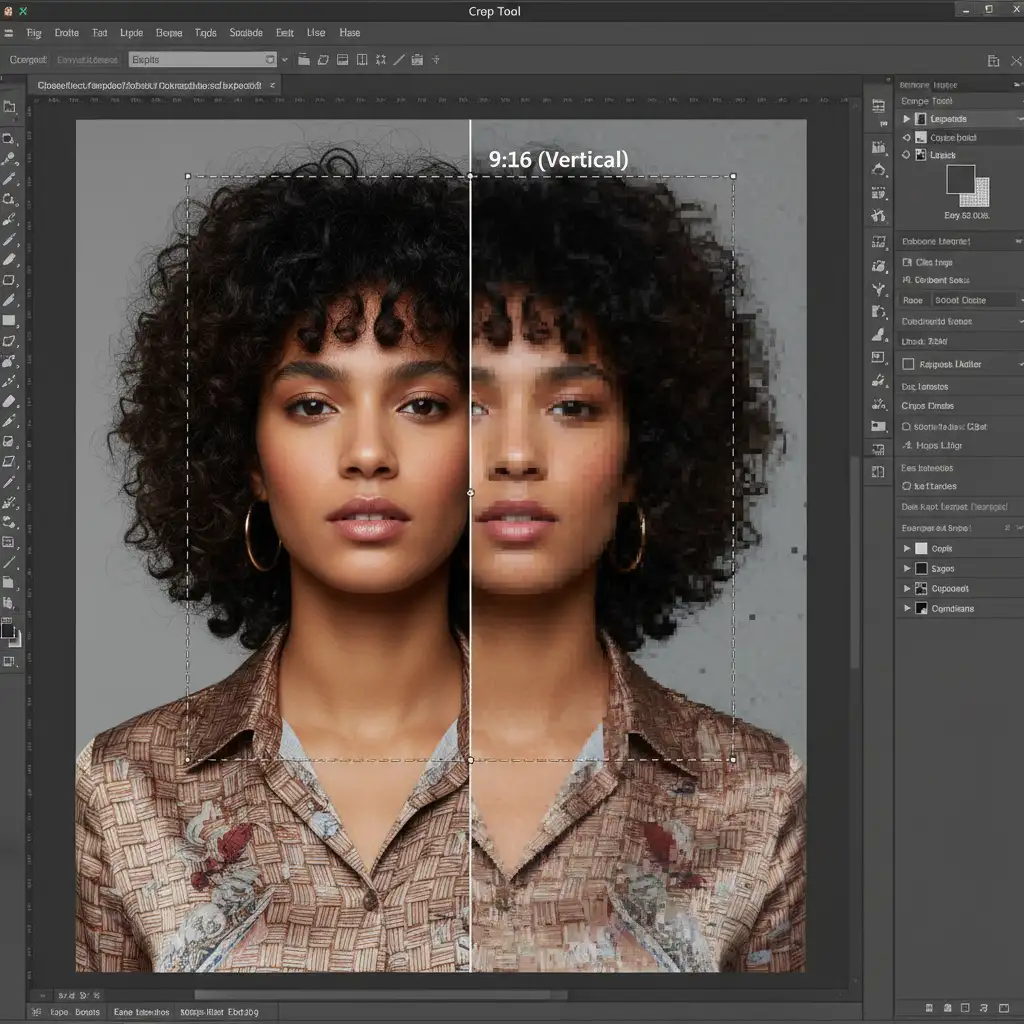
When you convert a standard horizontal photo into an aspect ratio 9:16 (TikTok or Instagram Reels minimum size is 1080×1920 pixels), you are asking the AI to fill a massive amount of empty vertical space. Because the AI can only generate a 1024×1024 block, Photoshop forces that small square to stretch and scale up to cover your entire transparent canvas.
This forced upscaling results in severe pixelation, artifacting, and a complete loss of texture compared to your original high-resolution source image.
3 Ways to Fix Low-Resolution AI Backgrounds
To get crisp, high-definition results, you need to stop Photoshop from stretching that 1024px square. Here are three proven methods to achieve a high-resolution output.
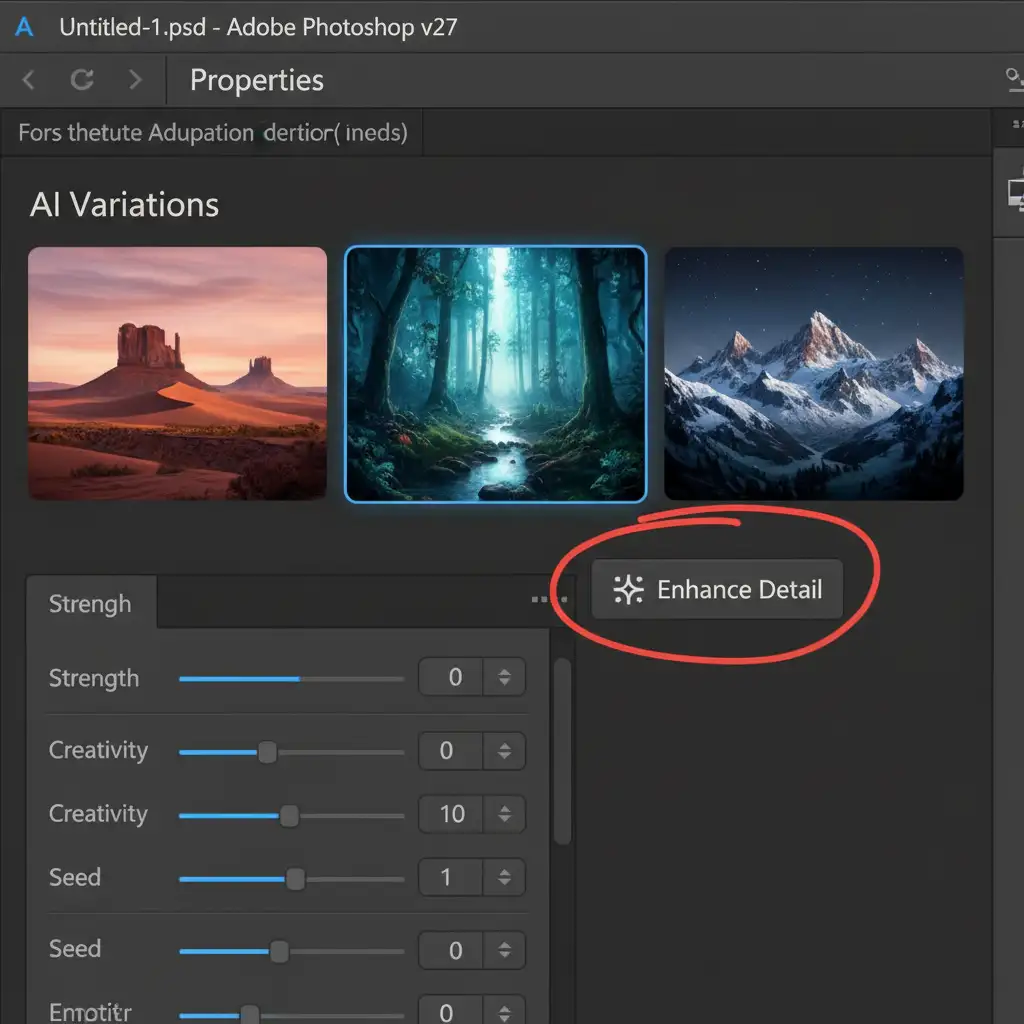
Method 1: The “Enhance Detail” Feature (The Quick Fix)
Adobe recently introduced a built-in solution directly within the Properties Panel. This is the fastest way to improve a blurry generation without leaving your current workspace.
- Select the Crop Tool and use Generative Expand to fill your 9:16 canvas.
- Review the generated variations in the Properties Panel and select the one that best matches your vision.
- Look for the Enhance Detail icon (it looks like a small sparkle or star symbol) located next to the selected variation thumbnail.
- Click the icon. Photoshop will re-process that specific area through a higher-resolution AI model, sharpening the details and removing the soft edges.
Method 2: The Tiling Method (The Pro Workaround)
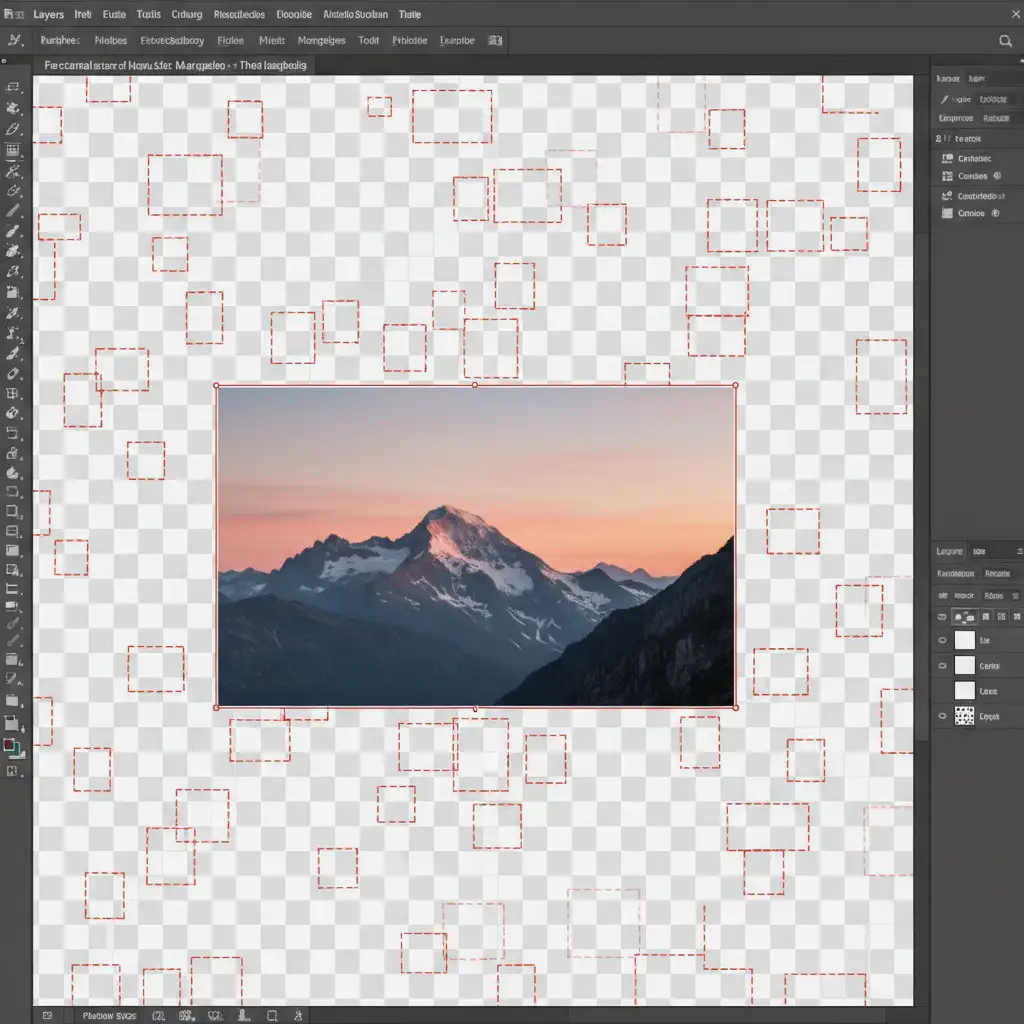
If the Enhance Detail feature doesn’t provide enough sharpness, you need to manually control the AI’s generation size. This is known as the Tiling method. By feeding the AI smaller chunks of empty space, you prevent it from ever hitting the 1024×1024 limitation.
- Expand your canvas to the 9:16 TikTok size using the Crop Tool, but do not use Generative Expand. Leave the new space transparent.
- Select the Rectangular Marquee Tool.
- Draw a selection box over a section of the transparent canvas, making sure the selection overlaps slightly with your original image. Crucial step: Ensure this selection box is smaller than 1024×1024 pixels.
- Click Generative Fill (leave the prompt blank) and hit generate.
- Repeat this process, tiling small overlapping squares across the transparent areas until the entire vertical canvas is filled.
Because no single generation exceeds 1024 pixels, no stretching occurs, resulting in native, flawless resolution.
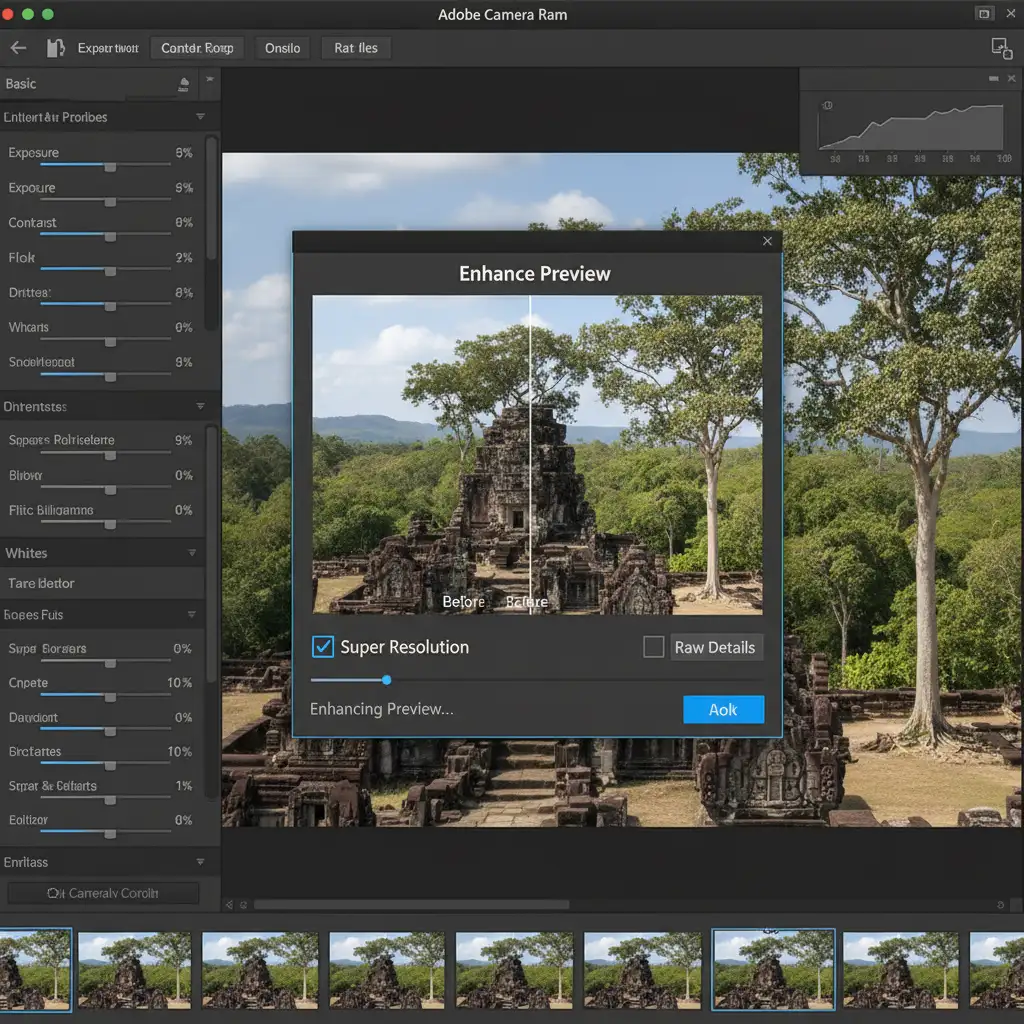
Method 3: Camera Raw Super Resolution (Technical Deep-Dive)
Sometimes you have a complex background where tiling creates mismatched seams. In this case, you can generate the whole background at once, accept the blurriness, and then upscale it using Adobe’s Neural Filters and Camera Raw engine.
- Run Generative Expand to fill your 9:16 canvas.
- Flatten the AI background layers.
- Duplicate this new layer and carefully mask out your original, sharp subject so they are not affected by the upscaling.
- Convert the blurry background layer to a Smart Object.
- Navigate to Filter > Camera Raw Filter.
- Inside Camera Raw, right-click the image and select Enhance.
- Check the box for Super Resolution. This will intelligently double the pixel dimensions of the blurry background, using machine learning to rebuild lost textures and edges.
Conclusion
Creating content for TikTok and Instagram Reels shouldn’t mean sacrificing image quality. By understanding the AI’s 1024px limit and utilizing the Enhance Detail button, the Tiling Method, or Super Resolution, you can ensure your vertical expansions look just as premium as your original photography.
Need Pixel-Perfect Assets Without the Hassle?
Struggling to keep your social media assets crisp and professional while managing tight deadlines? Manual AI generation and upscaling can drain hours from your creative team’s week.
At Image Work India and Cloud Retouch, we specialize in high-end retouching, flawless AI blending, and pixel-perfect formatting tailored for all platforms. Whether you need bulk image resizing for e-commerce or complex background extensions for a global social media campaign, our expert retouchers handle the heavy lifting.
[Contact Cloud Retouch today] to streamline your post-production workflow and guarantee your visuals are always high-resolution, no matter the aspect ratio.


