You have spent hours designing an engaging, high-converting TikTok carousel, but the moment you hit publish, disaster strikes. TikTok’s right-side engagement buttons and bottom description text completely cover your crucial text and focal points. Even worse, the transition between your slides is jagged instead of a smooth, continuous flow.
If you want to master the TikTok seamless photo swipe dimensions in Photoshop, you need more than just good design skills—you need exact mathematical canvas configurations and a strict adherence to UI safe zones.
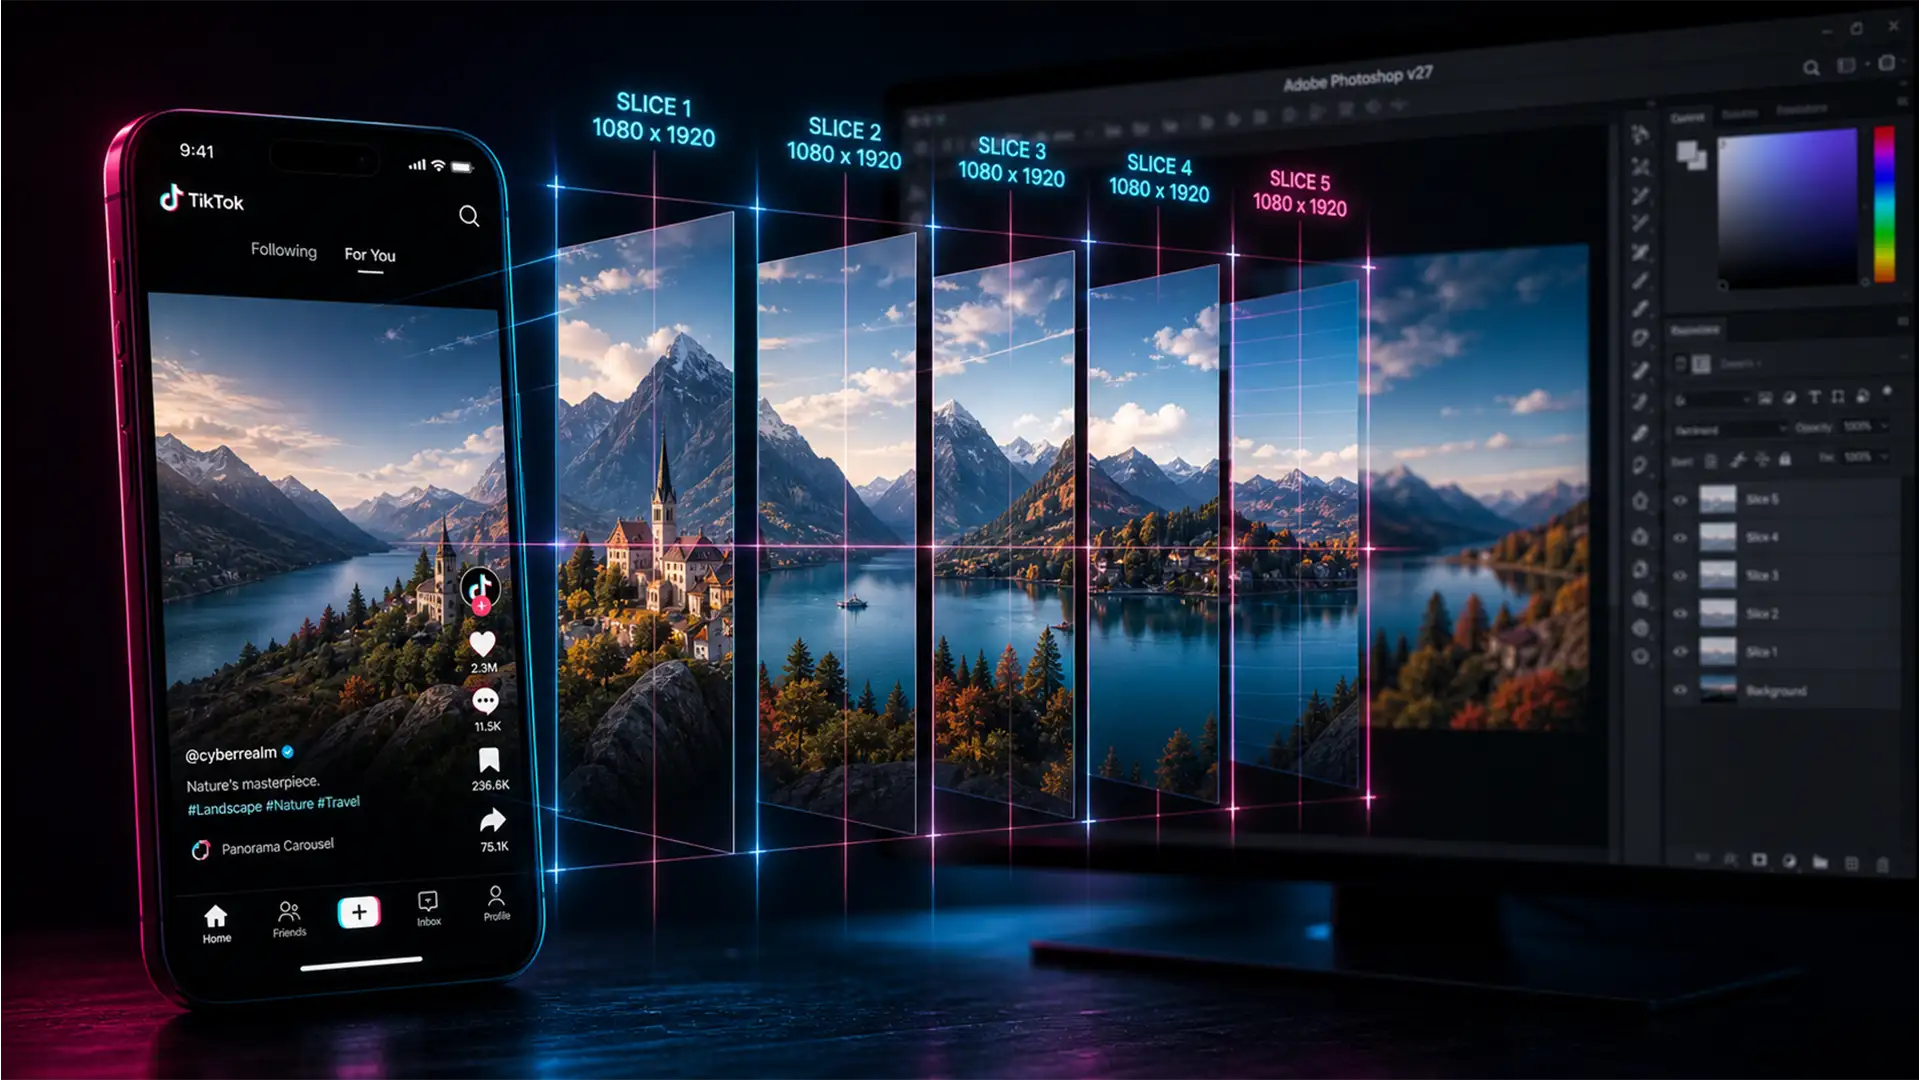
In this comprehensive guide, we will break down the exact 1080×1920 aspect ratio math, show you how to utilize Photoshop’s Slice Tool and Artboards, and provide the ultimate workflow to ensure your seamless panoramic carousels look flawless on every device.
The Math Behind TikTok Seamless Swipe Dimensions
The foundation of any TikTok carousel is the standard 9:16 aspect ratio. A single vertical image on TikTok requires dimensions of 1080 pixels wide by 1920 pixels high.
To create a seamless panoramic effect where the user swipes continuously across a single wide image, you must multiply the base width (1080px) by the total number of slides you intend to create, while keeping the height locked at 1920px.
Quick Reference Dimension Chart:
- 2 Slides: 2160 x 1920 pixels
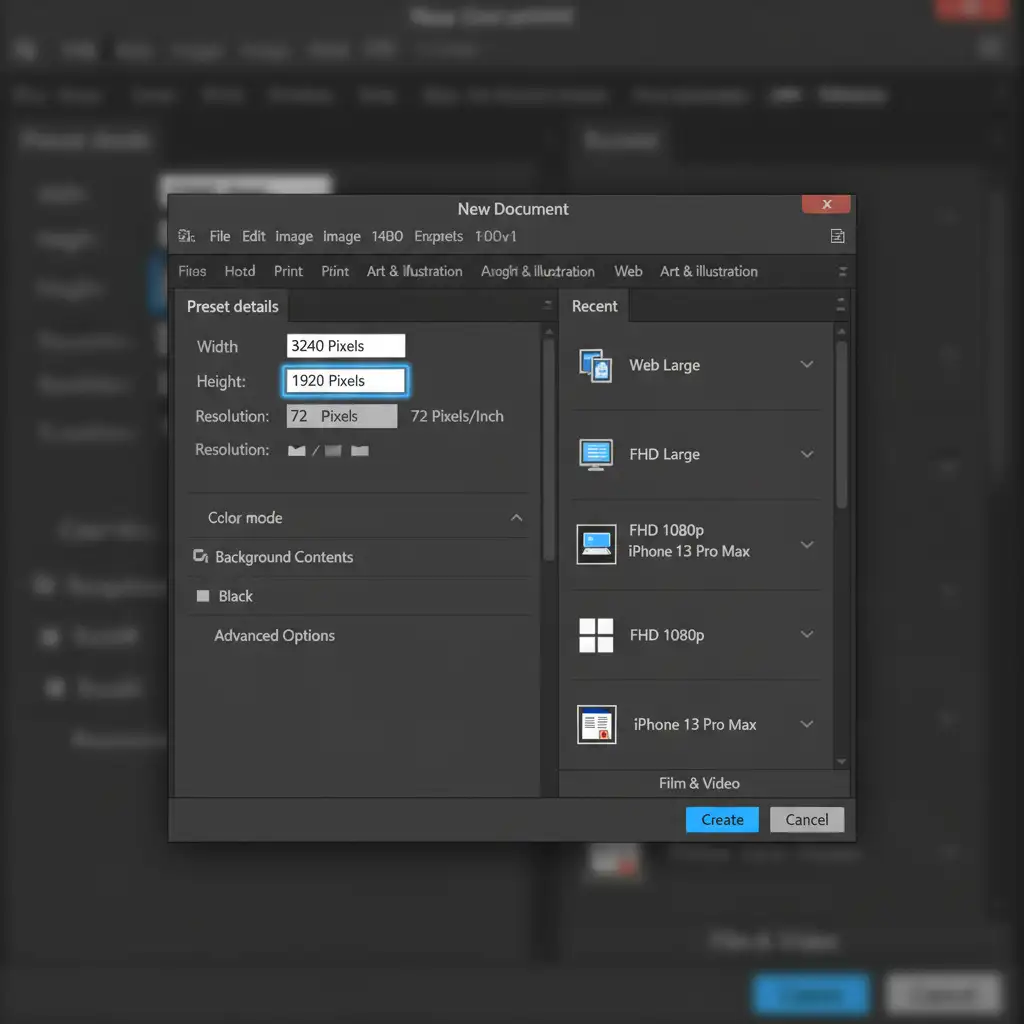
- 3 Slides: 3240 x 1920 pixels
- 4 Slides: 4320 x 1920 pixels
- 5 Slides: 5400 x 1920 pixels
The Silent Killer: TikTok Safe Zones
Knowing the dimensions is only half the battle. The primary reason seamless carousels fail is UI cutoff. TikTok’s interface overlays your image with a profile picture, like, comment, save, and share buttons on the right, alongside a caption and music ticker at the bottom.
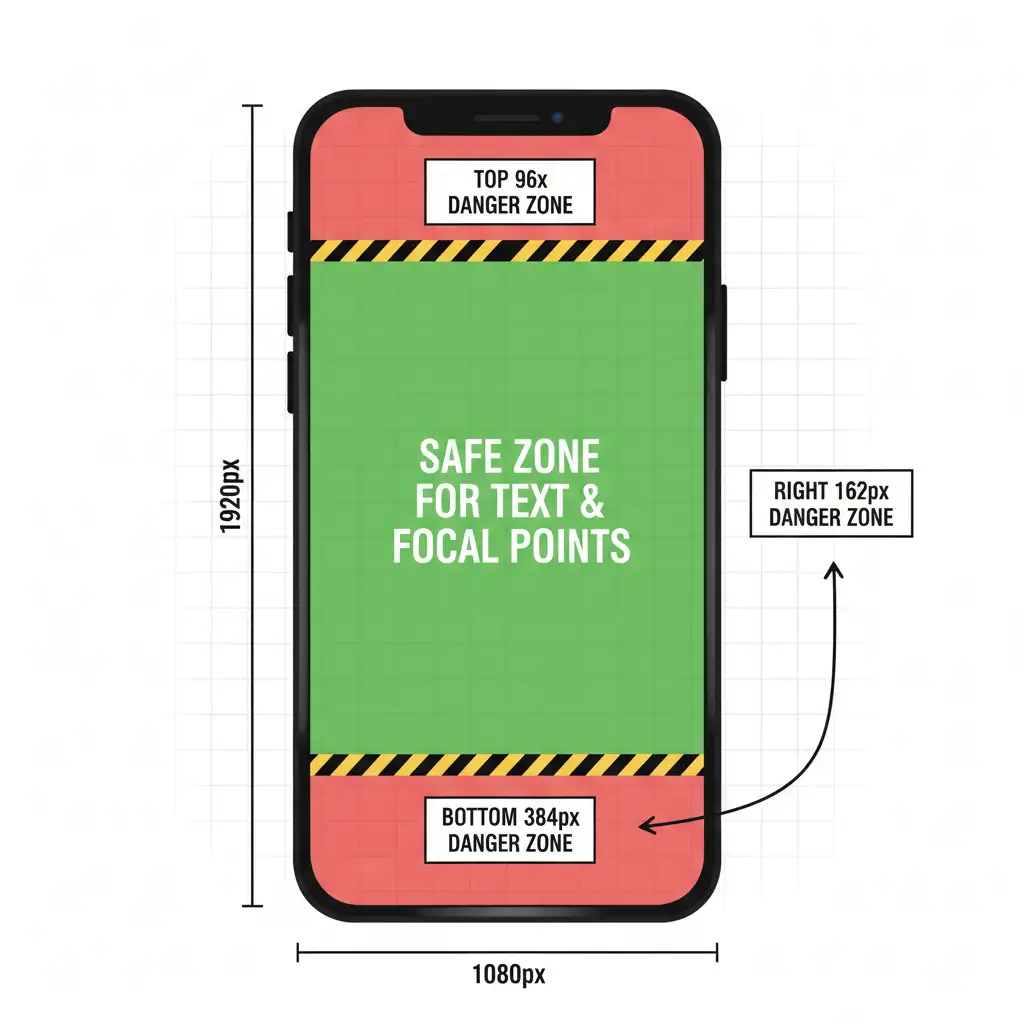
To avoid obscuring your design, you must design within strict Safe Zones:
- Bottom 20%: Reserved for captions, hashtags, and the music track.
- Right Edge 15%: Reserved for engagement icons.
- Top 5%: Reserved for the “Following/For You” tabs.
Method A: The Quick Fix Using the Slice Tool
If you are looking for the fastest way to build and export your carousel, Photoshop’s Slice Tool combined with Guide Layouts is the industry standard.
Step 1: Set Up Your Guide Layout
Once you have created your ultra-wide canvas (e.g., 3240×1920 for 3 slides), you need to divide it perfectly.
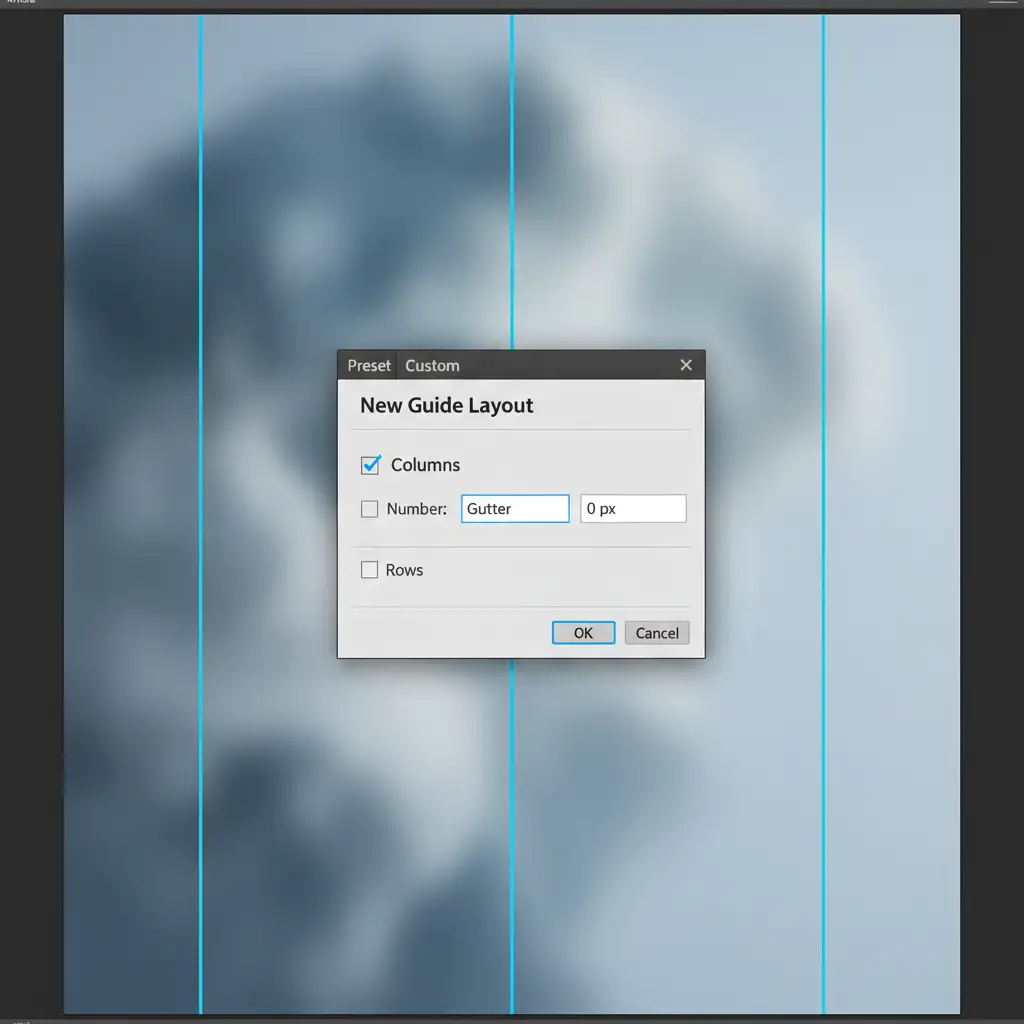
- Navigate to View > Guides > New Guide Layout.
- Check the Columns box.
- Enter your slide count (e.g., 3) in the Number field.
- Set the Gutter to 0 px.
- Click OK.
Step 2: Slice the Canvas
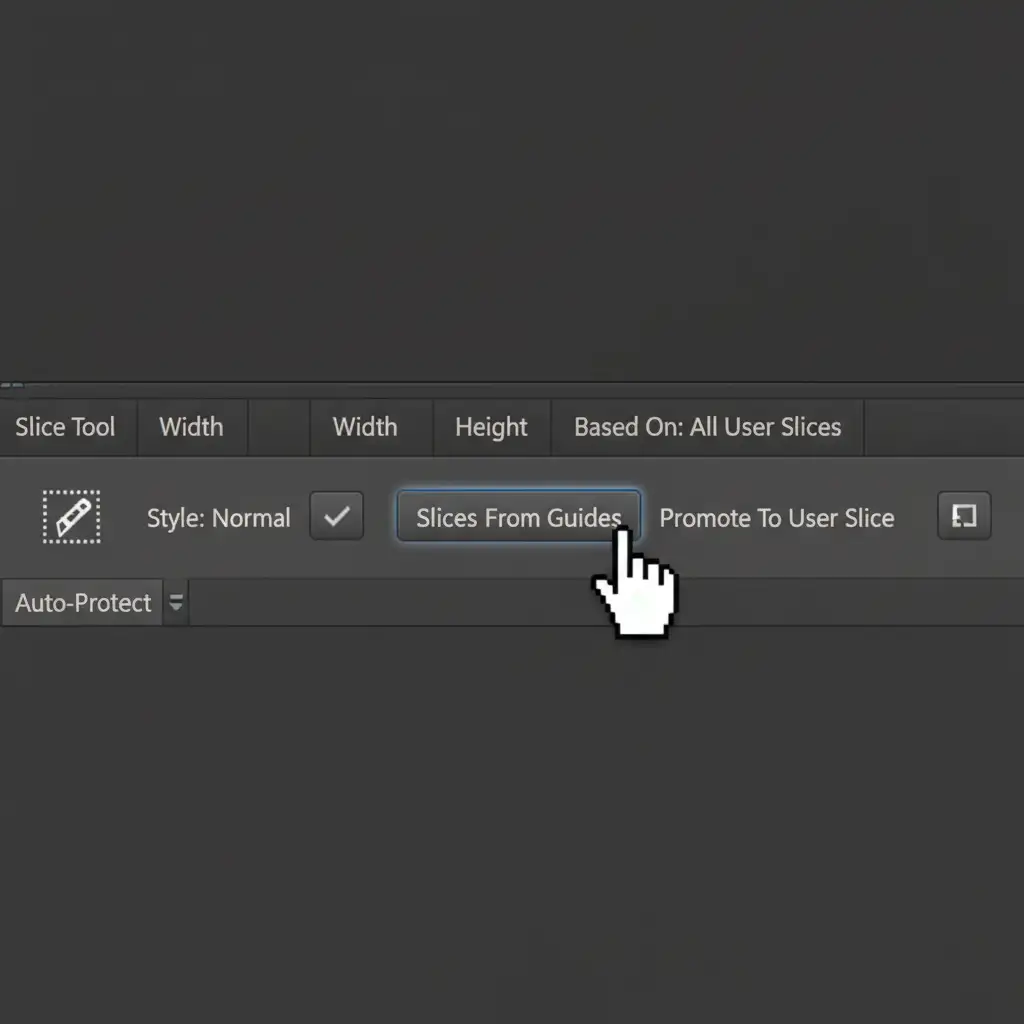
- Select the Slice Tool from the left toolbar (nested under the Crop Tool).
- Look at the top options bar and click the “Slices From Guides” button. Photoshop will automatically create perfect 1080×1920 slices based on your guides.
Step 3: Exporting Your Slices
Do not use standard export methods, as they will export the whole panoramic image.
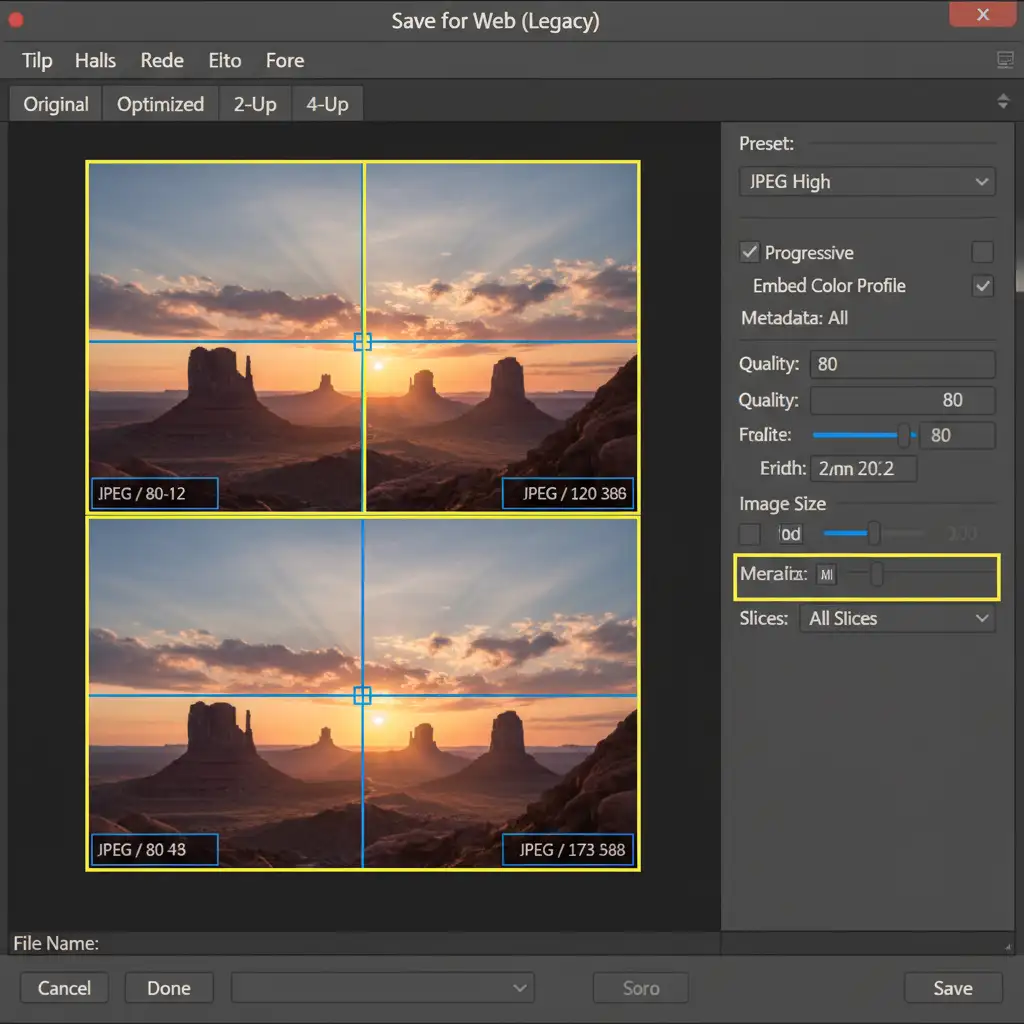
- Go to File > Export > Save for Web (Legacy).
- Zoom out so you can see all your slices. Click and drag to select all of them.
- Set your format to JPEG (High/Maximum) or PNG-24.
- Click Save. Ensure the dropdown at the bottom of the save window says All Slices.
Method B: The Pro Workaround Using Artboards and Smart Objects
If you prefer non-destructive editing and want to avoid the archaic Save for Web (Legacy) menu, using Artboards is a modern alternative.
- Create a new document with a single 1080×1920 Artboard.
- Use the Artboard Tool to duplicate this canvas side-by-side until you have your desired number of slides, perfectly flush with zero gaps.
- Place your ultra-wide master background image into the document.
- Convert this layer to a Smart Object.
- Duplicate this Smart Object and place it inside each Artboard, carefully aligning the position so the image flows seamlessly from one Artboard to the next.
- This method allows you to update the Smart Object once, and it will automatically update across all Artboards. You can then simply use File > Export As to export the individual 9:16 canvases.
Method C: Safe Zone Masking for Perfect Composition
To completely eliminate UI cutoff, you need to combine the seamless panoramic math with a Safe Zone Masking technique.
- Create the Template: Load a TikTok UI Safe Zone overlay PNG on the very top layer of your wide document.
- Highlight the Danger Zones: Use a red low-opacity fill to highlight the unsafe areas (the bottom 20%, right 15%, and top 5% of each individual 1080px section).
- Design Below the Mask: Build your seamless composition on the layers below this safe zone mask. Ensure no text, faces, or vital product shots fall into the red zones.
- Final Export: Right before you rasterize or apply the Method A slicing technique, simply hide (turn off the eyeball icon) the Safe Zone layer.
Outsource Your Pixel-Perfect Social Media Editing
Getting the TikTok seamless photo swipe dimensions in Photoshop exactly right takes time, precision, and technical know-how. If you are managing a brand, an agency, or a high-volume social media account, spending hours slicing images and dodging UI safe zones isn’t the best use of your time.
That is where Image Work India and Cloud Retouch step in.
We specialize in high-volume, pixel-perfect image editing and bulk social media asset creation. Whether you need complex seamless carousels sliced for TikTok and Instagram, advanced photo retouching, or custom template creation, our team of expert designers delivers flawless, high-converting visuals tailored for every platform.
Stop fighting with aspect ratios and UI cutoffs. Let us handle the technical heavy lifting so you can focus on growing your brand. Contact Image Work India and Cloud Retouch today to streamline your visual content creation.


