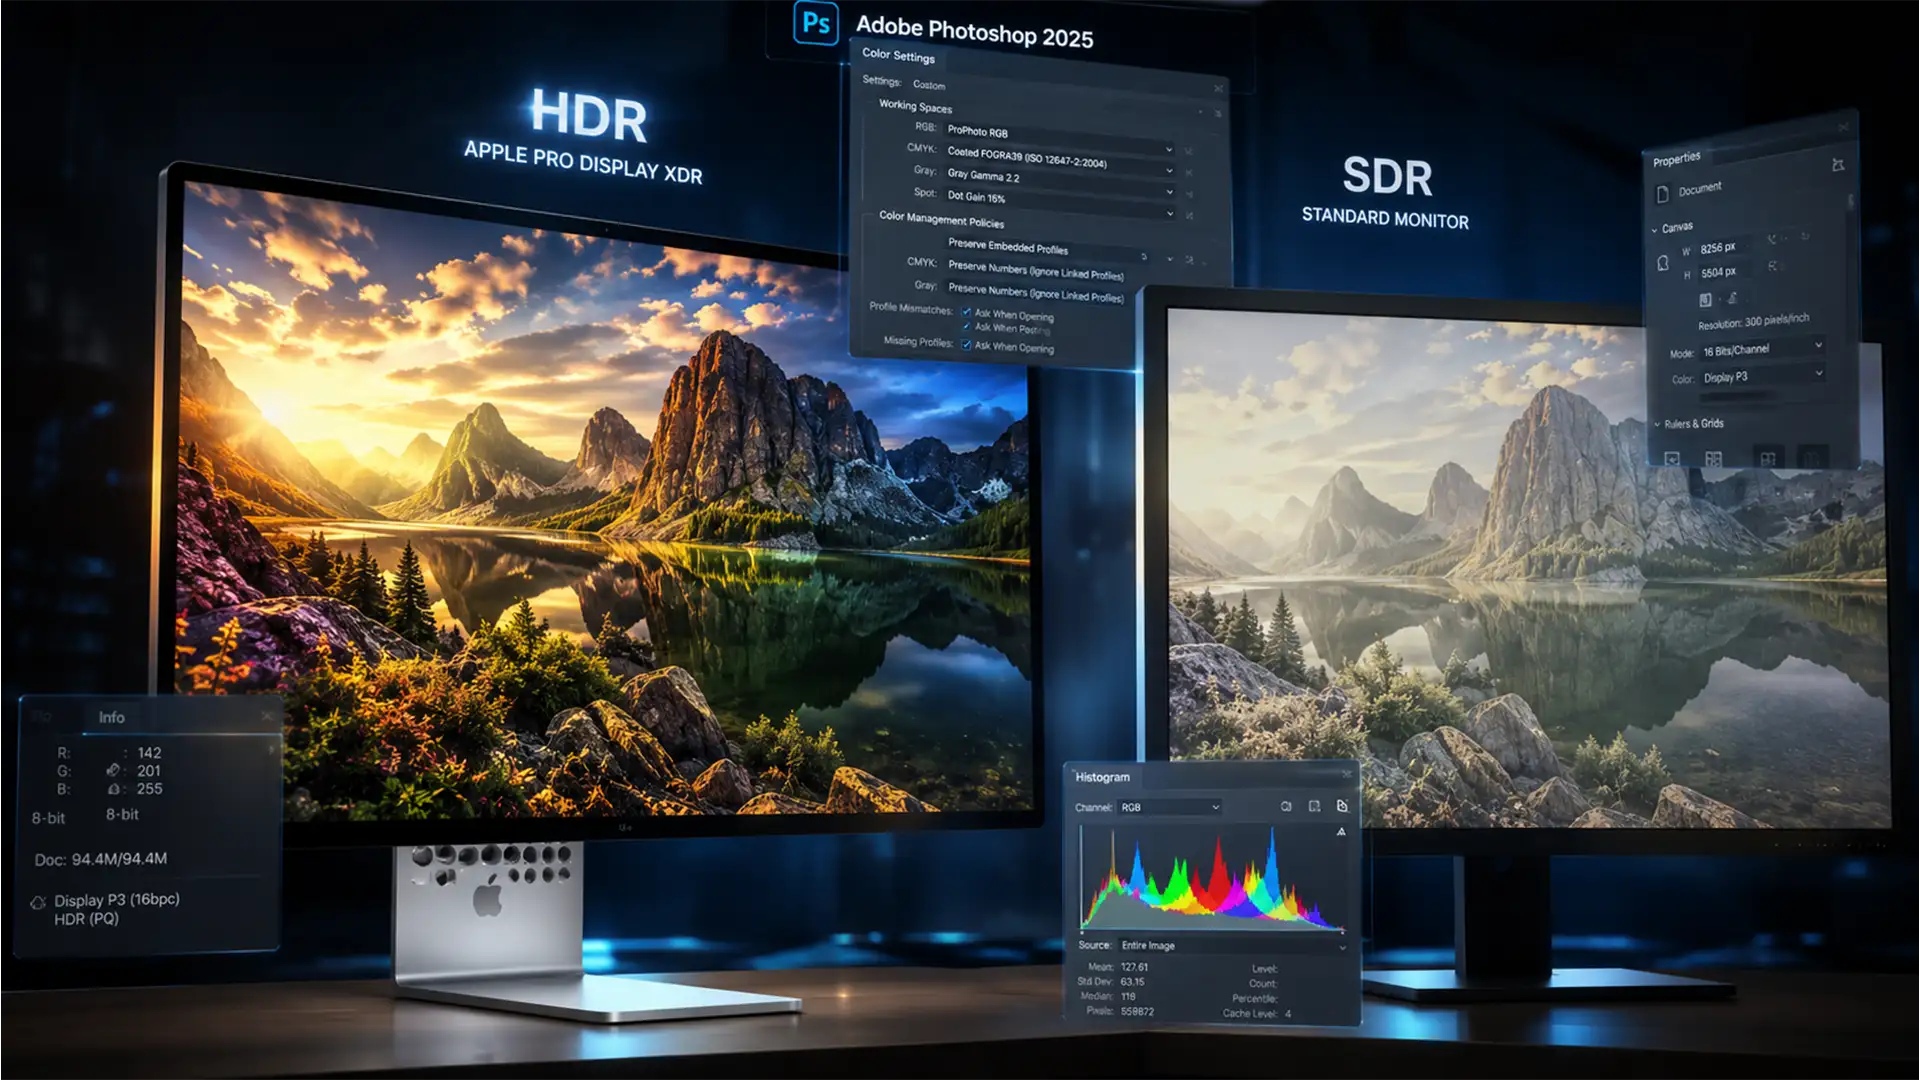
You spent hours perfecting the lighting and colors of a 32-bit HDR image on your high-end XDR display. But the moment you hit “Export As” or “Save a Copy,” the final JPEG looks flat, lifeless, and completely washed out. If you are dealing with this frustrating color profile mismatch in Photoshop 2025 (v26.x and v27.x), you are not alone.
The culprit is improper HDR to SDR tone mapping. When Photoshop attempts standard sRGB conversion, it often clips highlight data, resulting in severely reduced saturation and contrast on standard monitors. In this guide, we will walk you through the definitive photoshop hdr export washed out fix 2025, ensuring your web-ready images look exactly as vibrant as they do in your workspace.
Understanding the 2025 HDR Color Profile Mismatch
Working in a 32-bit workspace offers incredible dynamic range, allowing you to push highlights and shadows without degrading the file. However, standard web browsers and 8-bit image formats (like standard JPEG or PNG) cannot display this vast range of data.
When you export an HDR file without proper SDR Tone Mapping, the software forcefully compresses the colors. If your settings aren’t perfectly dialed in, the result is a massive Color Profile Mismatch. This issue is especially noticeable if you edit on an XDR Display but view the final export on a standard SDR monitor or mobile device.
To fix this, you must control how Photoshop handles the transition from 32-bit to 8-bit. Here are the three most effective methods.
Method 1: The Quick Fix (Convert to Profile)
The fastest way to prevent washed-out colors is to force Photoshop to map the colors perceptually before you ever open the export dialog.
- Before exporting, navigate to Edit > Convert to Profile.
- Under Destination Space, select sRGB IEC61966-2.1.
- Under Conversion Options, set the Intent to Perceptual.
By choosing Perceptual Intent, Photoshop compresses the entire color gamut proportionally. This manually tone-maps the HDR highlights into standard SDR space, preserving the visual relationship between colors so nothing looks washed out.
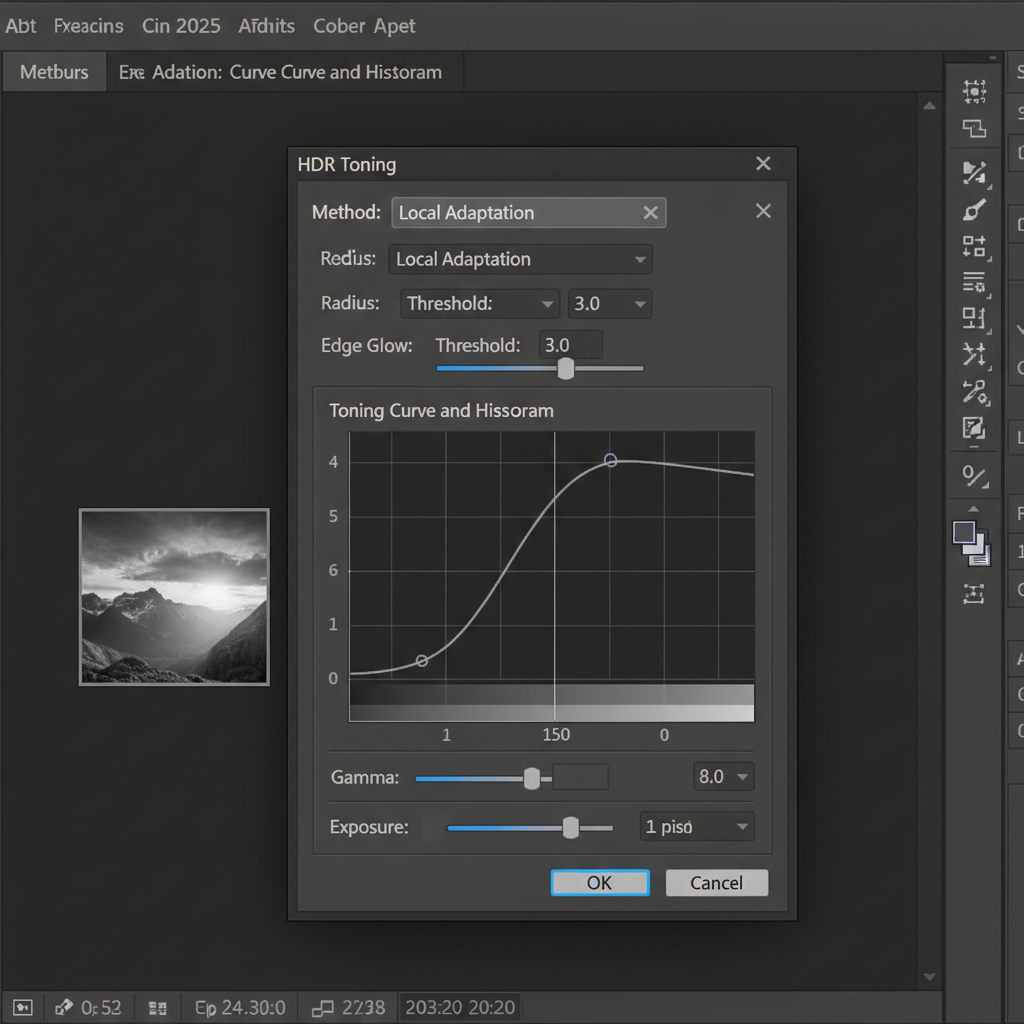
Method 2: The Pro Workaround (HDR Toning)
If you need granular control over the contrast and saturation during the bit-depth reduction, you should use the built-in HDR Toning tools.
- Go to Image > Mode > 16-bit/Channel (or 8-bit/Channel).
- This action triggers the HDR Toning dialogue box.
- In the Method dropdown, select Local Adaptation.
- Carefully adjust the Radius, Threshold, and Toning Curve sliders until the preview matches your original 32-bit HDR version.
- Click OK, then proceed to Save a Copy or Export.
Local Adaptation evaluates the brightness of adjacent pixels, allowing you to maintain localized contrast that is otherwise lost during standard compression.
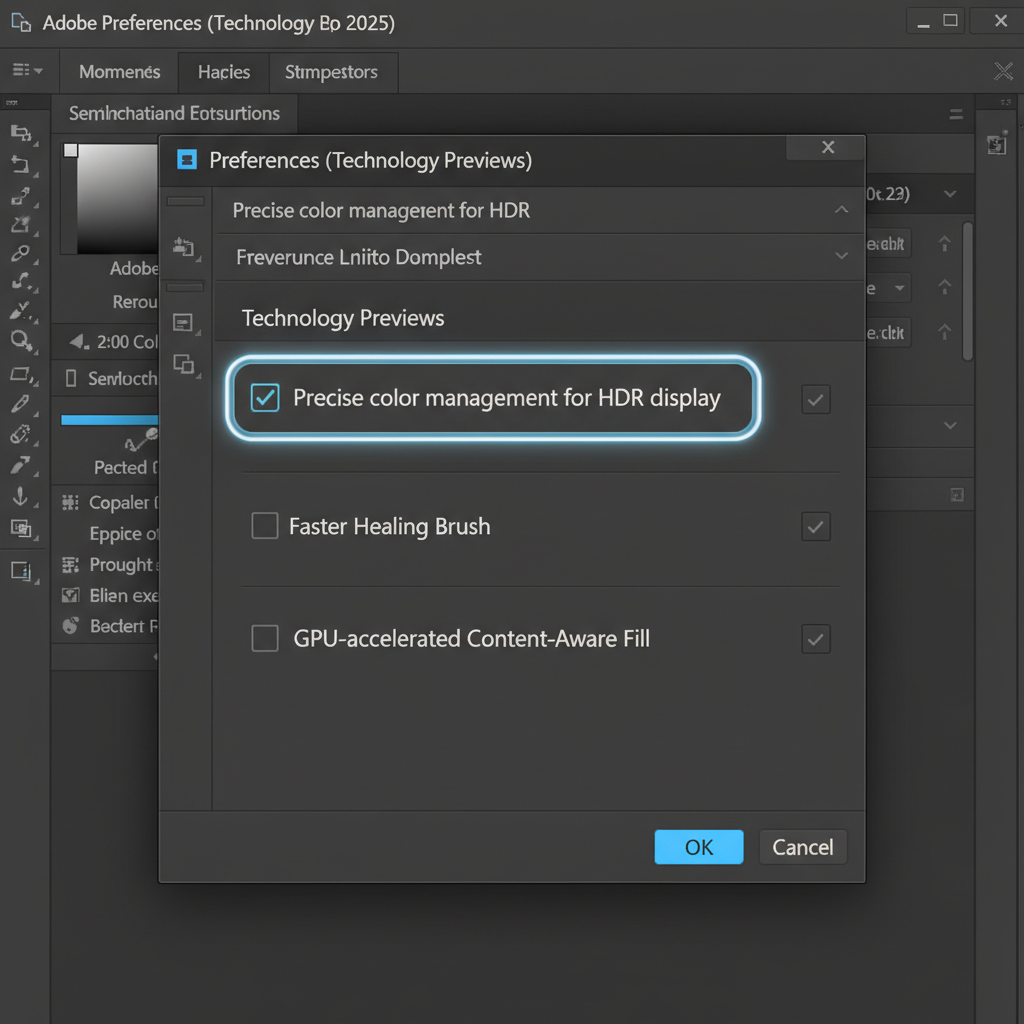
Method 3: The Technical Deep-Dive (Technology Previews)
For users who frequently work with high dynamic range photography, adjusting Photoshop’s core rendering engine via Technology Previews provides a permanent solution to the export bug.
Step 1: Enable Precise Color Management
- Navigate to Edit > Preferences > Technology Previews (Windows) or Photoshop > Settings > Technology Previews (Mac).
- Check the box labeled Precise color management for HDR display.
- Restart Photoshop to apply the new rendering engine.
Note: Ensure that your OS-level display settings have HDR enabled and that your GPU Acceleration is turned on in Photoshop’s Performance preferences. This ensures the monitor gamut matches Photoshop’s rendering pipeline.

Step 2: Configure Export As Settings
Once the rendering engine is updated, you must ensure your export settings are locked in.
- Go to File > Export > Export As.
- On the right-hand panel under Color Space, ensure both Embed Color Profile and Convert to sRGB are checked.
- Review the preview window on the left. Thanks to the Technology Preview adjustment, the preview should no longer look washed out.
Stop Fighting Software Bugs. Let the Experts Handle Your Edits.
Navigating color spaces, bit-depth conversions, and frustrating software bugs takes time away from what you do best: shooting incredible photos. If you are constantly battling with flat, lifeless HDR exports, it’s time to streamline your workflow.
At Image Work India and Cloud Retouch, our dedicated team of post-production specialists handles complex HDR blending, precise color management, and flawless export formatting every single day. Whether you need vibrant real estate photography, flawless product images, or high-end commercial retouching, we ensure your photos look perfect on every screen.
Don’t let technical glitches ruin your portfolio. Contact Cloud Retouch today to learn how our expert editing services can elevate your images and save you hours of frustration.


