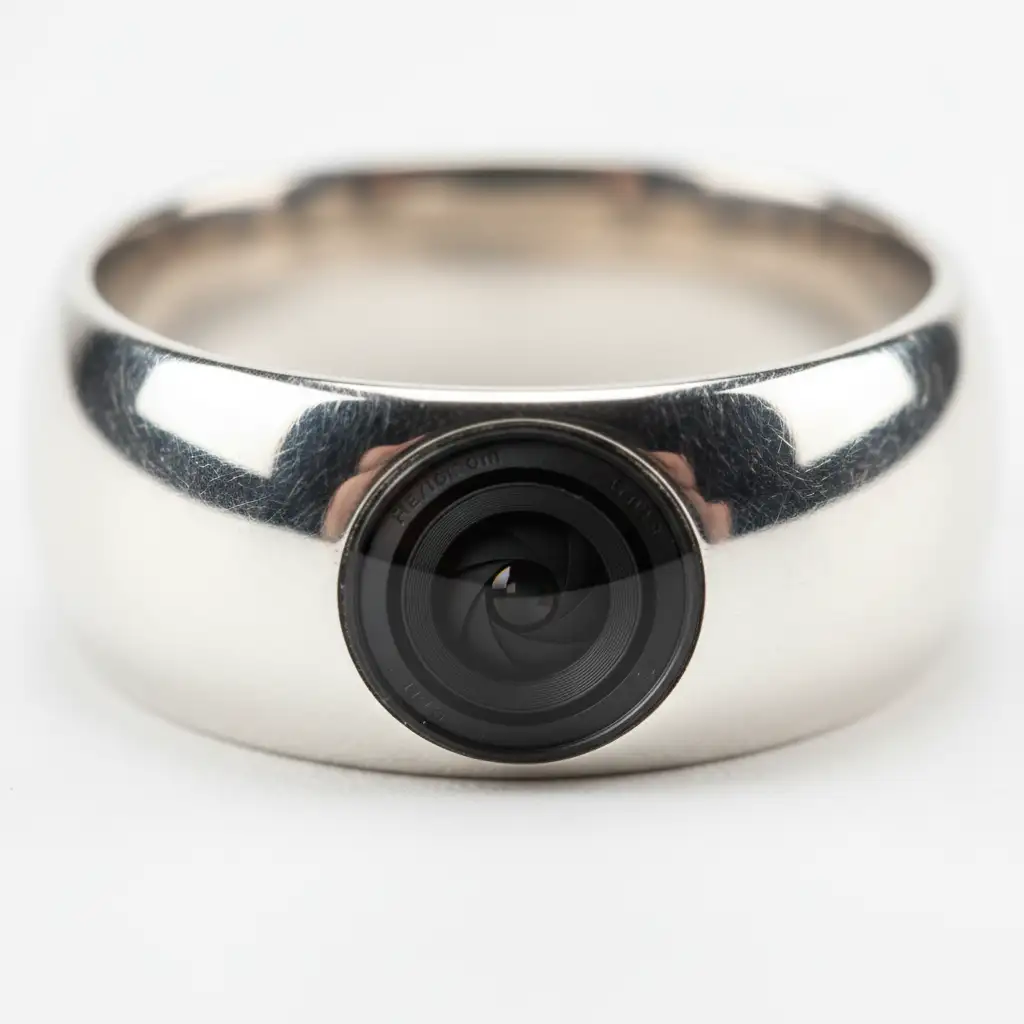
If you shoot macro photography of rings, bracelets, or watches, you know the ultimate frustration: high-polish metals act like convex mirrors. Instead of capturing a flawless, luxurious finish, your lens captures the dark studio environment, leaving harsh, ugly black spots right on the surface of the metal. When you try to remove black spots from high-polish jewelry reflections, standard tools like the Clone Stamp often destroy the smooth metallic gradients, leaving behind unnatural, muddy patches.
In this guide, we will break down the exact workflows used by high-end retouchers in Photoshop CC v25.0 through v27.x. Whether you need a rapid AI-assisted fix or a non-destructive manual reconstruction, these techniques will guarantee pixel-perfect specular highlights.
Why High-Polish Jewelry Gets Black Spots (And Why the Clone Stamp Fails)
Metals like gold, silver, and platinum are highly reflective. During macro photography, the curvature of a ring or watch bezel bends light, essentially taking a 180-degree snapshot of your studio. Those black spots? They are usually reflections of your camera lens, the tripod, or unlit corners of the room.
Standard retouching tools fail here because jewelry retouching is all about preserving metallic gradients and specular highlights. If you use a basic Clone Stamp, you copy hard edges and mismatched lighting variations, ruining the illusion of a smooth, polished surface. To fix this properly, we must rely on advanced AI synthesis or traditional non-destructive editing techniques.
Method A: The Quick Fix Using the Photoshop AI Remove Tool
For rapid, high-volume e-commerce catalogs, the AI-powered Remove Tool (introduced in recent Photoshop CC updates and refined through v27.x) is a game-changer. Unlike older healing brushes, this tool evaluates the surrounding metallic gradients and synthesizes a patch that respects the curvature of the jewelry.
Step-by-Step Workflow:
- Open your image in Photoshop and duplicate your background layer to ensure non-destructive editing.
- Select the Remove Tool (nested with the Spot Healing Brush).
- Look at the top options bar. Check Sample all layers and ensure Remove after each stroke is active.
- Paint a single, continuous stroke over the black reflection spot.
- The AI will analyze the adjacent specular highlights and seamlessly blend the dark area into the surrounding metal.
Pro Tip: For highly complex reflections where the Remove Tool struggles, you can integrate Generative Fill to rebuild larger sections of the metal band.

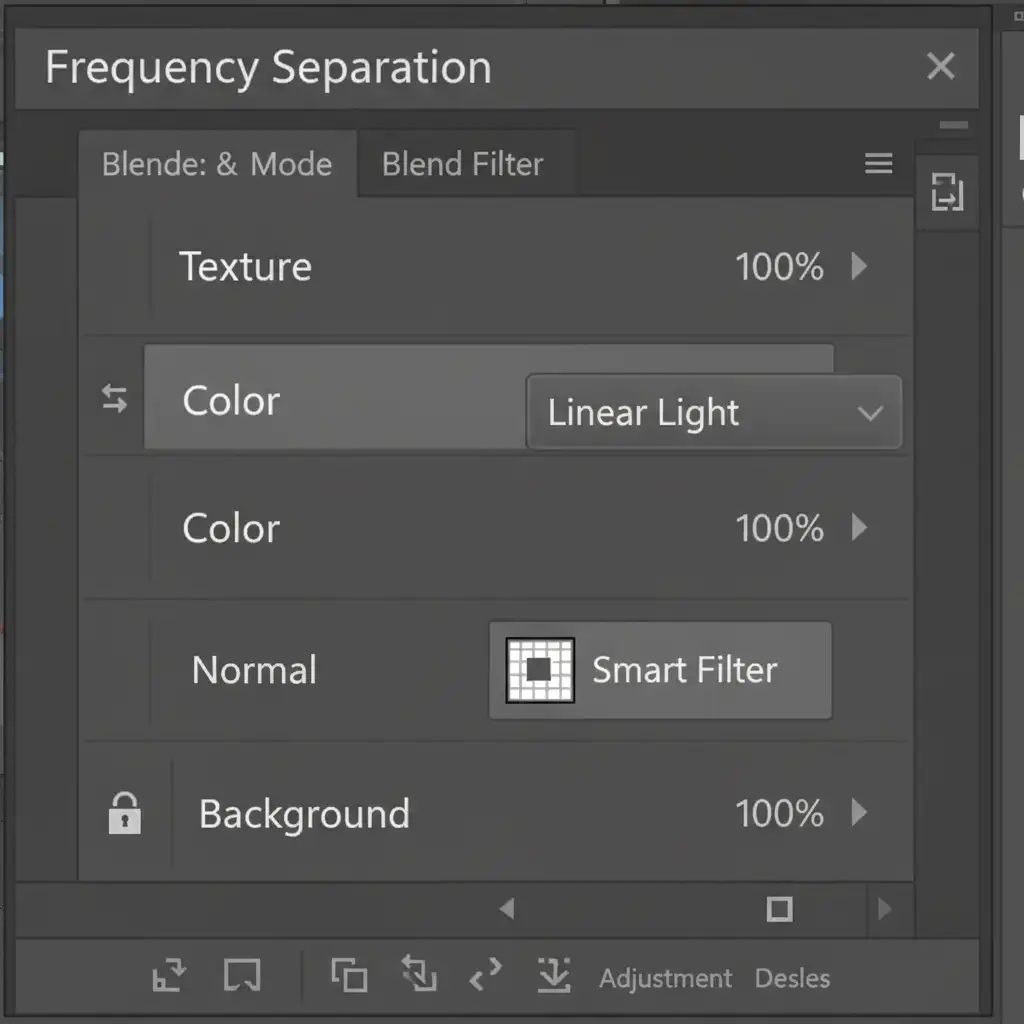
Method B: The Pro Workaround with Frequency Separation
When dealing with high-end editorial jewelry retouching, automated tools might blur crucial micro-scratches or texture. Frequency Separation allows you to separate the color (the black reflection) from the texture (the grain and finish of the metal), giving you ultimate control.
Step-by-Step Workflow:
- Duplicate your image twice. Name the bottom layer “Color” and the top layer “Texture”.
- Apply a Gaussian Blur to the Color layer just until the black spot diffuses and blends with the surrounding metal (usually between 4px to 8px depending on resolution).
- Apply the image to the Texture layer (Image > Apply Image) using the Color layer as the source, Blending set to Subtract, Scale 2, Offset 128. Change the Texture layer’s blend mode to Linear Light.
- Select the Color layer. Use the Mixer Brush with a clean, moist brush setting.
- Gently blend the surrounding bright metallic highlights over the dark reflection. The black spot will vanish, but the surface texture on the layer above remains completely intact.
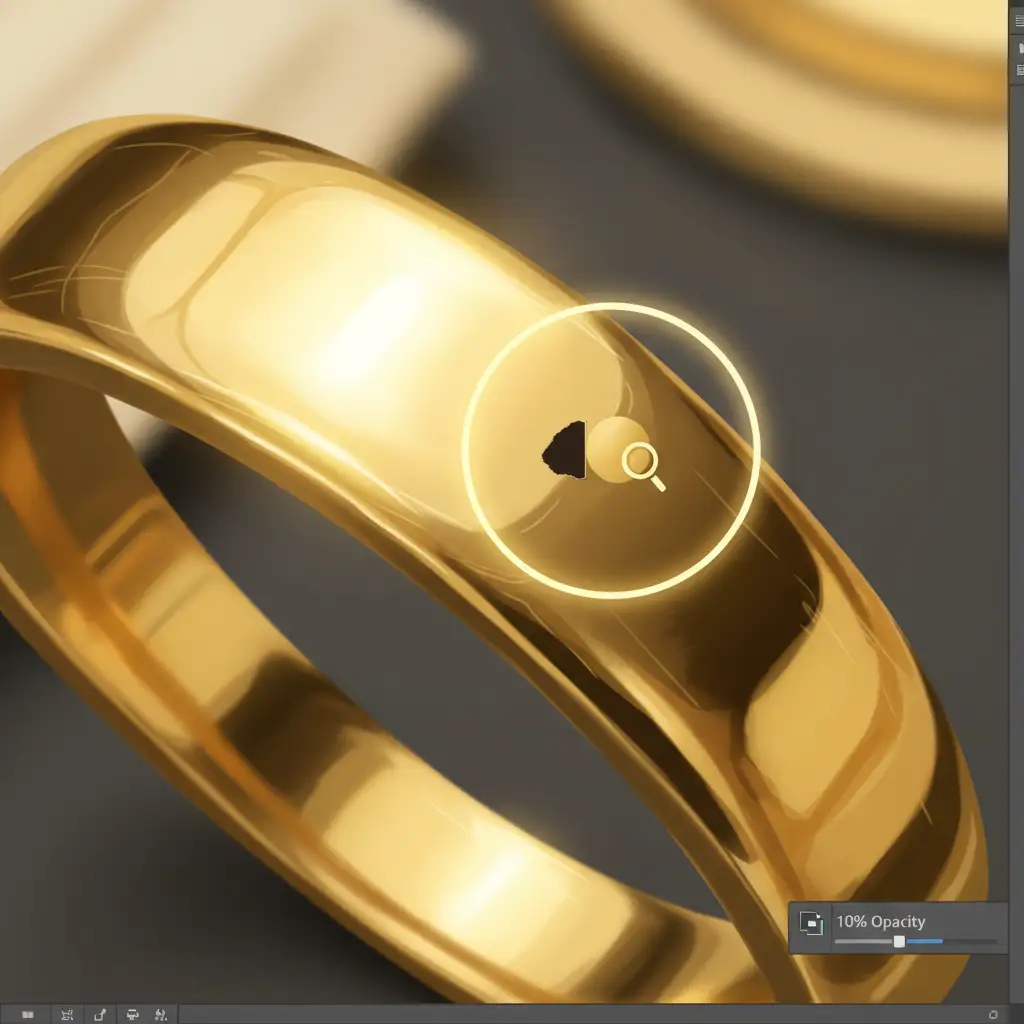
Method C: Technical Deep-Dive into Manual Gradient Reconstruction
Sometimes, the reflection completely obscures the natural shape of the jewelry. In these cases, you must manually rebuild the metallic gradients from scratch. This technique is often combined with luminosity masking for precise edge control.
Step-by-Step Workflow:
- Create a new blank layer above your jewelry image.
- Select the standard Brush Tool. Set your brush to 10% opacity and 0% hardness.
- Hold the Alt (Windows) or Option (Mac) key to temporarily switch to the Eyedropper tool. Sample the exact color of the bright metal immediately adjacent to the black spot.
- Gently paint over the edge of the reflection.
- Continuously sample new colors as you move across the band, rebuilding the natural gradient transition from light to dark.
- Crucial Step: Digital painting looks artificially smooth. To match the camera’s sensor grain, go to Filter > Noise > Add Noise. Add a uniform noise of 1% to 2% to your painted layer.
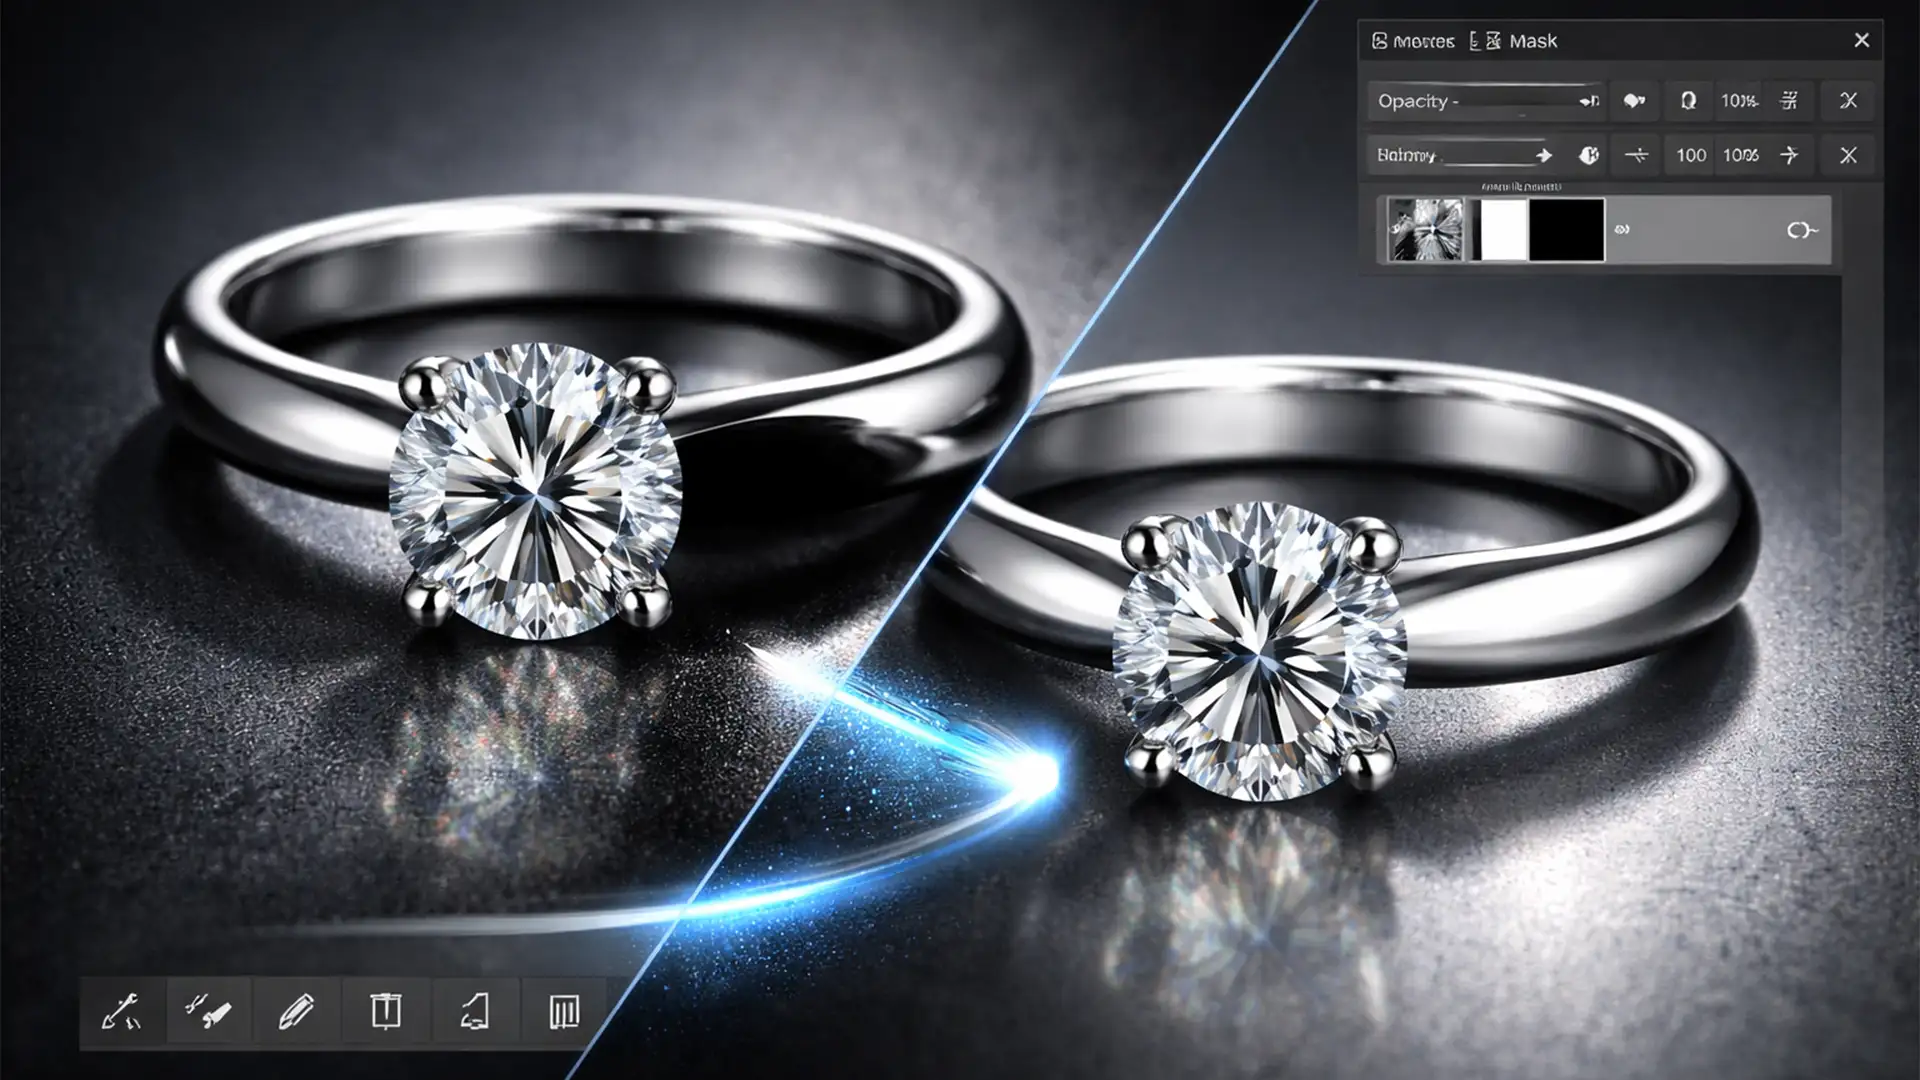
The Final Polish: Before and After Results
By mastering these three methods, you can completely eliminate distracting room reflections and camera spots. The result is a flawless, luxurious metallic finish that elevates the perceived value of the product.

Outsource Your Complex Jewelry Retouching to the Experts
Learning to remove black spots from high-polish jewelry reflections takes time, patience, and a deep understanding of light and shadow. If you are managing a massive e-commerce catalog or preparing a high-end editorial campaign, spending hours manually rebuilding metallic gradients simply isn’t scalable.
Image Work India and Cloud Retouch specialize in pixel-perfect, high-volume jewelry retouching. Our team of expert retouchers utilizes advanced Frequency Separation, AI integration, and meticulous manual gradient reconstruction to deliver flawless, luxurious product images every single time.
Stop struggling with stubborn camera reflections. Let us handle the heavy lifting so you can focus on growing your business. Contact Image Work India and Cloud Retouch today for a free trial and see the difference professional retouching makes.


